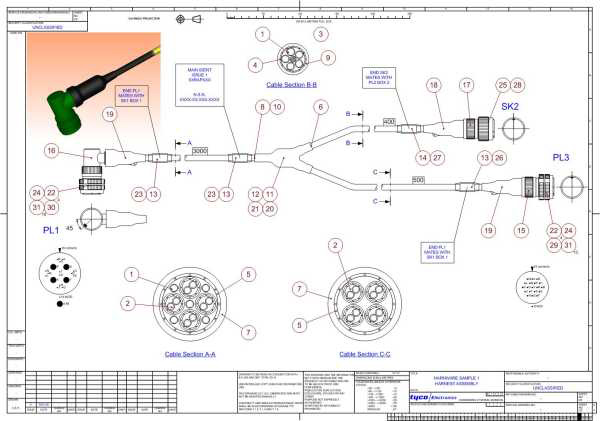
Electrons
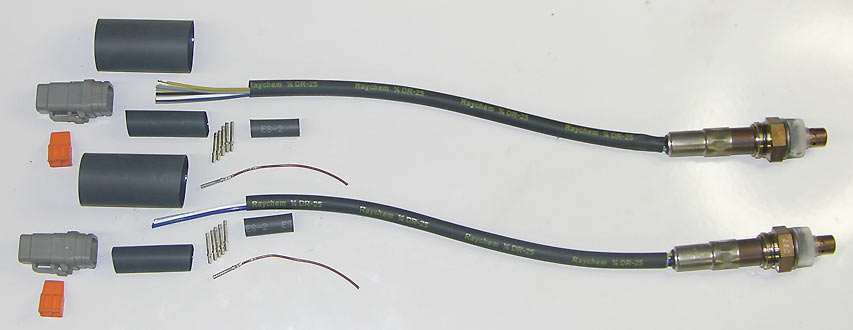
Getting electrical signals from point A to point B is pretty standard
thing...Put a piece of copper wire between A and B and the job is done.
A century of development has left us with increased specialization in
wiring, connection devices, and everything in between point A and B.
"Mil-Spec" or military specification, has become the buzz-word in
motorsport electrical harness construction. Actually motorsport wiring
has developed it's own specialized connectors but it's still largely
constructed from aerospace components.
Perhaps "Race-Spec" will become the new buzz-word....Probably not with
the trillions of dollars spent on drones, F22's, and commercial
aircraft.
This is not a definitive guide on building wiring harnesses as this
could encompass two wheels, four wheels or no wheels. It does give you
a perspective on motorsports ecu wiring and provides access to further
literature for you to study and make your own decisions. We build ecu
wiring harnesses for our production items and for our own racing
activities.
Production OEM
Automotive Wiring
On one end of the scale there is OEM automotive wiring, like on your
new passenger vehicle or truck, wherein costs are paramount and
warranties are offered, in some cases, bumper to bumper for 100,000
miles. Pictured above is a production passenger car harness in GXL and
TXL wires.
These vehicles and their myriad of up to sixty microprocessors,
connectors, sensors, relays, and switches are tested for years on end
in extremes of temperature, humidity, vibration, and electrical
interference. There are no mil-spec metal shell connectors, no airframe
tie wrapping or concentric twisting, and no epoxied or glue-shrunk
connections...Only plastic connectors and crosslinked polyethylene GXL
and TXL multi-strand copper wiring without any silver, tin or nickel
plating. Guess what, they work just fine...amid increasing complexity,
for years on end. A typical mid-sized car will have about 45-70 lbs of
wiring.
One time we scrapped out a 20 year old Honda Civic Wagon and were amazed at
how all the wiring was still in perfect shape...Connector seals were
still sealed and clean inside and all the grime, water and heat had not
caused any failures. Wiring was still flexible and not cracked. OEM
specifications and engineering are pretty damn good.
People who say this is inferior are full of shit. This takes
sophisticated automated and very expensive machinery and dedicated
tooling to pump out six-sigma quality.
In short, automotive grade wiring and connectors have a pretty good
track record. Not glamorous, but in business, economics and bean
counting it seldom is.
From 1989 to 2019 we manufactured our own RSR Closed Loop Fuel
Injection System and made hundreds of wiring harnesses with Deutsch ECU
connectors, Weatherpack connectors and TXL/GXL wires. We covered the
wires with Varflex fiberglass sheathing...and we had zero problems.
Nothing was sealed with epoxy or shrunk into DR-25. They were easy to
assemble with no fixtures...just fixed lengths of all runs...no contra
twisting
Professional motorsport harnesses have to be completely sealed and
essentially watertight employing harness epoxy and Raychem boots...this
involves a high level of planning and documentation and is far more
labor intensive. Sexy never is easy. Buckle up.
Aerospace Wiring
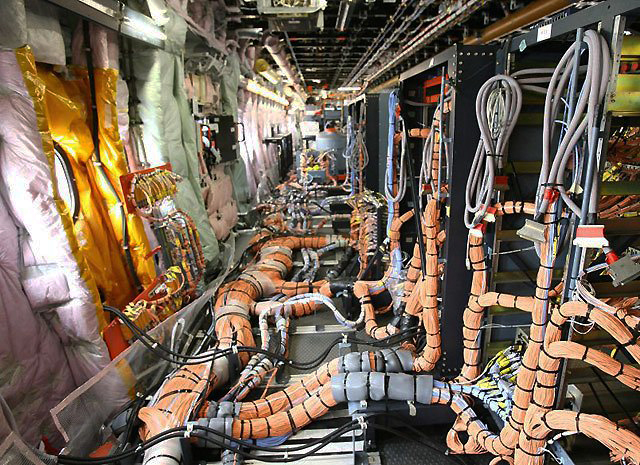
Airbus 380: With 530Km of wires, cables and wiring harnesses
weave their way throughout the airframe. With more than 100,000
wires and 40,300 connectors performing 1,150 separate functions, the
Airbus A380 has the most complex electrical system Airbus had ever
designed. They got to do it twice i.e. rip it all out and do it over
due to incompatibility in various software programs spread across a
myriad of suppliers. No concentic twising, no DR-25, no RT-125 epoxy.
20,000 flight hours life. Go figure.
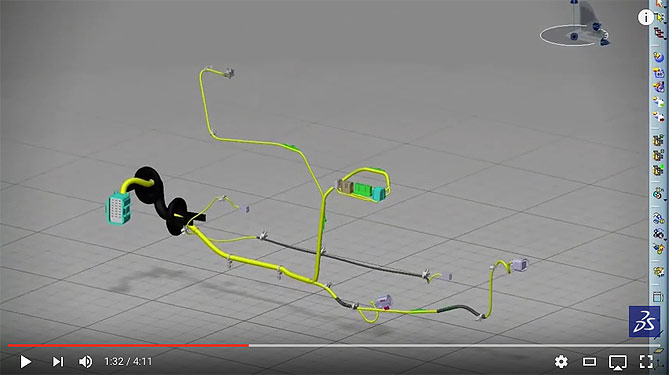
You Tube Video.
Motorsports
Wiring... Race-Spec
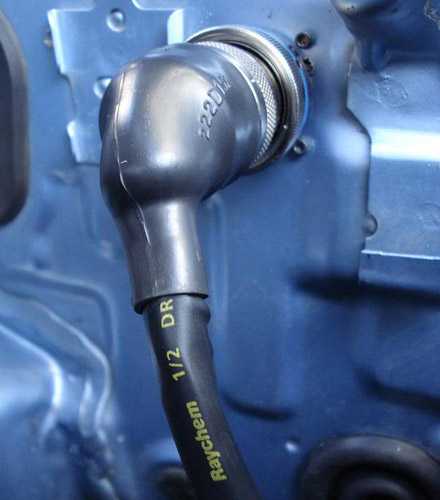
This has evolved from aircraft and military specifications wherein
light weight and reliability are paramount. As motorsports evolved into
an increasingly more sophisticated and expensive professional endeavor,
specific motorsport connectors have evolved which are even lighter and
smaller than their aerospace counterparts. These products don't have to
meet oem production testing requirements...They just have to be
reliable in a racing environment which is not the same as freezing in
Siberia or bouncing down rural roads in your F150 pickup for decades.
Sort of serious in a Darth Vader, rubber-fetish way. Bondage and latex
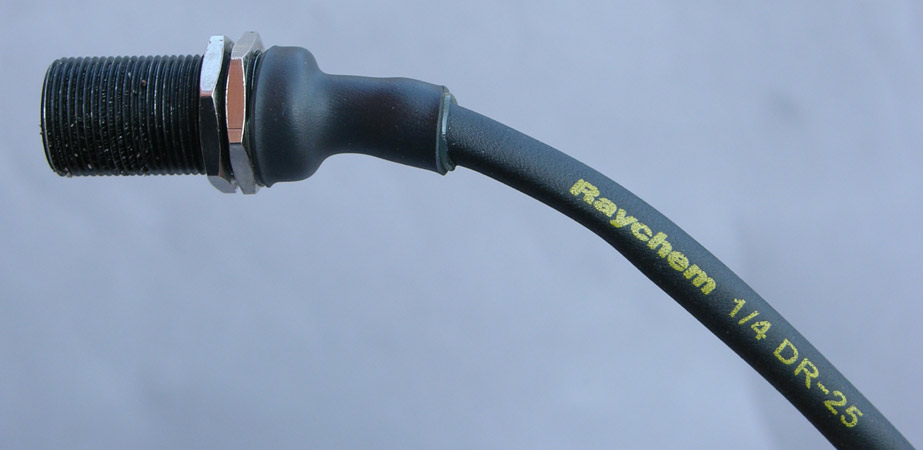
in the hell of an engine bay. Above are heat shrink boots sealing
circular connectors and the DR-25 heat shrink wire protection.
Everything than can slow you down is the enemy....weight of the wires,
weight of the connectors and any kind of outright failure, or worse,
intermittent failure, which is harder to isolate. This is why F1 might
be using tiny 30 gauge wire or why the new McLaren MP4-12C went to
extremes in specifying hexagonal aluminum wire to save both space and
weight.
In motorsport electronics Mil-Spec circular connectors are the norm,
full of all sorts of trickery like strain reducing service loops and
concentric twisting for flexibility and more compact wiring harnesses.
Reliability at 30,000 feet or going airborne at the Nurburgring...it's
all the same thing...well, sort of the same thing.
Mil-Spec...Race-Spec...Autosport.
Service
Loops and Service Loop Tools
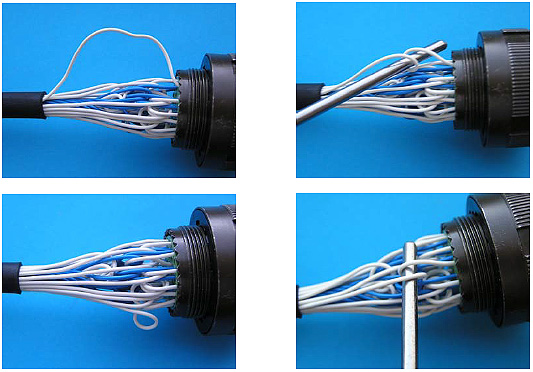
Service Loop Tools allow a loop to be formed, held, and maintained at
your wiring harness connector for strain relief and later servicing or
repinning.
"Service Loops" are used on Mil-Spec / Deutsch Autosport circular
connectors for wire sizes 16 AWG to 30 AWG. The purpose is to provide
strain relief to the wire termination and to provide a surplus length
for repair purposes. It is not an aircraft procedure per se and is only
used in military and motorsport applications.
Depending on your planning these can go in first or last. The wires
have to be loose so doing them as they are installed in the connectors
easier with a large number of terminals. In general, it's easier to
work from the connector outwards rather than with all the wires bunch
up at the connector as shown above...planning all this is a bitch.
If you are working outward from the ECU connector, just leave thewires
extra long and cut to length, terminate, and finalize length in place
forming service loops at the sensor if necessary .
PDF on
Service Loops.
Service Loop Tools and
Procedures
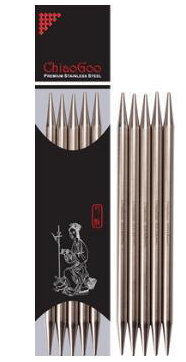
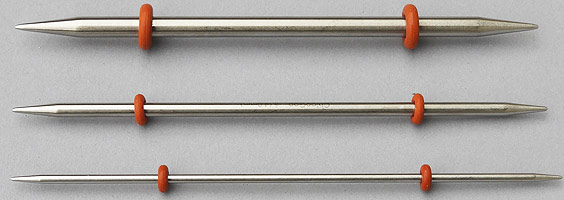
Motorsport Wiring Service Loop Tools:
6"
ChiaoGoo knitting needles
come in packs of five. You can get free shipping and -10% for orders of
$30.00. These come in different diameters (2mm to 8mm). Stainless steel
with rounded tips. Use these to hold
your loops in place. If you want to get tricky, O-Rings sized to grip
the needle, can hold them
in place so they don't slip out for each row or column.
Smaller diameters (2.5mm) for circular connectors and larger diameters
(6mm) for rectangular or square connectors. The sizes are laser-etched
on each needle.
On circular connectors it is recommended to start your loops at the
center and
work outwards if the numbering system runs clockwise or
counterclockwise. For rectangular or circular connectors identified in
rows, it is recommended to work row by row. Loops should face inwards.
Loops must be staggered to minimize any increase in the cable diameter.
When looping is complete all loops should face inwards to give a neat
appearance and to insure that the wires are not trapped or damaged if
an adapter or back fitting is present.
If your connector is already terminated and the wires are shrunk with
DR-25 it gets a little more difficult as you will have to press back
the connector to bow the wires. You may have to cut back on the harness
DR-25 to free up the wires.
All of this is a bit stiff to wrestle with so holding the wiring
harness, the connector, and the looping tool at the same time is a bit
interesting. Think ahead. A specialized connector fixture (best) or a
vise with aluminum jaws can be used to hold the connector.
It is a good idea to wrap an Autosport Connector in Kapton tapes to
prevent it being scratched.
The connector above features concentric (twist) wiring, service (strain
relief) loops at the connector, lacing cord and Kynar clear shrink to
hold the wires tightly together near the connector. Kapton tape will
cover the wires and service loops at the connector to protect them from
the specialized boots (shapes) and RT125 harness epoxy.
The DR25 can be terminated with a short length of Raychem SCL adhesive
lined heat shrink. With the wires
covered by DR-25, the SCL, Kapton tape, and the RT125 sealed boot,
the harness will be protected from the environment and from
abrasion.
Here flat braided lacing tape is counter-wound to hold the concentric
twisted wires in place. Something to think about: Were the service
loops put in first or last? Generally first and work outwards.
Guideline for
concentric
twisting.
Here a Deutsch Autosport connector has its Spec 55 wires wrapped in
Kapton tape to prevent the adhesive shrink or harness epoxy from
grabbing the wires. The
tape allows repairs to be made at a later date. Once the adhesive or
epoxy sets
it really grabs the connector, the DR-25 wire covering, and anything
underneath it. Raychem boots are heat shrunk at about 480F (280C).
You use special tips on your heat gun to focus the shrinking of these
boots. You can't shrink the boot all at once.Generally you focus on the
center and then the ends. By shrinking the mid point you can "cup" the
boot and insert the Resintech RT125 epoxy and then shrink that end
first...Then finish the other end...Wiping both ends with an alcohol
wipe and foam tipped swabs as you go.
There is a video of this using TE Connectivity S1125 epoxy further down
the page that shows the steps in this process.
Low Static Kapton adhesive tape is commonly available in 1/4, 3/8" and
1/2" rolls. The silicone adhesive does not leave any residue. It is
amber in color. It is also used to protect circular Deutsch Autosport
Connectors during the harness assembly process.
Motorsports
Wiring...Race-Spec
Circular connectors, glue shrunk boots, Raychem DR-25 shrunk over
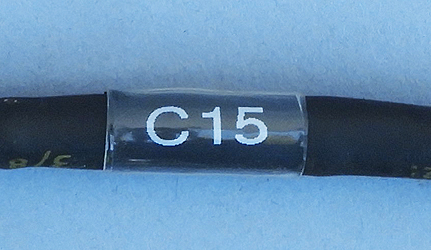
concentric wound silver-plated Raychem Spec 55 XLETFE wiring and, of
course, the requisite yellow shrink tube labels covered in Raychem
RT-375 clear shrink tubing.
Cosworth Pectel
SQ6M ECU. Mil-Spec evolved into Race-Spec.
Wicked Wicking
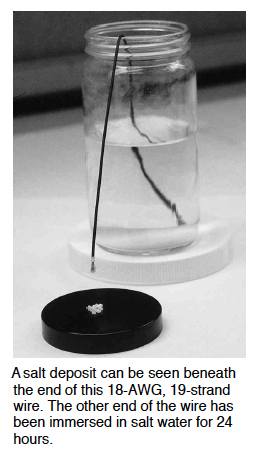
In case you doubt the need for epoxy or adhesive-lined terminations,
the above picture gives graphic evidence of corrosion traveling down
the voids between the strands of copper wires. Since we go to the
Bonneville Salt Flats two to three times a year for up to a month, and
everything gets bathed in salt, properly sealing the electrical
connections is a major concern. Year one OK...year two fix one or two
things...year three redo everything. Using adhesive-lined or
epoxy-based sealing schemes we can keep corrosion out of our wiring
harnesses.
OEM harnesses employ silicone seals on thermoplastic connectors to
address these issues. Any gap in the harness can provide a path to
internal corrosion.
Sealing
With Epoxy

Sealing boots and shapes that do not have adhesive melt can be done
with specialized two part epoxies. Abrading the inner surface and
applying the epoxy to the connector and cable before the heat shrinking
operation. Epoxy is not applied to the inside of the heat shrink. Here
the connector is sealed to the cable using V25 Deray thin wall shrink
tube (2:1) and sealed with epoxy.
Resintech RT125 Epoxy
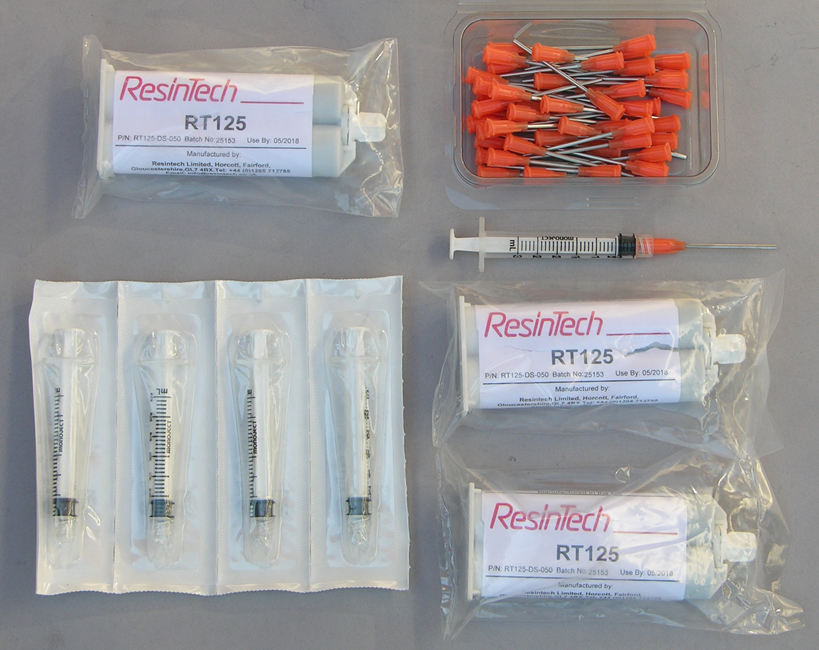
The preferred epoxy for sealing wiring harnesses is
Resintech RT125.
It
is a two part semi-flexible epoxy that is mixed 50/50. You can purchase
RT125 and a 3M applicator mixing gun from Prowire. These are standard
50ml cartridges. Note they have a shelf life. If you are using this in
concert with non-adhesive lined boots do not fill the boot up with
epoxy
or you will have a real mess. Only seal the ends one at a time. Be
prepared to do some clean up wiping with a clean cloth and alcohol as
the epoxy
hardens much later than the adhesive lined boots.
If the entries and exits of the boot are single round diameters then
either adhesive lined or non-adhesive lined boots can be used. If
non-adhesive then seal the exits with RT125, one exit at a time, wiping
the excess off. Syringes are used for more delicate sealing of smaller
parts.
Here we have sealed the multiple branches under the Raychem boot with
Resintech RT125 and shrunk the boot over the epoxy. It's a good idea to
use an additional tie wrap strain relief at the multiple branch point.
Resintech RT125 3M
Mixing Gun
3M EX-PLUS-II-APPLICATOR for the
Resintech RT125.
This makes the
application of the epoxy a lot less messy.
About
$38.00 from
Prowire
USA... well spent. You throw away the mixing nozzles after each
application as the RT125 starts setting rather quickly. You should let
the applied boot and RT125 harden as it can get a bit messy before you
go off to the next sealing point. Hanging the harness up so the RT-125
doesn't flow "down" away from the joint is a good idea.
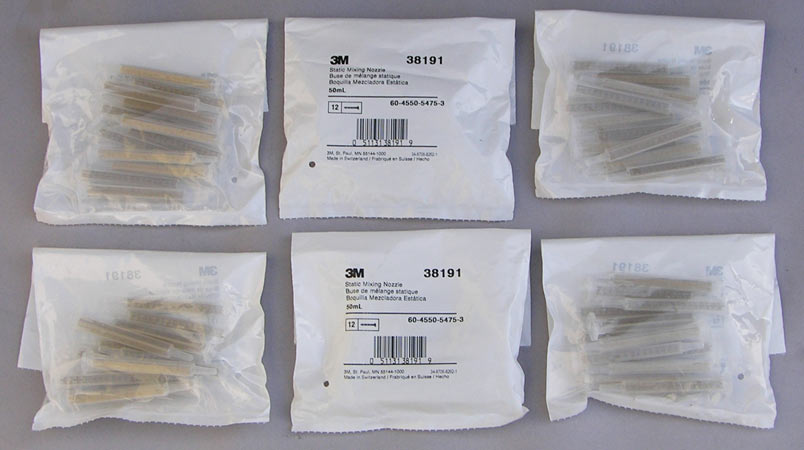
We buy the mixing nozzles in packs of 12 as we use RT125 for other
projects in addition to sealing wiring harnesses.
Epoxy Syringes 3cc and Epoxy Needles 15 ga
Sold it kits with supporting materials
S1125 adhesive is used to
seal
DR-25 and Raychem Boots in the same manner as Resintech RT125.
This
video shows the proper procedure for sealing and testing the bond
on
DR-25 and molded boots. S1125 is more expensive than RT125. The
procedures
are the same for both. Here a non-adhesive lined boot is sealed on both
ends.
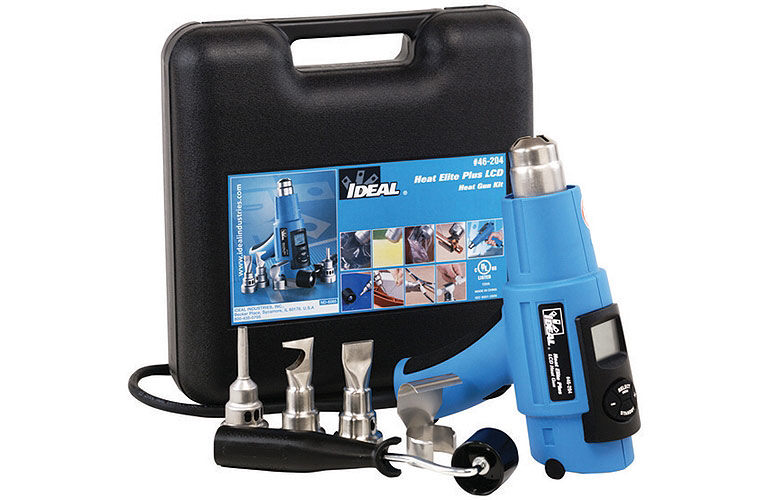
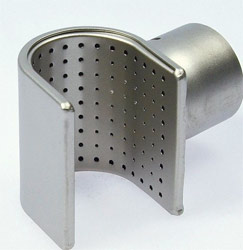
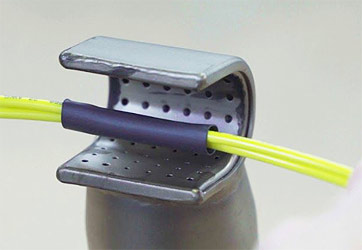
With Ideal 46-204 Elite Plus Heat Gun use 46-955 Ovelap Adaptor to
shrink the boot.
The Raychem Boots are the last items to seal and shrink in the harness.
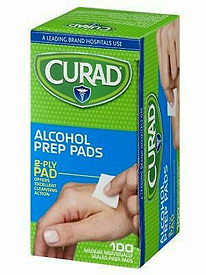
Inexpensive 70% isopropyl prep pads to wipe the overflow of the harness epoxy from the end of the Raychem boot.
Motorsport Wiring Vises
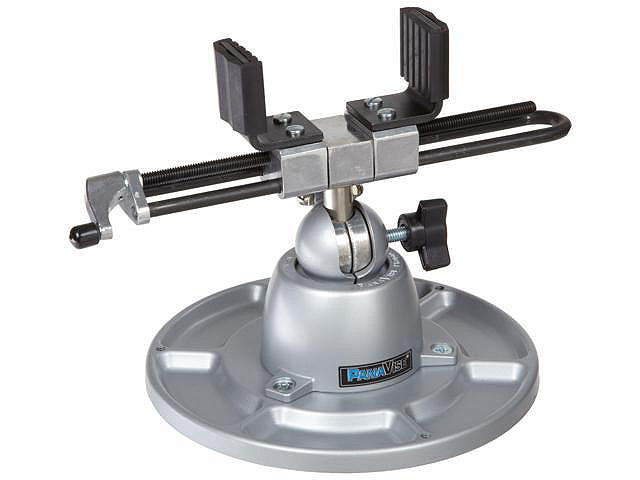
The Panavise 350 Motorsort WiringVise
can be used to hold
objects from ecus to bare wire by just flipping the rubber lined jaws
around. In general, if you are doing concentric twisting, you need to
hold the harness at both ends to do successive layers. Holding
the harness at both ends allows you to twist
exiting leads.
The Panavise 350 is widely used in motorsport wiring and is firmly
attached to a
production wiring bench. The small circular tray around the base can
prove useful holding pins and sockets.
Having a lip around your production bench keeps parts
from taking a dive. Looking for a 22ga socket on the floor and then
rolling your chair over it or stepping on it s not a recommended
exercise routine.
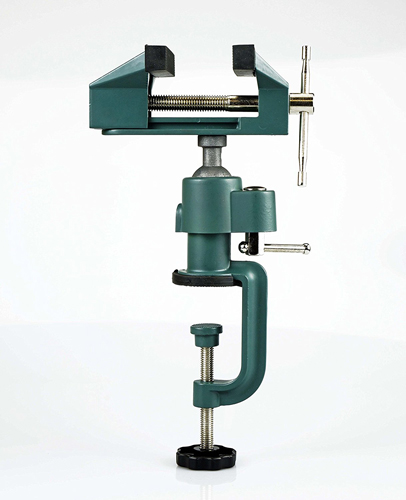
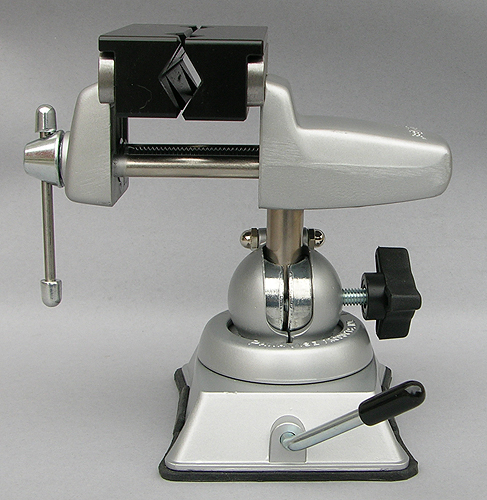
Inexpensive vises for holding motorsport
wiring harnesses and connectors. The SE 8436MVC 3" Universal Table Vise
on the left above has slip on soft rubber pleated jaws.
The vacuum base Panavise Model 381 on the right we modified with
two 4" x 1" x .25" steel plates replacing the Panavise plasic
jaws and added a set of 4" NO-M.A.R
PlastiXrevolution
magnetic polymer magnetic jaws. This gives us a 1/2" to 1"diameter grip
on wiring harnesses.
Here we are holding an Autosport AS16 26 position connector for
socket insertion and service loop forming. Any circular connector
clamping diameter beyond 1" and up to 1.250" you will have to fabricate
a new lead screw with a 7/16" x 14 x 5" socket head cap screw and drill
/ insert a 1/4" handle. Use the 350 Vise for larger widths. In gereral,
you should wrap Kapton tape around circular Autosport Connectors to
keep from
scratching the anodized surface.
Both vises come with
soft jaws. Invaluable when holding harnesses for concentric twisting,
forming service loops, or pin/ socket insertion. Available from many
sources. The SE8436MVC can mount to the table's edge and the Panavise
can be moved around and fixed in place if the surface is non-porous.
These are not heavy duty items. Holding wiring harnesses is certainly
light duty. We use all three shown. Daniels Mfg has a $750.00
vise for circular connector assembly.
Foam Swabs
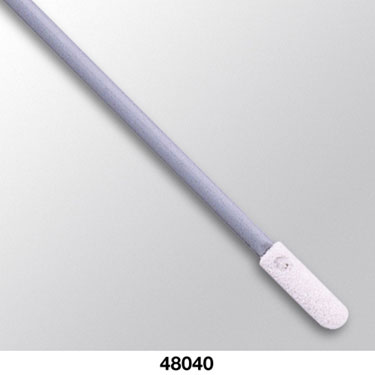
Chemtronics Coventry
Sealed Foam
48040 Swabs are perfect for dealing with harness epoxy as you don't
have to mess with the fuzzies in common cotton swabs.
Available
in packs of 500 for about $0.12 each. We
use all sorts of potting compounds beyond the harness specific RT125
and have found these to be the best way to clean and manipulate the
goo.
The comprehensive guide is
Raychem
Heat Shrink Products. However, it
can get a bit confusing and, in general, you will be using System 25
Specifications for your wiring and connector sealing. For example on a
Pectel SQ6M with three Autosport connectors we might use a 90 Degree
Boot with adhesive. 222K152-25/225-0. The /225 refers to the factory
applied adhesive, and the "25" is the boot material used in System 25
applications.
Whether you use adhesive lined boots or seal them on their ends
with RT125 Epoxy you use about 480F or 280C with your heat gun with a
flat bladed tip.
There is a newer "25L" designation for a lighter boot, not listed in
the literature.
With Ideal 46-204 Elite Plus Heat Gun use 46-955 Overlap Adaptor to
shrink the boots.
Micro
Molded Boots
Instalite
Molded Boots
Raychem Instalite
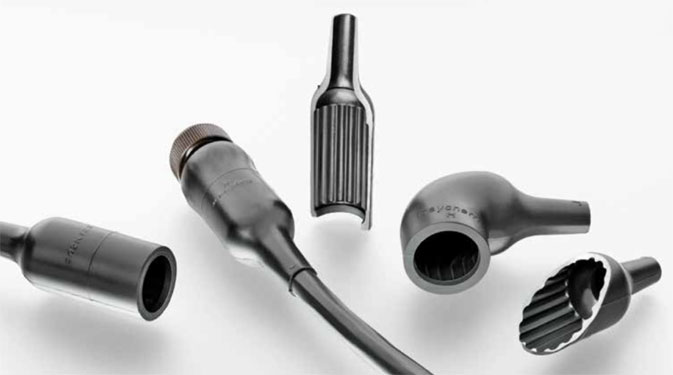
The Raychem boots on Deutsch DTM06_xS_E007 Connectors.
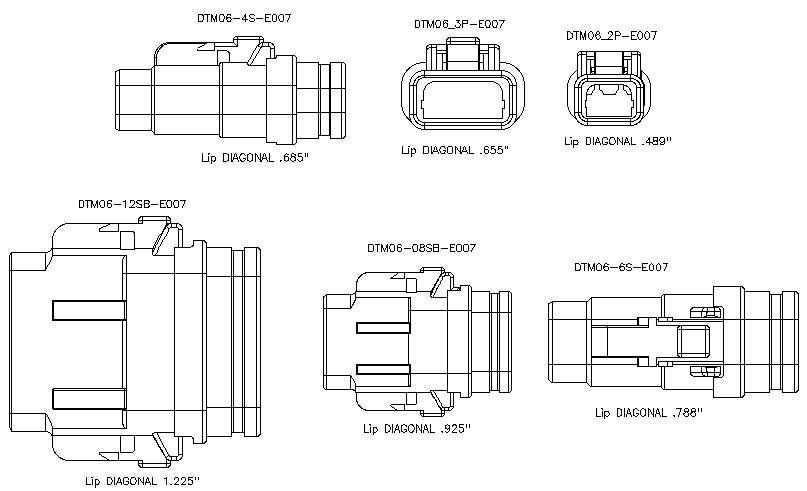
To provide additional sealing and strain
relief, either
Raychem
molded shapes
(boots), or adhesive heat shrink like ATUM (3-1 or 4-1 shrink ratios)
can be used on Deutsch DTM Connectors. The lip diagonal dimensions
above allow you to decide on the proper sealing boot or shrink tubing.
Raychem Boots v. Heat Shrink: A Reality Check
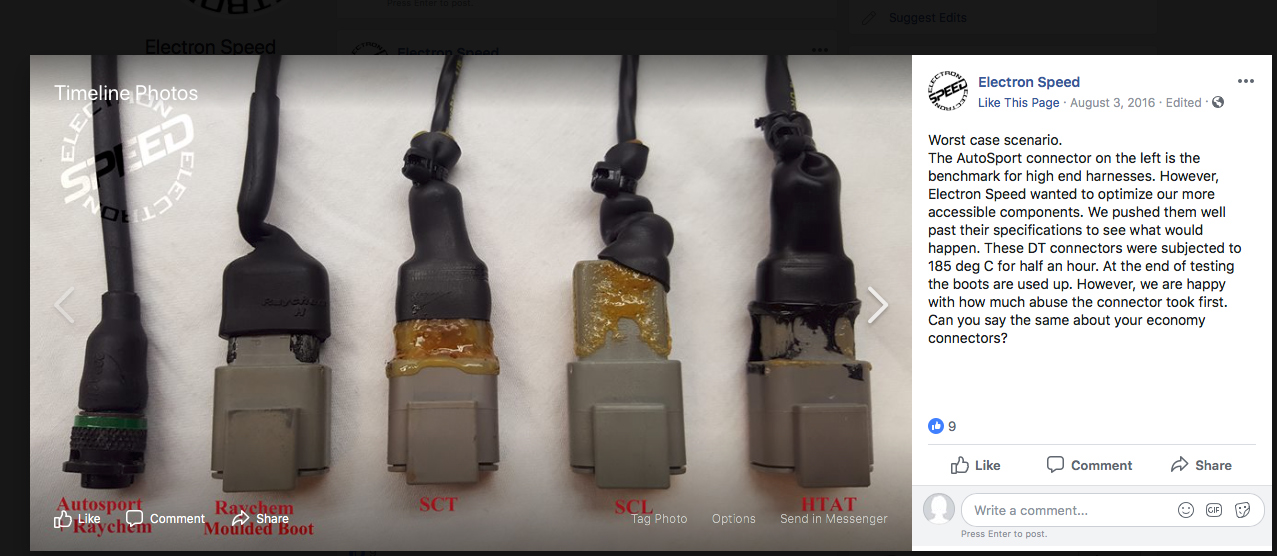
Electron Speed is a full service motorsports electronics firm. Here they compared, in a controlled test, what happens when heat
is applied to the various schemes for connector sealing. It's pretty
obvious that dedicated Raychem Boots, albeit expensive, are the
preferred solution when paired with harness epoxy (RT125).
ATUM (not shown), which is frequently used on DTM Connectors, will react similarly to SCL. HTAT shrink has been discontinued.
Keep in mind that Plastic does not corrode. Autosport aluminum
connectors will...We know because we spent years going to Bonneville
where the salt and salt air eats everything. Deutsch D369 Connectors (3
/ 6 / 9 position) have the highest temperature rating of any plastic
connector with PEI/PEEK construction and flurosilicone seals...and they
are tiny (26-22 / 24-20ga).
Get your Raychem Boots at Prowireusa
Prowire Designed "SuperSeal" Boots
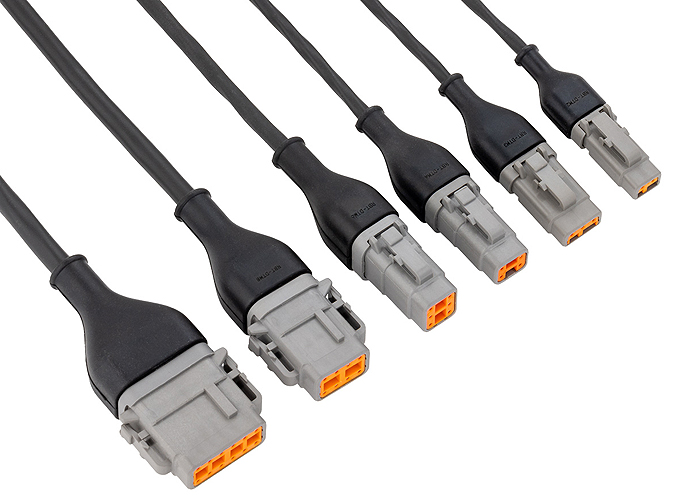
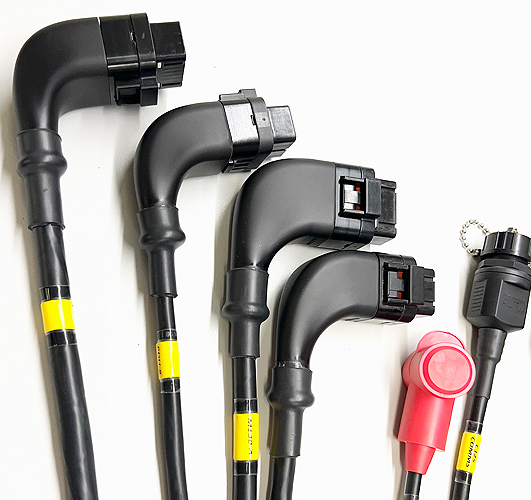
Prowire has recently introduced a series
of friendly,
flexible, connector specific, rubber boots that provide both strain
relief and sealing with no need to use the more expensive Raychem boots
that have to be shrunk with heat guns. DTP and DTP variants coming
Spring 2023.
Prowire designed these and had the molds made (covered by Design and
Utility Patents) to give you an elegant flexible sealing system. Speed
your harness design with these.
If you are familiar with the Bosch family of OEM rubber
connector boots you will appreciate these. Even more so when you use
Prowire solid contacts designed for the Deutsch Superseal Connectors.
Prowire: "
Introducing our brand new patent pending in-house designed solid
contact specifically for use with Superseal 1.0 connector housings. The
time of using the factory-stamped contacts with either hokey or
expensive tooling is over.
Our SSC-N is a nickel-plated hoodless solid contact with a
nickel-plated body and a beryllium copper gold-plated clip just like OE.
You can terminate your ECU, PDM, or dash at breakneck speeds. Our SSC
contact is currently available in an 18-24awg version, with a 16-24 ga
version releasing May/2023"
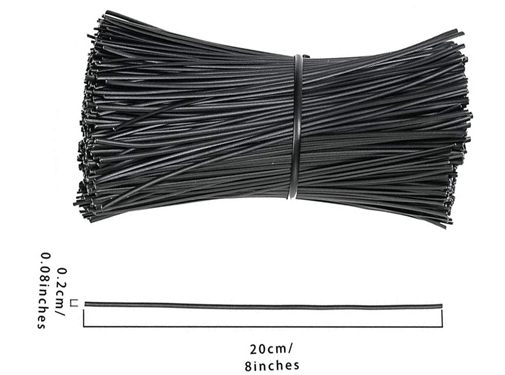
Motorsport Harness Layout Assembly: Don't use plastic cable ties when laying out
your wiring harness on your workspace, as you will have to continually cut them off and you end up
with a bunch of wasted ties and run the risk nicking the harness wires. 1000 twist ties for about $16.00.
Use plastic-coated, solid wire, twist ties to holds together
temporarily. The coating won't harm any wiring and the wire can be reused. 8" lengths.
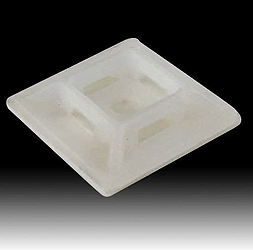
When laying out your harness on a table or board use
4 way adhesive mounts
to locate the harness and leads in place and use the twist ties to hold
the wires.
It's easy to remove and to add, or subtract wires, for
concentric or sensor lead twisting. No wasted plastic ties or nicked wires.
20 Gauge Plastic Coated Wire Spool
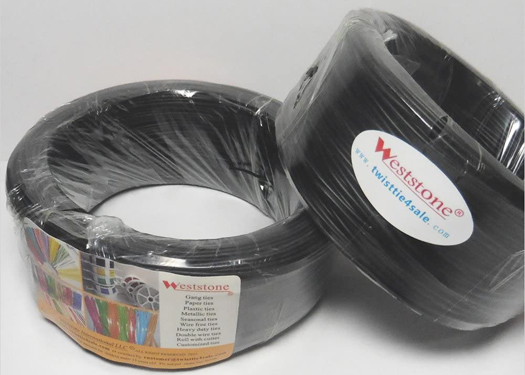
When you need to hold wire bundle leads
together, typically near a multi-pin ecu connector, use plastic
coated solid 20 Gauge wire.
Buy a roll and snip off a piece. This saves wasting cable ties. No chance of nicking the wires.
This wire is too fat to slip into the 4-way adhesive mounts linked above.
Cable Ties
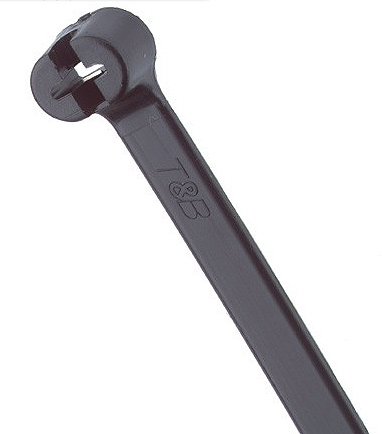
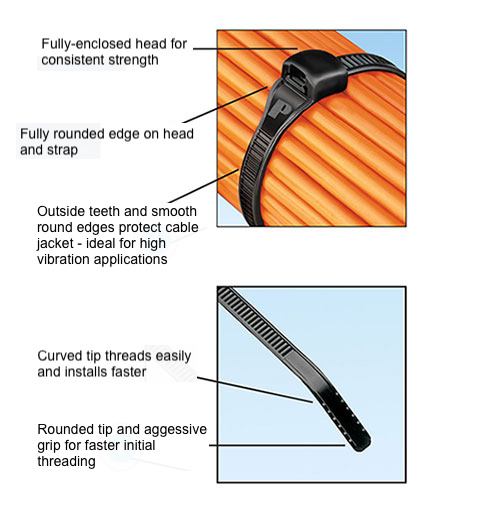
We have found the best Cable ties are
Thomas &
Betts Ty-Raps with a
stainless steel locking mechanism. Metal locking tabs are a NASA
requirement (NASA-STD-8739.4 [7.3.4])
An alternative is the Panduit
Contour-Ty (right picture). Normally you use Black Nylon cable
ties...be sure
they are UV Stabilized and only purchase Brand Names like Panduit,
Thomas & Betts Ty-Rap, or Hellerman Tyton. Once at Bonneville we
bought some cable ties from local auto parts store and they broke when
you tightened them
Peek Cable Ties
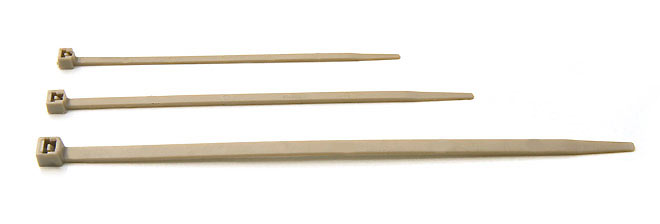
PEEK Cable ties
are rated up to about 500 Deg F... way, way, beyond
normal Nylon cable ties (185 Deg F). There are priced in the
$1.00
each price range for 100 6" ties. Available from Panduit in 4.0"
(PLT1M-C71); 5.9" (PLT1.5M-C71); and 7.4" (PLT2S-C71) lengths.
MIL-W-22759/32-35
and MIL-W-22759/41-46 or Raychem "Spec 55"Primary Wire (Race-Spec)
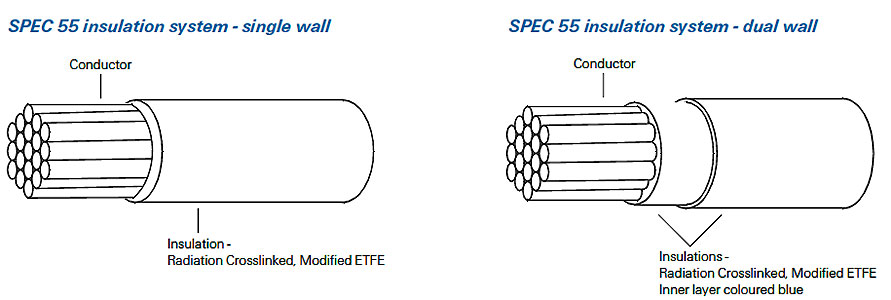
Raychem Spec 55 wire has become the defacto standard for motorsports
wiring. "Spec 55" is a trademark of Tyco Electronics. The actual
designation is MIL-W-22759/32-35 and 41-44. MIL-W-22759/44 is the
normal wire of choice with silver plated copper stands. Silver plated
copper (SPC) strands have a higher temperature rating than does Tinned
copper (TC) strands.
Spec 55 Single Wall or "interconnect" wire carries the designation
55A011-xx-xx. Spec 55 Dual Wall or "airframe" wire carries the
designation 55A081-xx-xx.
"XLETFE" insulation refers to Cross Linked ETFE Polymer (Tefzel) which
provides increases abrasion resistance over Tefzel insulation. Dual
wall construction is commonly used in aircraft. ETFE is described as a
"modified radiation cross-linked polymer”.
Specification
|
Insulation
|
Conductor
|
AWG Range
|
Temp
|
Voltage
|
Wall
Type/Thickness
|
M27500 Symbol
|
MIL-W-22759/32
|
XLETFE
|
TC
|
30-12
|
150C
|
600
|
Single .006"
|
SB
|
| MIL-W-22759/33 |
XLETFE |
SPHSCA
|
30-20
|
200C
|
600 |
Single .006"
|
SC
|
| MIL-W-22759/34 |
XLETFE |
TC
|
24-00
|
150C
|
600 |
Double .010"
|
SD
|
| MIL-W-22759/35 |
XLETFE |
SPHSCA |
26-20
|
200C
|
600 |
Double .010" |
SE
|
| MIL-W-22759/41 |
XLETFE |
NPC
|
26-00
|
200C |
600 |
Double .010" |
SM |
|
| MIL-W-22759/42 |
XLETFE |
NPHSCA
|
26-20
|
200C |
600 |
Double .010" |
SN
|
| MIL-W-22759/43 |
XLETFE |
SPC
|
26-00
|
200C
|
600 |
Double .010" |
SP
|
| MIL-W-22759/44 |
XLETFE |
SPC
|
28-12
|
200C |
600 |
Single
.006"
|
SR
|
Dual wall (normal weight) "Spec 55" will have an inner layer of a
contrasting color (blue) to indicate when the wire has been nicked,
abraded or cut.
TC refers to Tin Plated Copper. SPHSCA refers to Silver Plated High
Strength Copper Alloy. NPC refers to Nickel Plated Copper. NPHSCA
refers to Nickel Plated High Strength Copper Alloy. Note: 24-30 AWG
should use SPHSCA conductor
Nickel has a higher melting point than does silver but this is of
little consequence in motorsports ecu wiring.
Best deal in town for these 3-1 shrink tube wire markers for
22759/32, 22759/16, and TXL wires. ...and all White 22759/44-xx-9 wires.
If you are going "Pro" and intend to use 22759/44-xx-9 wire then
this is your ticket to sanity. 2500 pieces for pennies each. Refills
of 250 pieces ship immediately.
Use all White wires like in F1 and WRC and go crazy. Why all White
wires?...Well with all White you just cannot make assumptions and 100
percent inspection and Hi-Pot testing is the rule.
Alternatives to
MIL-W-22759/44 "Spec 55" Race- Spec Primary Wire
A less expensive and more commonly available wiring is the single wall
Tin Plated (TC) Copper strand wiring MIL-W-22759/16 or the thinner wall
22759/32. It could be argued that silver has a better conductivity and
higher temperature rating than tin plating...but, both offer increased
protection against corrosion over bare copper wires.
| Specification |
Insulation |
Conductor |
AWG Range |
Temp |
Voltage |
Wall |
M27500 Symbol |
MIL-W-22759/16
|
TEFZEL
|
TC
|
24-00
|
150C
|
600
|
.011"
|
TE
|
| MIL-W-22759/32 |
XLETFE |
TC |
30-12
|
150C
|
600
|
.006"
|
SC
|
The main benefit of Spec 55, MIL-W-22759/44 and MIL-W-22759/32, over
the alternative MIL-W-22759/16 is that it is "tougher" i.e. it has
better abrasion properties due to its irradiated jacket. This is less
of a concern if the harness is sheathed in DR-25 heat shrink, which is
a common motorsports practice. In short it is an acceptable alternative
to the more expensive 22759/44 silver plated wire.
In 20 AWG it weighs 5.18 lbs/1000 feet as opposed to Spec 55 20 AWG
which weighs 4.3 lbs/1000 feet. It is also larger in diameter in 20 AWG
.060" versus .050" for the Spec 55 wire.
A thinner and bit tougher insulation alternative to the /44 wire is the
MIL-W-22759/32 and saves a few thousandths in diameter and
weight...It's the same price as the /16 wire. Both are tin plated
copper ("TC").
Available
from ProwireUSA. A thinner tougher wire in the 22759/44 and
22759/32 variations.
Wire is really the cheapest part of the equation. It's the labor
stupid. We use both /16 and /32wire for our products and harnesses.
A word of advice: When you stock up on 22/20/18/16 gauge wires
be careful to keep the various gauges physically separated as it's easy
to grab, say, some 20ga (22759/32-20-xx) wire when you really are
installing 22ga (22759/32-22-xx) wire. This mistake makes it
interesting when you go to install the terminals.
Note: Tefzel is Ethylene-Tetrafluoroethylene (ETFE)
Dimensions 22759/32-
Wire
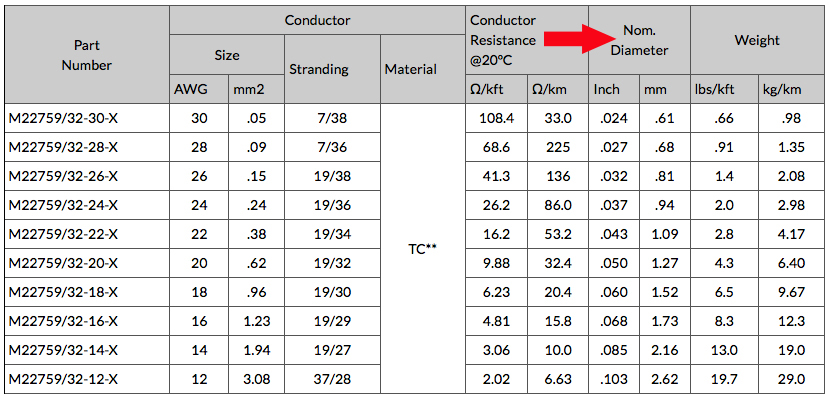
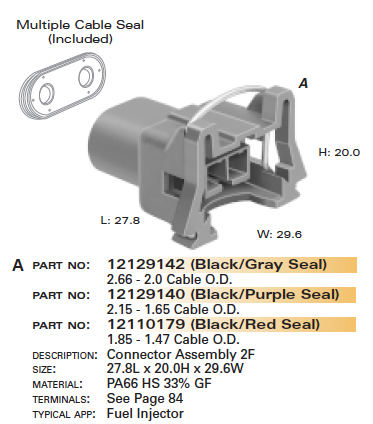
Wire dimensions for both the conductor
and the insulation must be known when you are choosing the terminal and
seal for a particular connector. Often you will order a connector and
seal only to find the terminal is the wrong size for the wire and
insulation and or the seal supplied with the connector does not seal
the wire. The conductor is expressed in mm2 and the wire insulation
diameter is expressed in mm. Metri-Pack 280 Series Injector / Sensor
connector example above.
The above link allows you to determine the harness diameters for
22759/32 wiring. When planning your harness you need to know the
diameter of each branch to plan for your transitions and Raychem Molded
Boots.
The Wire Harness Diameter Calculator takes inputs for 24 to 14
gauge MIL-W-22759/32 wires to determine the bundle diameter.
Amperage Ratings
Mil-Spec 22759/16/32 Wire
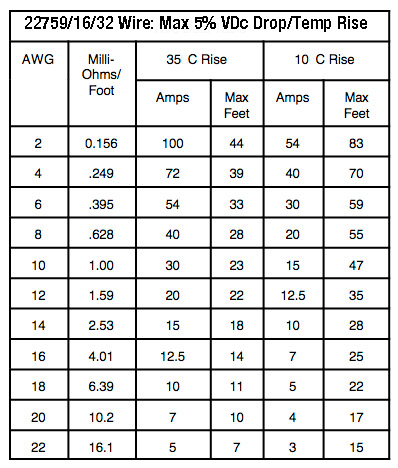
The above chart gives a general amperage
rating for the mil-spec 22759/16 and 22759/32 wires. In reality, it
gets a
little more complicated than this as wires have resistance and the
longer they are the less capacity they have, and the greater the
voltage drop. In a motorsports wiring harness the wires will be
enclosed in DR25, twisted together, and not in free air, so there will
be more heat, which further degrades their capacity.
The chart is based on maximum length to maintain a 5% VDc drop. For a
more complete explanation on temperature rise in harnesses
view this pdf.
In automotive use with longer runs here are safe recommendations:
Battery Positive Direct 10AWG
Battery Negative Direct 10AWG
Other Battery Positive 14AWG
Fuel Pump Positive 14AWG
Radiator Fan 14AWG
Switched Ingition 20AWG
12V 5A Fused 20AWG
Tach Output 20AWG
Sensors 20 AWG
Injectors 20AWG
For motorcycle use where the runs are very short we use
14/18/16/20/22AWG. For example: Injectors 20AWG (better seal plugs);
Lambda Sensor (5)20AWG to Autosport; Lambda Harness: 12V+ 20AWG, Heater(-) 20AWG, Vs
22AWG, Ip 22AWG, Lambda Analog GND 22AWG; 5V Sensors 22AWG; Fuel
Pump +/- 16AWG; VBat+ 14AWG; Chassis Ground VBat- 14AWG.
To see what the effects of length have on your wire AWG choice
visit this
calculator
which gives you your end voltages and maximum lengths. We suggest you
use the 2% drop figure mentioned in choosing your wire sizes.
Prowire USA Custom
Mil-Spec 22759
Wire Striping
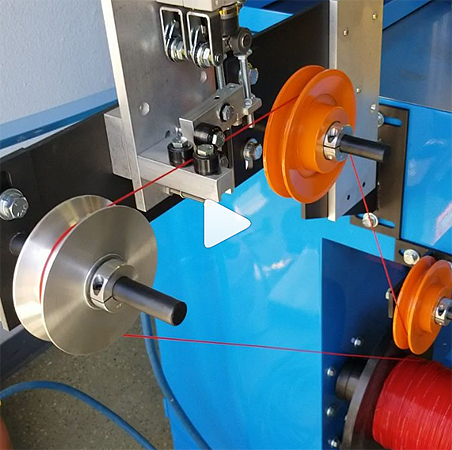
In case you wondered how mil-spec wires
are color coded with up to 100 combinations of base colors and stripes
here's a link to Prowire USA's
mil-spec
wire striping machine
in action which can print up to three stripes simultaneously as well as
alpha/numeric, hash marking, band marking, longitude striping and
dotting. Complex expensive puppy.
Identifying wires in your harness is easier with colors and stripes.
Spec55 Wire color
codes. There are ten basic wire colors. Add the stripes and there
are 100 combinations.
If you wish to get your wires organized by numbers (1-12) , and not by colors, Prowire offers a
White Wire numbering service...say 1-6 for Fly By Wire etc. Bi-directional.
Prowire USA Mil-Spec
Wire
Modular Rack System
(Note: Not Currently Available due to COVID Price Increases)
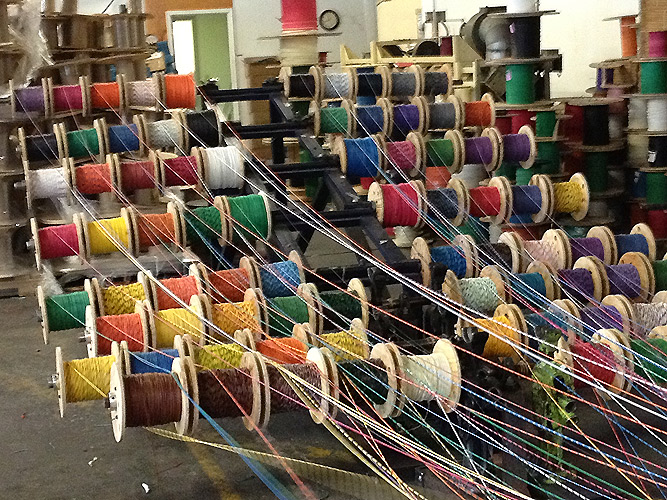
How do you organize multiple spools of
wire and Raychem DR-25? Well, not like in the picture above. There are
all sorts of wiring spool racks available, but none were created
exactly for Motorsports Mil-Spec 22759/16 and 22759/32 wires and also
Raychem DR-25 Heat Shrink use.
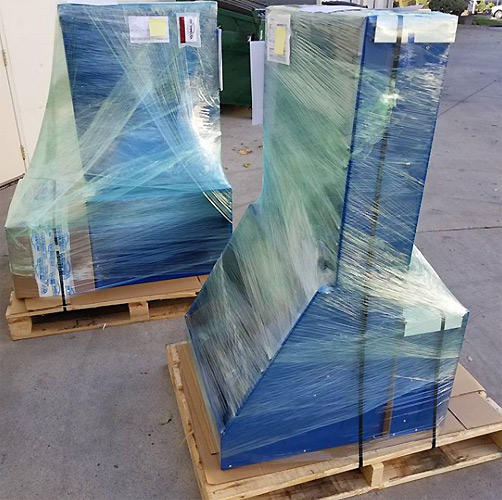
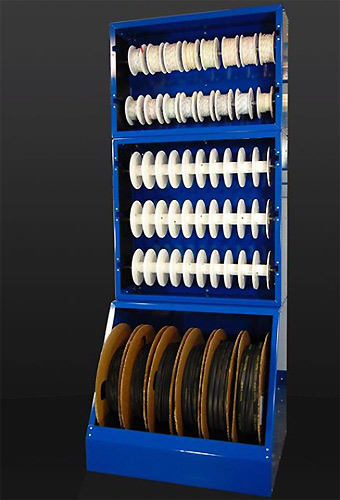
ProWire
USA Mil-Spec
Modular Rack System:
Stackable modular racking system for Mil-Spec wire, cable and DR-25
heat shrink. Shown here in powder coated blue. This rack, as
shown, will hold 55 spools of Mil-Spec wire as well as 6 large spools
of DR-25
tubing. ProWire made several variations of these racks....even some in stainless for NASA.
All 3 cabinets bolted together are about 70" tall by 28" wide and 24"
deep on the tubing cabinet.
This rack will
hold full rolls of 1/2" to 3/4" DR-25 tubing on the bottom section (19"
diameter rolls). The Middle and top sections are stackable. On those
Prowire made: 2 row (20 spool) and 3 row (30 Spools) cabinets.
The unit, as pictured, stands 70 1/4" tall and is 28 1/4" wide and
weighs in at 112 lbs bare.
This is the best way to keep your sanity and reduce clutter. Go
vertical and save time and space. Time is money.
These
are currently not available due to COVID price increases which raised
the price way above the original start price of $750.00.
If you want to male your own: 1 3/8" tube for the DR-25 and 3/4" tubing for the wire spools to spin on.
Cutting Mil-Spec
22759/16/32 Wire...Rennsteig and Ideal Cutters
If you've cut thousands of wires with
regular blade type cutters from Ideal, Snap-On, and others you know
there must be a better way so the twisted strands stay round instead of
being flattened or mushed out a bit.
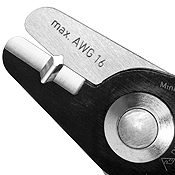
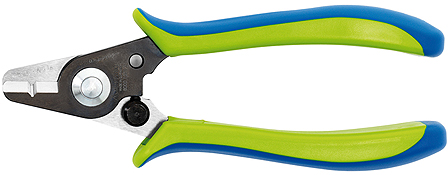
The answer for a perfect round cut is the Rennsteig
8000 1001 3 RT Miniature wire cutter
and
strand trimming tool (Flush Cut). It cuts wires from AWG 26 to 16
according to aerospace standard AS6173/1. It is not spring loaded to
open so you use your finger next to your pinkie to open it. Be careful
with these as the cutting edge is easily damaged
if you get a bit overzealous, don't get the wire in the slot, or cut the wrong type wire...like thicker
GXL or
TXL.
You have to align the wire each time so this takes time as opposed
to usual diagonal cutters. Its major advantage is it leaves the 19
strands of the 22759/16
and 22759/32 wires round. Very clean
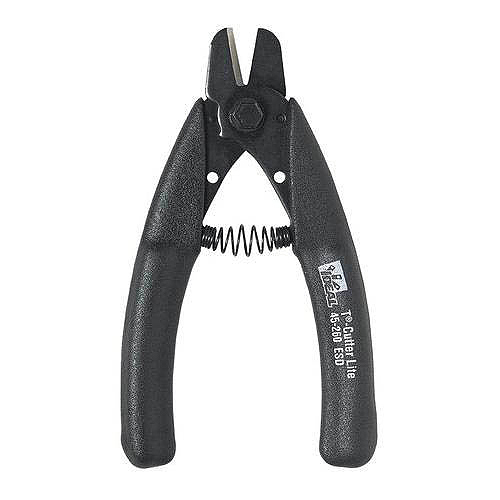
Another choice is the spring loaded Ideal 45-260 ESD safe knife blade cutter. You don't have to line up the wire in the slot as it is a knife blade.
High quality diagonal cutters are available from Knipex
https://www.knipex.com/products/electronics. Polished and laser-hardened steel. Everthing from Knipex is A-1.
Twisted Pairs:
Protection From EMI Interference
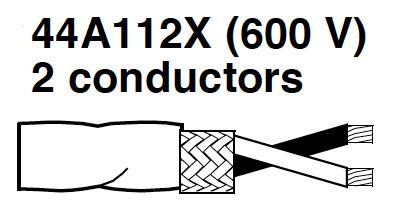
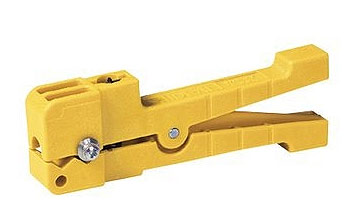
How do you strip shielded cable for a solder sleeve?...Well there's
always a tool. The
Ideal
45-402 Ringer Cable Stripper.
Crankshaft sensors, camshaft sensors, RS 232 and other communications
should use twisted pair, shielded, wiring. 20 or 22 AWG is typical for
twisted pair sensor and communications. We use 22 gauge
Shielded
Tefzel Cable wires from Prowire USA for our two wire crank position sensors
and three wire hall-effect sensors.
Twisting the wires reduces magnetically induced interference. Forcing
the wires together reduces the loop area and therefore the induced
voltage. Since the currents are flowing in minimum loop areas, magnetic
field generation is reduced. Good idea to avoid signal problems due to
noisy ignitions, coils etc.
Note that the commonly used model 45-402 comes with a blade and is used
on 20-24AWG M27500 SB cable.
Grounding of the shielded cable is accomplished by using
dedicated solder splices. Section 8-3 of Tyco Electronics
(te.com) main
Wire
and Cable 27.9Mb Catalog lists these solder splices.
They are available with or without leads. We ground our shielded wire
jackets directly at the SQ6M ecu.
Procedures are defined for grounding the of the shielded wires. Best
practice is that you leave the shield open at the sensor side for
shielding to be effective. If this side is grounded in some way,
the shield doesn't work. Shielded gounds are tied to a single ground
point at the ECU side.
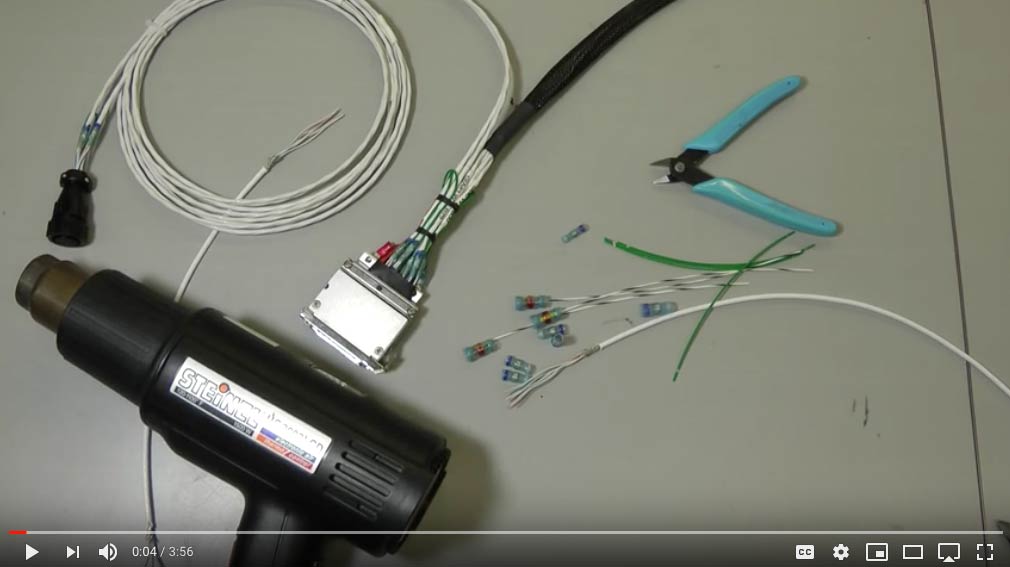
Solder Sleeves are available from ProwireUSA
Video:
Installing Solder Sleeves
Where
to Buy Motorsport Wiring Supplies

An excellent source for your motorsport wiring supplies for you go-it-alone types
is
ProwireUSA as they stock
about everything you need and sell in small
quantities. It a good place to pick up your MIL-W-22759/32 and
MIL-W-22759/16 wire and supplies. They have 140 Mil-Spec wire color
combinations in stock and even custom stripes and numbers wires to order.
ProwireUSA has extensive experience building
wiring
harnesses and only stocks the best and competition proven parts. Quick
service and excellent prices.
Don't make the mistake of using less quality supplies from autopart and
general supply houses. Prowire also stocks oem TXL and GXL wires as
well as the mil-spec 22759 Tefzel wires.
Follow
Prowire on Instagram.
ProwireUSA
22230 S Scotland Court, Queen Creek, AZ 85142
Phone: 619-440-9473
Email: sales@prowireusa.com
Connectors
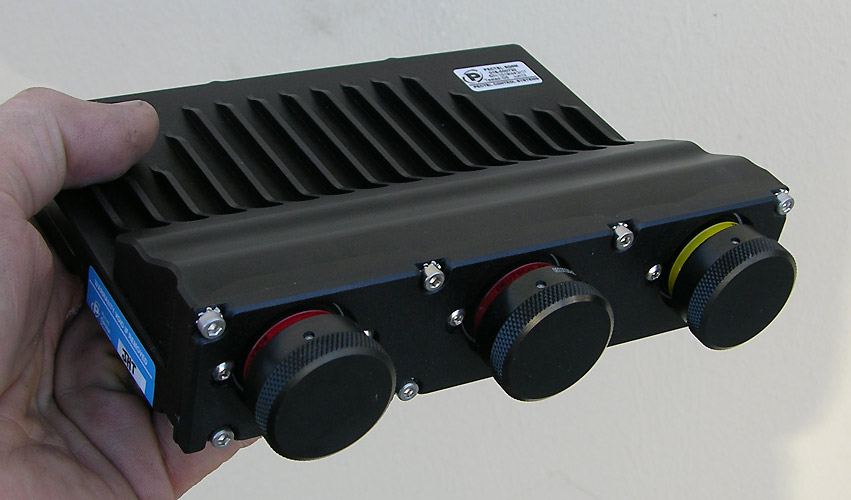
Deutsch
Autosport: Specifically designed for motorsport. Lightweight.
Expensive. Requires Mil-Spec crimping and stripping tools. This is
Cosworth Pectel SQ6M that we use on our
ORCA motor
turbocharged
Harleys. The color bands denote the connector shell keyway. The
left
and right connectors are 26 Pin 20 gauge of different keyway locations
so you cannot mix them up. The center connector is a 55 pin 22 gauge
connector. Figure on spending about $400.00 for the associated
connectors, sockets, and insertion tools for the SQ6M. 107 pins total.
Metal shells don't melt like plastic ones do. Higher end motorsport
applications all use Autosport ECU connectors...Pectel, McLaren,
Magnetti-Marelli, and Bosch. We model the SQ6M with the Autosport
connectors to use in our wiring diagrams.
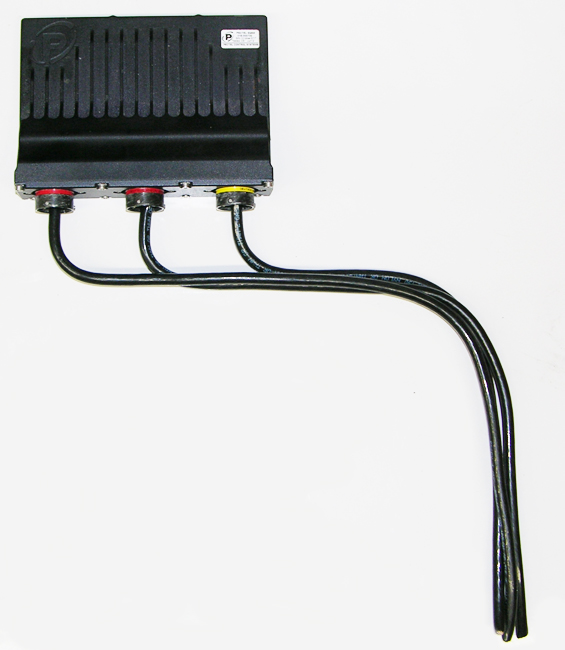
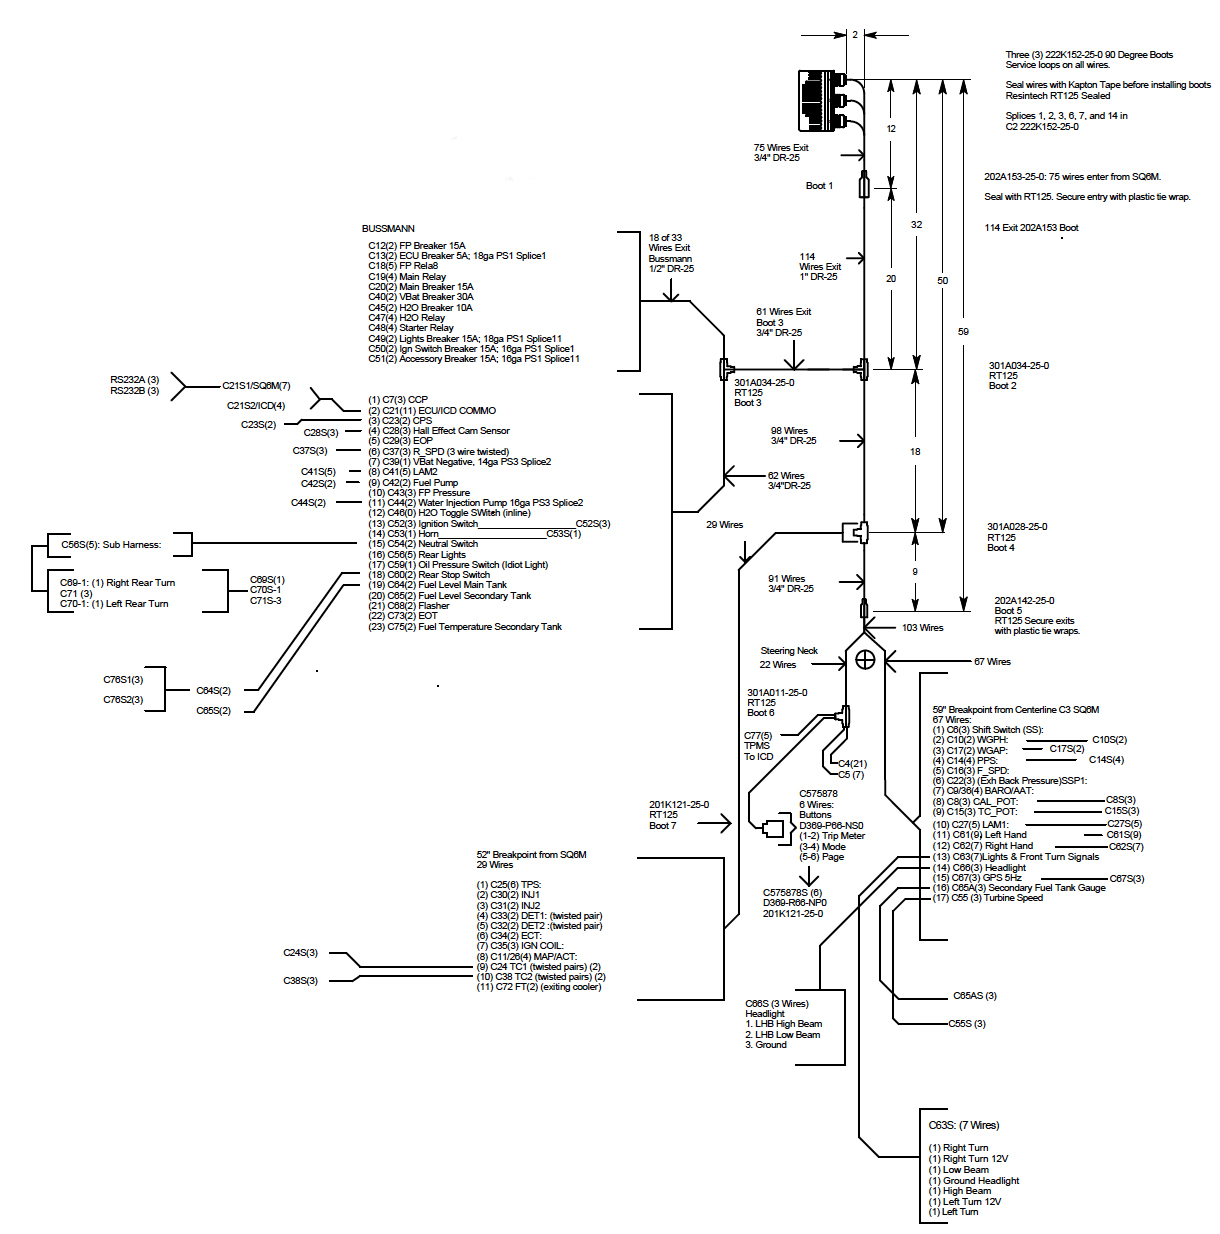
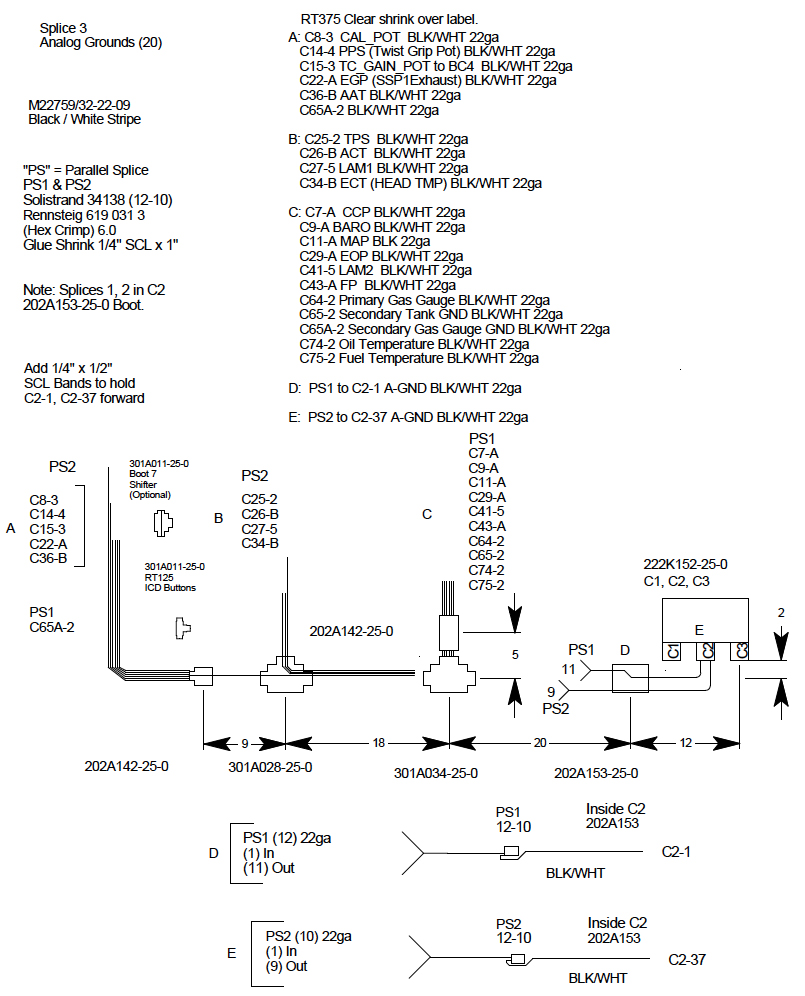
One simple way to do layout planning for
wire and heat shrink lengths, where the harness makes some turns, is to
use electrical wire that can be bent into shape. Here we are figuring
out the lengths where the three SQ6M connectors will exit the three
222K-152-25-0 boots and go to the next boot, a Raychem 202A153-25-0.
8AWG works well. Here we used some 4AWG. It worked out to 16", 19" and
22". From there we subtract
the overlap from the boots to get the DR-25 lengths. We fudge wire
lengths on either end to allow for concentric twisting.
We model the various Deutsch Autosport connectors that we use in our
harnesses. Pricey devils, but they don't melt, and use Raychem lipped
boots sealed with Resintech RT125.
Pectel MQ12 controller. Same as used by Aston Martin, Lotus, Nissan
Nismo GTR and in World Superbike. Full Autosport Connectors. In
case you are wondering how fast this controller can process things it
has a MPC5200 processor that delivers 760 Million MIPS (Instructions
per second) to keep track of all your inputs. Four Autosport
Connectors.
What's Between
Autosport and DTM Connectors?...Deutsch
369 Series Connectors
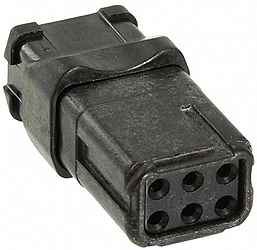
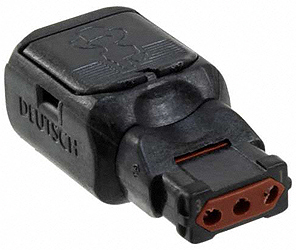
Deutsch 369 Series
Connectors
come in 3, 6 or 9 pin variations. These are rated at 175 Celsius (347F) or
about 50 degrees Celsius higher than Deutsch DT or DTM Connectors. They
are also IP67 rated.
Made of high temperature PEI/PEEK materials with Flurosilicone seals,
they are about 5 times more expensive than DTM connectors. Designed for
aerospace they use #22 Contacts 26-22 AWG and #20 Contacts 24-20 AWG. Rated at 500 mating cycles.
Just the ticket for
motorsports wiring with its high
heat, weight, space, and harsh environment requirements. Less expensive
than Deutsch Autosport anodized metal variations. Where exposure and
corrosion is an issue PEI/PEEK can offer an advantage over anodized
aluminum. We had Autosport aluminum connectors corrode at the Bonneville Salt Flats.
This
video explains the 369 Connector
features
The 369 Series are really small parts. Above left is an oversize
model of the Deutsch three pin 369 Receptacle. Above right is an actual
size
model of the 3 pin Receptacle. The actual part is .389" Width by .752"
Length...Smaller than a comparable
Autosport Connector. Nice items for motorsports wiring with
FBW (6 wire) and
other sensors
which use 22 Gauge wires where heat, space, and packaging issues are at
a premium. Pins / Sockets for these are in two sizes: 22 (26-22 AWG)
and 20 (24-20 AWG).
We use these in conjunction with Black DTM connectors, with
the DTM connectors being used with larger 20/18/16 gauge wires.
Where to Buy Deutsch
Connectors & Mating DT/DTM Raychem Boots
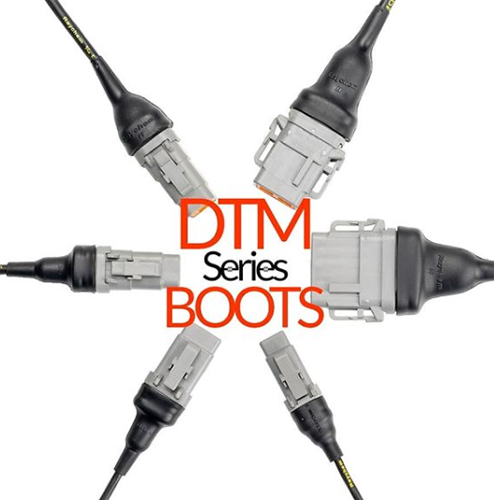
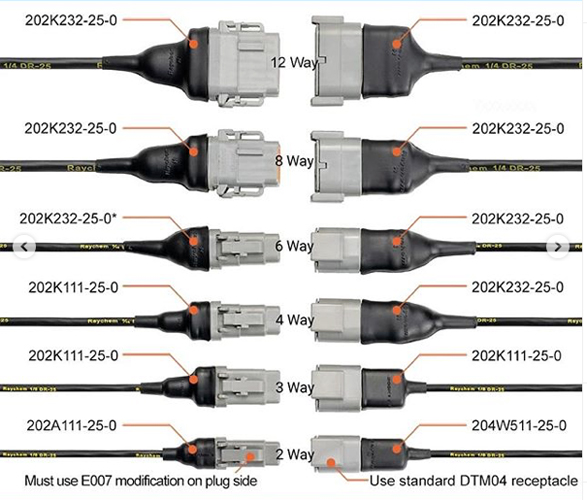

Deutsch DT, DTM and DTP Sealed
thermoplastic connectors are the cost effective motorsport standard...A
step above the ubiquitous Weatherpack connectors.Used by all motorsport
wiring professionals in Mil-Spec and Race-Spec Motorsport wiring.
The best place to buy these is the
Deutsch Connector Store.
With 100 rated mating cycles and precise pins and sockets these are the
next step below the all metal Autosport Connectors which are way, way,
more expensive. Its best to buy these from someone who can provide a
complete solution in both parts and tooling. Fast shipment and
excellent prices. One thing you might consider as these will not
corrode as can happen with the more expensive Autosport Connectors.
Connectors and the Rayhem Boots are available for
purchase
from
Prowire USA.
Using the Raychem boots is the cleanest most durable method of sealing
DT/DTM Connectors. Raychem ATUM works well with its high shrink ratio
but will degrade faster under high heat conditions. Using the proper
boot and sealing it with RT125 is the preferred solution. Things stay
sealed and no seeping adhesive from overheating the ATUM in fabrication
or use. Rock solid.
If you get confused by all the Deutsch Suffixes in the part numbering
scheme
check out
this page done by LADD.
Deutsch DTM
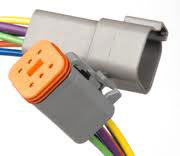
Deutsch DTM Series : Sealed thermoplastic connectors designed for
harsh
environments like engine compartments. Reasonably priced. Available
from many sources, they offer watertight silicone seals that also act
as a strain relief. Available in 2, 3, 4, 6, 8 and 12 pin contacts with
size 20 contacts for AWG 16 to 24 gage wire. Either solid pins and
sockets or crimped pins and sockets can be used. Solid pins are crimped
and are easiest to work with. In no case should the pins and sockets be
soldered. Multiple wire size #20 contacts with 7.5A rating.
Pictured above are 2, 3,and 4 pin DTM connectors with the optional
shrink boot adapter (Option E007). There are all sorts of suffixes for
the DTM connectors and whereas you might spec out a particular option
i.e. like the shrink boot...It may not be available in plug and
receptacles. We suggest you check out this
interactive
product guide
first.
.DXF Files Deutsch DTM
Connectors
For our CAD wiring harness drawings we construct .dxf models of these
Gray
Deutsch DTM Connectors on a 1:1 scale. There are downloadable in
Autocad R14
.dxf file
formats. In Firefox Browser Choose "File, Save Page As", and open in
your CAD program. They can be colored as is the gray two pin DTM above.
Alternatively you can import .dxf files into
Microsoft
Visio
Professional 2013 using
Autodesk TrueView.
2 pin
DTM04-2P-E003
2 socket DTM06-2S-E007
3 pin DTM04-3P-E003
3 socket DTM06-3S-E007
4 pin DTM04-4P-E003
4 socket DTM06-4S-E007
6 pin DTM04-6P-E003
6 socket DTM06-6S-E007
All of the pins and sockets are made from 98% pure copper and then
plated. Standard plating is Nickel. For critical circuits, pins and
sockets are plated with Nickel and then Gold. For lighting, power and
control circuits choose Nickel. For critical and very low voltage and
amperage circuits such as oxygen sensors that operate at 0-1 volt or
0-5V (wideband) and for data transmission circuits that operate at 5
volts, choose Gold. Type K Thermocouple wire should use Chromel or
Alumel terminals (see below) in the DTM two or three wire connectors.
Note: rear silicone seal will seal on smooth insulation from .053" to
.120" O.D. Of importance is the fact they are rated at 100 cycles of
engagement and disengagement. These are your affordable step below the
very expensive Deutsch Autosport line. They will melt if they touch
something like an exhaust so be careful about securing things before
you start an engine.
Amphenol-Sine ATM Connectors: Same as DTM
Motorsport Alumel
and Chromel Thermocouple Terminals:
Deutsch DTM Connectors (#20) an Autosport (#22)
Amphenol-Sine has come out with a complex array of
ATM Connectors that are
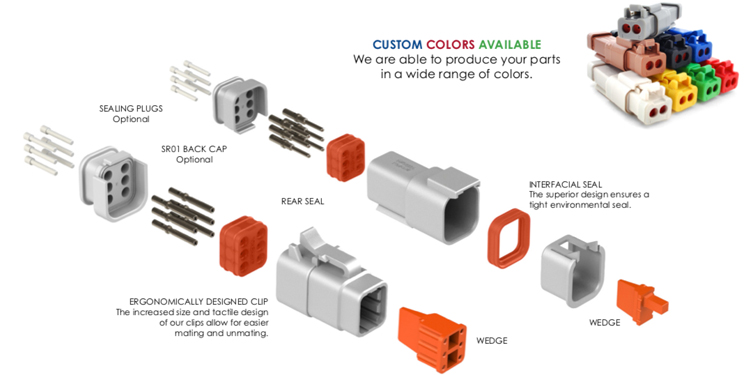
DTM compatible size 20 connectors. In some cases they may provide boot and color options not available in Deutsch DTM supply chains.
For instance DTM 3 way Black Plug and Receptacles do not come with
Raychem boot lips...ATM connectors do...Pictured above.
ATM06-3S-SR01BK; ATM04-3P-SR01BK. We have a preference to black instead of the gray for our motiorcycle harnesses.
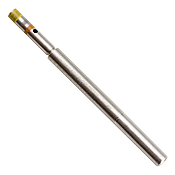
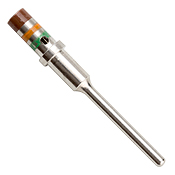
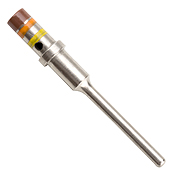
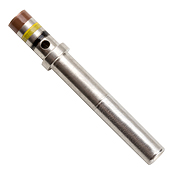
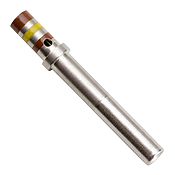
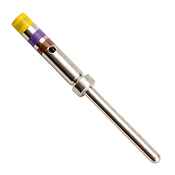
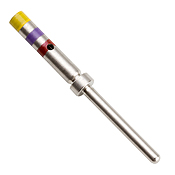
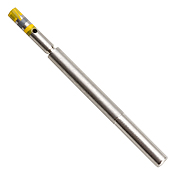
Prowireusa
has the specialzed pins and sockets in Chromel (+) and Alumel (-) in
sizes 20 and 22. These are crimped with the Crimp Tool M225201-01 (DTM) and MS22520/2-01 Crimp Tool (Autosport) and the
appropriate K41(M22520-06) and K42 (M22520-09) positioners,

"MS"
Contacts have
a BIN (Basic Identification Number) code consisting of three color
bands around the crimp barrel. There are 10 colors which designate a
number. The BIN codes are read from the wire barrel end of the contact
towards the mating end. The first band is wider than the other two to
further facilitate identification. Bin-code can also be stamped on the
contact. Example: Red/Yellow/Black above would be -240 suffix.
Deutsch DTM #20 terminals in Alumel and Chromel are available. The
sequence of the color bands defines the terminals material and type.
0 = Black
1 = Brown
2 = Red
3 = Orange
4 = Yellow
5 = Green
6 = Blue
7 = Violet
8 = Gray
9 = White
Thermocouples, either EGT probes or Cylinder head
temperature, have to be wired with special thermocouple wire all
the way to the ECU input pins. You must use Alumel (-) or Chromel (+) wires and
terminals i.e. pins or sockets, or you will have cold-junction errors.
The all-metal Deutsch Autosport Connectors have specialized size #22
Alumel and Chromel terminals as well as #23 for the MicroLite Series.
There are also size #20
Chromel and Alumel
Terminals available for the less expensive DTM series of
connectors.
Pectel
SQ6M ECUs
have two dedicated EGT Chromel (+) pins: (TC1 POS [YEL Wire], TC2
POS [YEL Wire]); and one common EGT Alumel (-) pin (TC
NEG [RED Wire]) in the AS216-35PN connector.
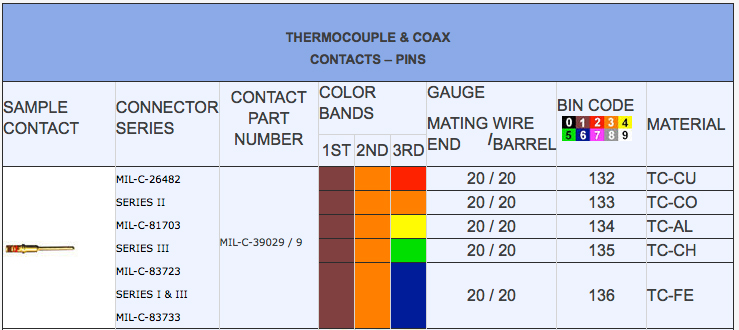
Chromel Pins Size #20: MIL-C-39029/9-135; Brown Orange Green
Alumel Pins Size #20: MIL-C-39029/9-134; Brown Orange Yellow
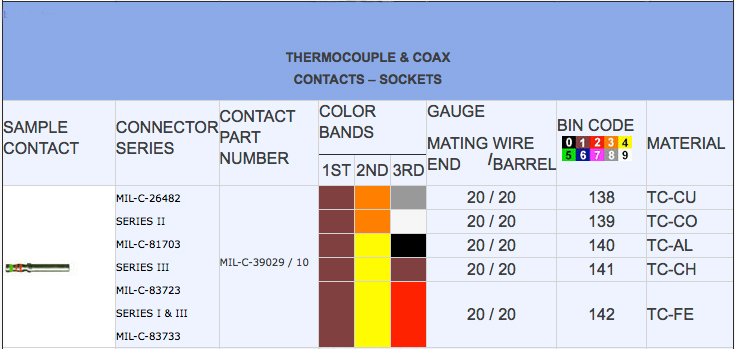
Chromel Sockets Size #20: MIL-C-39029/10-141; Brown Yellow Brown
Alumel Sockets Size #20: MIL-C-39029/10-140; Brown Yellow Black
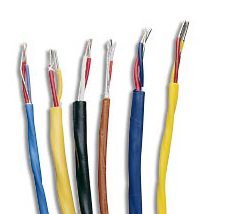
Wiring
thermocouples into a motorsport harness is a bit different than
industrial applications as we typically use a a three position
plug / receptacle connection in a branch off the harness. If the
thermocouple is shielded then one terminal of the three position
connector should connect the shield/drain from the main harness to the
thermocouple. You never ground the drain wires at the thermocouple but
back at the ECU, typically at the ECU's chassis ground splice.
Pectel SQ6M ECUs have two dedicated Chromel thermocopule positive pins
and a common (spliced) thermocouple Alumel negative pin. You should
always use Alumel and Chromel thermocouple extension wires in your
harness. Stranded wires offer flexibility and foil sheathing and a
drain wire offer additional protection.
Motorsport Thermocouple Harness Wiring
Example:
Connectors and wire for EGT Type K Thermocouples.
Thermocouple ALCOR 86161 90 Deg 1/4" NPT
DTM04-3P-E007 with Raychem Boot 202K111-25-0 (abrade DR-25 and RT125 epoxy)
DTM06-3S-E007 with Raychem Boot 202K111-25-0 (abrade DR-25 and RT125 epoxy)
Chromel Pins: Prowire 710106
Alumel Pins: Prowire 710104
Chromel Sockets: Prowire 710103
Alumel Sockets: Prowire 717102
Drain Pins: 0460-202-2031
Drain Sockets: 0462-201-2031
(3) Solder Sleeves (drain wires): Prowire S01-03-R; use 22ga drain wire BLK
CTC-0018-24-9/5-9 (19 strand): Twisted Pair: Green Chromel(+); White Alumel(-); Jacket White
Strip CTC-0018 with
Ideal
45-402 Ringer Cable Stripper.
DR-25 covering thermocouple wires and harness wires.
Raychem 19 Strand CTC-018 Motorsport Thermocouple Wire

 19
strand CTC-018
 Raychem Motorsport Alumel Chromel Type K wire. pictured above. This is the best motorsport thermocouple wire, but not
easily obtained and expensive. TE Connectivity. About $300.00 for 25 feet of 44 gauge.
We use this wire in 24 gauge. Two Thermocouples: Green wires (+) to
pins 4 and 11, C2 Pectel SQ6M. Parallel spice White wires (-) to pin 13
C2 SQ6M
CTC-0018-24-9/5-9
CTC-0018-22-9/5-9
CTC-0018-20-9/5-9
More common is 24ga stranded (7x32), typically shielded, with a
integral drain wire.
Various sources. About $300.00 for 25 feet.
If shielded with a drain wire, use 3 position connector with gold
terminals on the drain wire Cover leads with Raychem DR-25 and heat
shrink the 3 position DTM connectors for strain relief. Typically is type K
Thermocouples.
The fastest acting thermocouples are the grounded type with thinner
probes. Grounded means there is a continuity between the probe
and
either of the two wires. The thinner
diameter probes are made of Hastaloy-X, or similar high temperature
alloy.
Depth should be adjustable so the tip of the thermocouple is centered
in the exhaust stream. Place 1/8", 1/4" NPT or 1/4 x 20 welded-on
mounting points on the upper quadrants, not beneath the exhaust port.
Expect 1% accuracy.
In the case of single or multiple thermocouples they should be equally
spaced
approximately 2"- 4" from the exhaust port...The further away, the more
of a temperature drop. They should not be placed in a collector.
Thermocouples with exposed tips and 1/4" thick, insulated, probes are
not as fast acting and are susceptable to damage. See below for how
thermocouples actually act.
For testing and calibration purposes we use a
Thermoworks Microcal 2K
that can be set to a particular temperature C/F to .1 degree F and .3
degree C accuracy. A handy Deg C to F and Deg F to C
PDF from Omega.
Thermocouple
Misconceptions
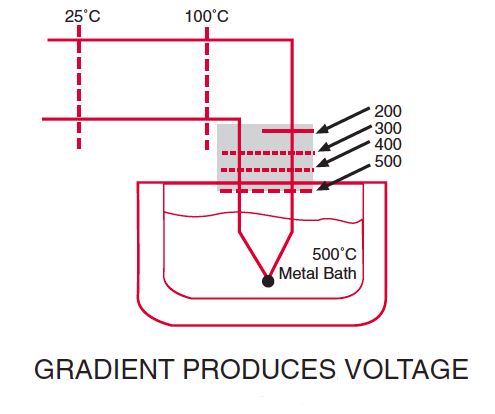
Robert Moffat in his Gradient Approach
to Thermocouple Thermometry explains that the thermocouple voltage is
actually generated by the section of wire that contains the temperature
gradient, and not necessarily by the junction.
For example, if we have a thermal probe located in a molten metal bath,
there will be two regions that are virtually isothermal and one that
has a large gradient. In the figure above, the thermocouple junction
will not produce any part of the output voltage. The shaded section
will be the one producing virtually the entire thermocouple output
voltage.
If, due to aging or annealing, the output of this thermocouple was
found to be drifting, then replacing the thermocouple junction alone
would not solve the problem. We would have to replace the entire shaded
section, since it is the source of the thermocouple voltage.
In short, keep the thermocouple, even fast acting ones, well into
the
center of the exhaust stream, not just the exposed tip. Designs with
this probes and grounded designs are the fastest and most accurate.
DTM Terminal Removal

The simplest way to remove DTM Terminals
(Pins, Sockets) is to: (1) pull out the plastic terminal lock
with a small needle nose plier and then, (2) use a small flat-bladed
screwdriver...Typically the one you have that has a magnet on the other
end, and release the tab lock by pressing down and pull out the wire.
Simple.
Detusch DTM Black
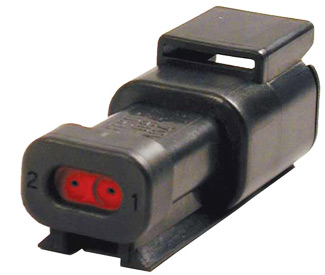
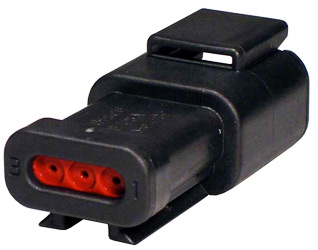
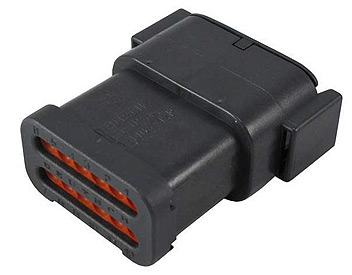
Everyone seems to use only the Gray DTM connectors simply because
that's
what they see everywhere. The DTM series actually comes in 11 colors.
We
use the Black DTM connectors on our production street harnesses as
they blend in with the DR-25, Raychem Boots, and heat shrink tubing. On
motorcycles Black sort of disappears whereas the Gray stands out. We
use the E005 End Cap option when it's available...like the "Cat-Spec"
DT Series pictured below.
.DXF Files Deutsch DTM
Connectors
For our CAD wiring harness drawings we construct .dxf models of these
Black
Deutsch DTM Connectors on a 1:1 scale. There are downloadable in
Autocad R14
.dxf file
formats. In Firefox Browser Choose "File, Save Page As", and open in
your CAD program. They can be colored as is the black two pin DTM above
or the 12 pin DTM connector below.
Alternatively you can import .dxf files into
Microsoft
Visio
Professional 2013 using
Autodesk TrueView.
2 pin
DTM04-2P-E005
2
socket DTM06-2S-E005
3 pin
DTM04-3P-E005
3
socket DTM06-3S-E004
4 pin
DTM04-4P-E005
4
socket DTM06-4S-E004
6 pin
DTM04-6P-E005
6
socket DTM06-6S-E005
8 pin
DTM04-8PB
8
socket DTM06-08S-E007
12 pin
DTM04-12PB
12
socket DTM06-12SB-E007
"Cat-Spec" Detusch DT
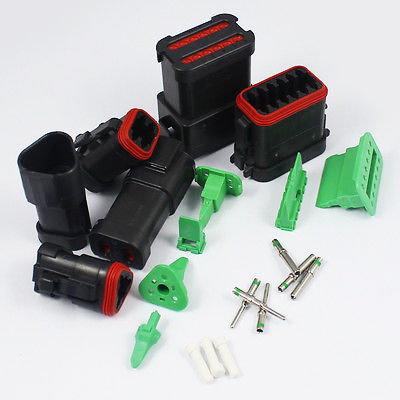
Deutsch DT Series have #16 contacts with a 13A rating. Often
called "Cat-spec as they are used by Caterpillar and have improved seal
retention on the plug and a cap on the rear of the housing to retain
the silicone wire seal.
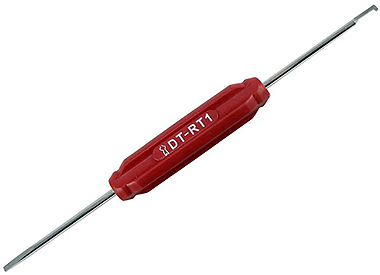
The
Deutsch DT-RT1
is a removal pick for the Deutsch DT Series only. The tool has a double
ended removal tool. One end has a sturdy 90 degree hook for non-slip
wedge lock removal. The other end has a standard flat head screw driver
which can be used as a straight pick or driver. Tool has a tapered one,
four sided handle.
DT-RT1 application instructions PDF.
Controller Area
Networks (CAN)
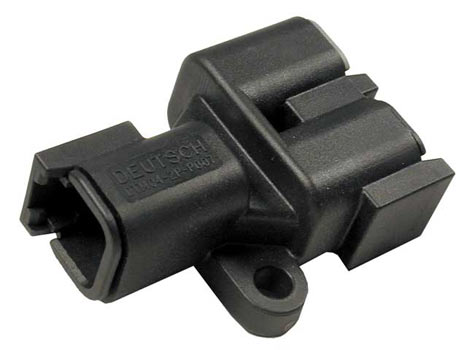
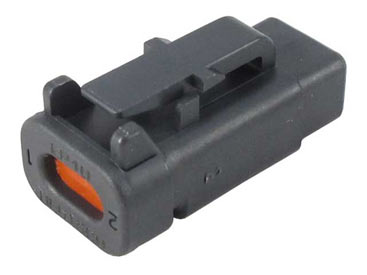
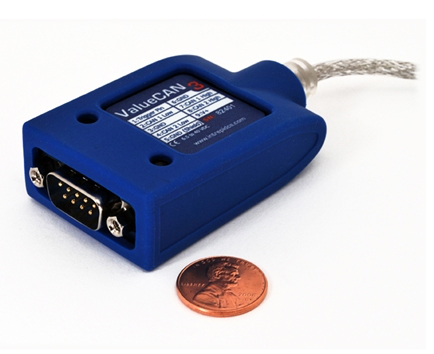
Specialized
DTM Connectors
for SAE J1939/15 2-wire CAN systems. DTM04-2P-P007 Receptacle "Y"
Connector above left. Right: DTM06-2S-EP10 Plug with molded-in 120 Ohm
Resistor. The
Valuecan3
is helpful Diagnosing CAN issues.
CAN-BUS Joysticks
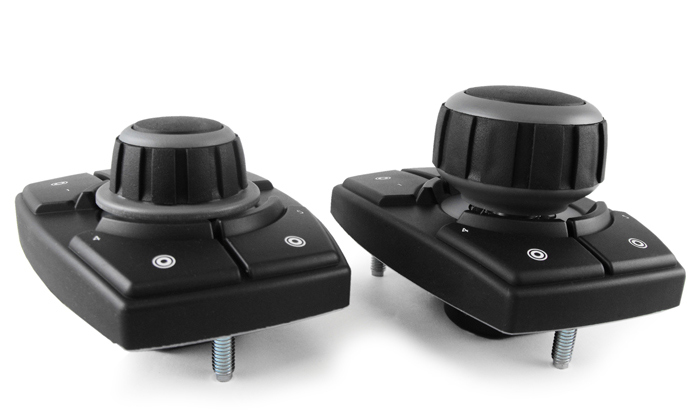
Grayhill’s Series 3J Vehicle Display Controller (VDC) is an operator
interface device for on-board software. The VDC features an optical
rotary encoder for scrolling through menu options and a center
pushbutton for selecting options. Five “hot key” pushbuttons are placed
around the center shaft to quickly pull up the most common functions.
Legends on the hot keys can be chosen from a library of ISO standard
legends or customized with new symbols. An optional 8-way joystick
provides cursor control for navigating on-screen. CANopen and J1939
protocols are available as standard options.
Download VDC Brochure
on these.
Sureseal
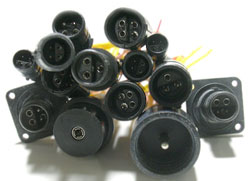
Sureseal: Interesting
rubber push to connect seals. Like any specific
connector they require specific and expensive tooling. These connectors
are rated at
50 cycles of engagement and disengagement. We have used them in the past but prefer DT/DTM/D369 and Autosport connectors.
Weatherpack
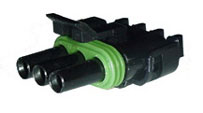
Weatherpack: Ubiquitous automotive silicone sealed thermoplastic
connectors designed for harsh automotive environments. These connectors
are validated to perform to specification for 10 cycles of engagement
and disengagement, but up to 50 cycles probably will not see any signal
degradation.
In short they are excellent for oem use but a bit wanting
in a motorsports environment where >10 engagement/disengagement
cycles are normal. For over 25 years we used all the one to six pin
variants with GXL and TXL wire and they were reliable but not
motorsport grade.
Weatherpack GM MAP Sensors can be further sealed with a [
HellermannTyton
(page 63)]
shrink
boot
available from ProwireUSA. If you use GM 1, 2, or 3 Bar Map Sensors
with 22 Gauge 22759/16 or /32 wire use the 15324983 DARK RED Silicone
Cavity Seals and Pins 12089307 (22ga). Appropriate pins, sockets and
seals for the different wire sizes are available from ProwireUSA.
GM 2 and 3 Bar Connector 12015384 Black; GM 1 Bar Connector 12020403
Green.
Although the Weatherpack connector is "sealed" by the cavity seals it
is a good idea to provide additional strain relief. Alternatively seal
the ends of the DR-25 with 1.2" of ES2000-1.
Before you automatically use the three pin GM MAP Sensors you should
consider engineering your project for BOSCH T-MAP sensors that have
four contacts and combine temperature and manifold pressure in one
sensor.
You can kiss some pneumatic tubing and tees good-bye. A better
way to
fly. Cut your sensor count in half and get rid of some problematic
vacuum / boost tubing and clamps.
1 Bar: 0261 230 030; 0 261 230 333
2.5 Bar: 0261 230 266; 0281 002 514; 0 261 230 042
3 Bar: 0281 002 437; 0281 002 845; 0 261 230 280
3.5 Bar: 0 261 002 456
4 Bar: 0 281 002 576
For 22ga 22759/32-22 wire:
Connector BOSCH 1928403736; BDK Terminal 1 928 498 056 (20 AWG); Seal
BLUE 1928300599 (.35-1.0mm2)
Sensor Resistance Data: Polynomial Fit to 0-5V Data Entry
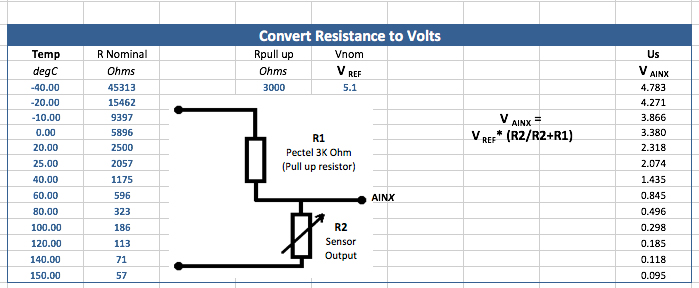
Sensor Data is often given in resistance v. temperature. This does not correspond exactly to equal divisions of 0-5VDc.
Use this calculator (Cosworth Excel Spreadsheet) when using 3K pullup resistor for temperature calibration.
Injectors and EV6/14 Connectors
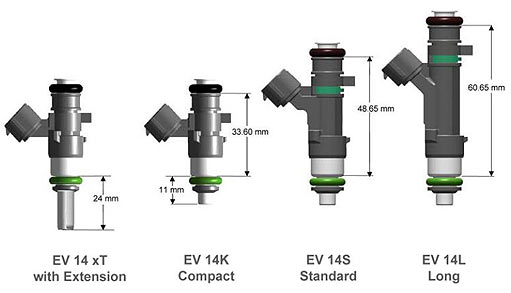
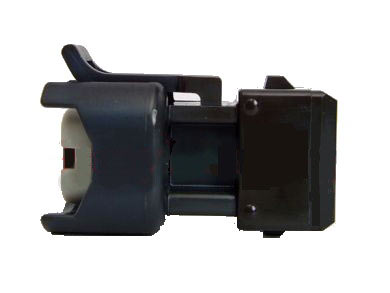
The trend in injectors is to use the
Bosch EV14 injectors
which are
high impedance, typically 12 Ohms, instead of the older style Low
Impedance (2-3 Ohms) as the EV14's are very fast opening and very
accurate. Most typically use USCAR EV6 Type B Red style
injector
connectors (Green Cavity Seal 22ga). The exception to this are the
ID2000 Injectors which use a
Sumitomo
6189-039 Injector Connector (Black Cavity Seal 22ga).
People tend to yank on the injector wires which are typically 22 ga.
We use 20AWG. Make sure you have the proper crimping tool. Do not solder the
wires...ever. Crimp 20-22 gauge with the Delphi GT150 Connector crimping tool
(15359996),
after removing the spring loaded plastic GT150 terminal stop, using the
22-20 position. If you are using 20 gauge wires you can use the general
purpose
Delphi
12014254 Crimping Tool.
Prowireusa Bosch EV6/14 USCAR Injector
Connectors and Seals (Aptiv was Delphi)
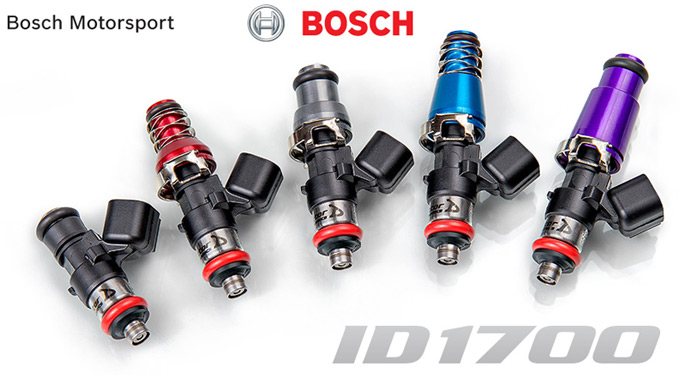
These days there is a lot of BS floating around about injector matching
etc...Take our advice and use
Injector
Dynamics Injectors as they work directly with Bosch Motorsport.
Check out the lengths they go to in
this video.
We use their 750cc, 850cc, 1000cc, 1050cc, 1300cc, 1700cc and 2000cc
injectors. Pictured above
are the new ID1700X injectors developed in conjunction with Bosch
Motorsport. Tony Palo drives a 2400hp GTR so he's crazy like the rest
us...only he has more horsepower.
Circuit
Breakers not Fuses
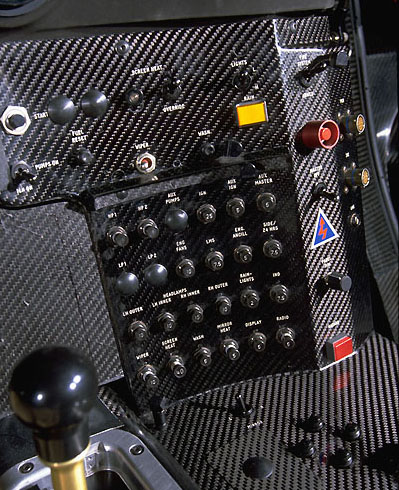
Passenger cars use fuses everywhere whereas, in motorsports,
re-settable aviation-style circuit breakers are preferred. Circuit
breakers have the advantage of being re-settable which allows you to
perhaps just "push it in" and get going until you diagnose the problem.
You also don't need to replace a fuse. Harley uses truck style
thermal breakers...your bike would sign off due to some short and a few
minutes later it would run again...but you didn't melt your wires.
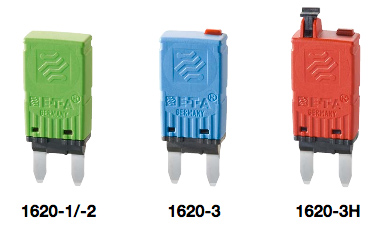
Tyco W23, ETA 483, and Klixon 2TC14 series push to set circuit breakers
are a standard aviation item and are available in many amperages. They
"pop up" when they trip and you push them down to reset them. If you
are using the popular sealed WeatherPack silicone sealed fuse holders
you can use Bussmann 227 series circuit breakers that are a drop in
replacement, albeit pricey, for the cheaper one time fuses.
Klixon
2TC14-X (green
breaker) are available from ProwireUSA in
varying amperages from
1A to 25A for about $20.00. Higher end ETA 483 series are about four
times more expensive.
Breakers like the Tyco W23 are usually installed in panels that a race
car driver can reach and reset. "Reach and reset" doesn't work on
motorcycles.
Space is also a premium on motorcycles and there is the
issue of being exposed to the elements like pressure washers. If you go
to the Bonneville Salt Flats like we do then corrosion is a major
issue. A second issue for our applications is high vibration and the
three threaded points...possible issues with that.
Cooper Bussman 227 Low
Profile ATC Blade Type Manual Reset
Circuit Breakers pictured above. There are nornally installed in a fuse
box in place of the standard ATC duses. These are too tall to fit in
Delphi Metri-Pack Sealed Fuse Holders
(12033731 Cap Cover and 12033769 Female Connector).
Waterproof Fuse/Circuit
Breaker and Micro Relay Enclosures
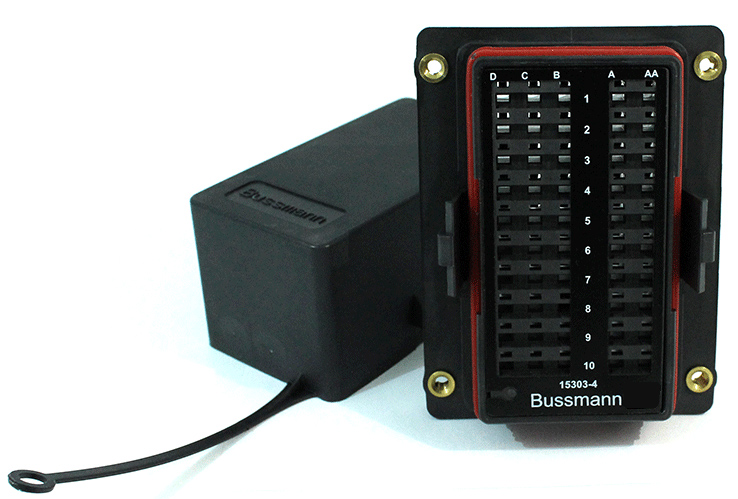
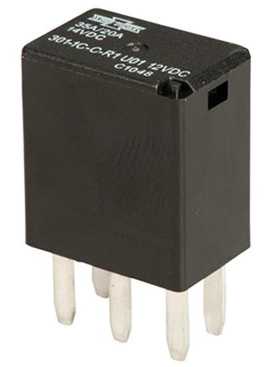
For motorsport wiring the Bussmann
enclosures present a simple, compact, solution in a waterproof, sealed
enclosure.
Sealed Busmann
Enclosures can house a various combination of 280 series
(.320" c-c) Mini Fuses,
280 series
mini circuit breakers and
ISO 280 Micro Relays.
There are a variety of
these bussed and non-bussed, so be careful when you order them. IP 66
weather tight sealed. Cheap and compact for $20.00...or use $2000.00
and up
programmable PDMs. Mini 280 series (SAE J553) Circuit Breakers can be
either auto-reset or manual reset (2 versions).
These use Delphi Metri-Pack 280 Series
(sealed-tangless) connections on the back side:
Metri-Pack 280 silicone cable seals : 15324985 (purple 20-22ga);
15324982 (green 18-16ga GPT; 20-18
SXL); 15324980 (gray 14ga GPT; 16ga SXL);
Cavity Seal Green 12010300;
Terminals: 12084201-L (22-20ga); 12110847 (18-16ga); 12129409
(16-14ga).
All parts are available from
Waytek
Please note that the mounting screws go in from the fuse side as the
inserts are split, self-clinching, and the I.D. is smaller on the
"back" side. Part designations are (3) 10-32 or (4) 5mm. Normally
these enclosures are inserted through a panel hole with the screws
going
through the panel and into the fuse side. Typically, with
10-32 threads, we use 18-8 Stainless Steel Pan Head Phillips Screws
10-32 x 1/2" with 16ga thick panels.
Should you have a space premium on the "back side" where you wish to
mount the Bussmann enclosure on top of a panel cut-out (wires), and put
the screws in from the back side, then you can run the appropriate tap
(10-32 or 5mm x .8) through the top of the insert so the screw will
easily thread into the back side. We use 18-8 Stainless Steel Phillips
Screws 10-32 x 1/2" with #10 18-8 Stainless Steel Split Lock Washers on
a 16ga
panel.
In the picture above the Bussmann enclosure is installed on a
Harley-Davidson FXR (the side cover needed to
be spaced out). Lots going on in small space as space is at a premium
with about 80 outboard connections.
Pectel
SQ6M controller for a turbocharged application. 18-8 Stainless
Steel Phillips
Screws 10-32 x 1/2" with #10 18-8 Stainless Steel Split Lock Washers
coming in from the back side.
Panel Mount Circuit Breakers
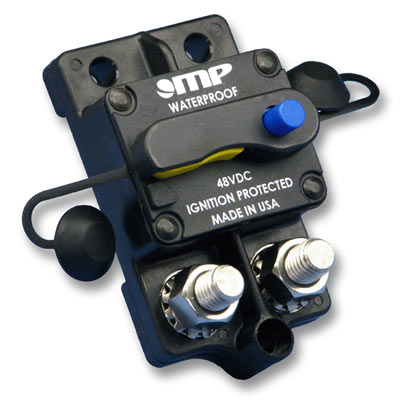
High Amp Series 17 Waterproof Panel Manual Reset Circuit Breakers from
Mechanical Products are available from
Waytek
Inc.
Amperage Ratings from 25 to 300 Amps
Trip-free operation
Industry standard terminations available in panel and surface mount
New "Easy Access" Panel Mount and "Side by Side" Surface Mount
configurations available
Surface Mount available with 1/4" and New 3/8" stainless steel terminal
studs and sems nuts
Panel Mount available with 1/4" brass, nickel plated terminal studs and
stainless steel sems nuts
Auto, manual, or manual push-to-trip options
Dustproof and waterproof
Visible trip indication
Ignition Protected
Sealing Backs of
Circuit Breakers

Raychem SCL heat shrink can be used to seal circuit breakers and other
types of switches from the environment. Much niftier than trying to
heat shrink a couple of screw terminals. It is a dual-wall adhesive
lined shrink tube with a 2.5:1 shrink ratio.
A greater shrink ratio (4:1) can be accomplished by using
Raychem
ES2000, or DSG-Canusa CDR adhesive-lined semi-rigid shrink tubing.
Raychem ES2000 is available in small quantities (4' sticks) from
various electronic suppliers like Mouser.
Sealed K4 Toggle
Switches
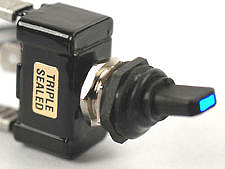
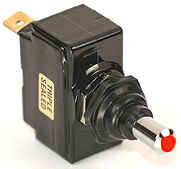
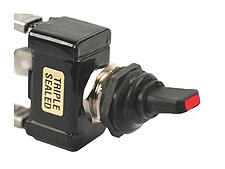
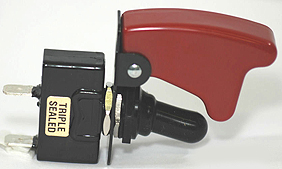
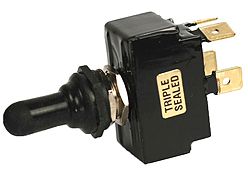
K4 Triple Sealed Switches are used in off road racing and other
motorsports where moisture and dust are your enemy.
Complete K4
Catalog. Available from
ProwireUSA.
Sealed Toggle Switches
with Leads
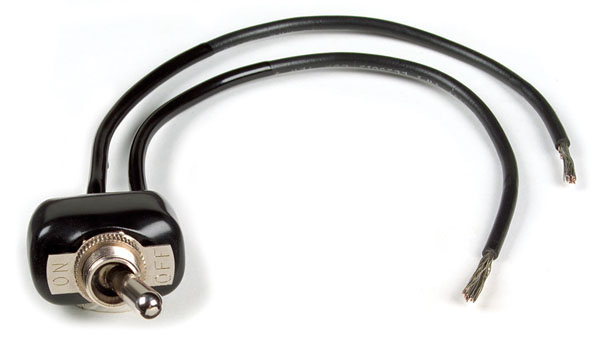
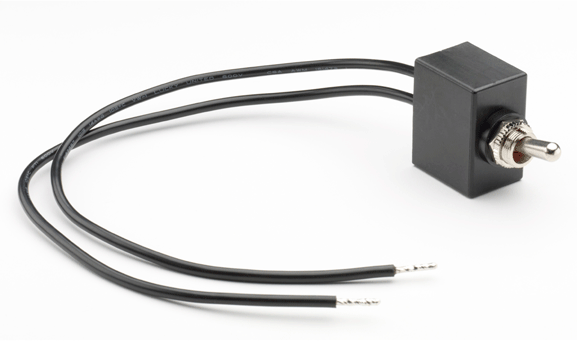
Instead of having to deal with exposed blade contacts or tiny
brass screws with eylets, get a sealed toggle switch with lead wires
and install a Deutsch DTM Connector.
Grote
82-2111 SPST Toggle
pictured above left. Switch is completely sealed in epoxy. Silver
contacts for long life. Waterproof and Dustproof to IP68 standard.
Similar
switches, above right, are also available from
Littelfuse.
Several less things to worry about...no loosening of
screws or issues of sealing blade contacts from corrosion. Here the Grote 82-2111 with a
DTM connector, Raychem DR-25, RT125 sealing and ATUM 16/4. Alternatively
you can hardwire the switch with two step-down butt connectors (offset
them) and seal the connections with 1.2" ES2000-1 and cover with 1/4"
DR-25 sealing both ends of the DR-25.
Otto P7
Waterproof Pushbuttons From Prowire

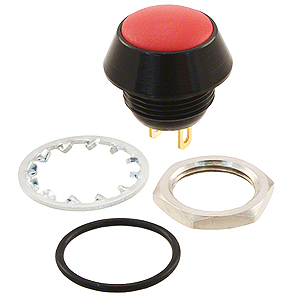
As we all know being waterproof is better than not. SPDT Momentary.
Otto P9
Pushbuttons..Momentary
or Latched...Plastic From Prowire
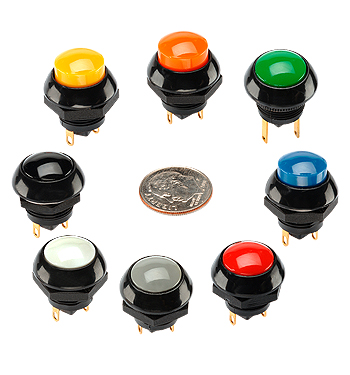
OTTO P9
pushbutton switches.
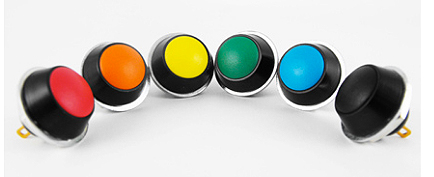
They
come in different color buttons with buttons raised or
flush and a myriad of options, but you really need to label them
where they are installed. These have a 6 to 7 digit ordering number
after the "P9" so be careful when you order them. These are
plastic construction. 15/32 thread. IP 64 rated.
Prowire Otto P7/P9 Switch Boot Adapter
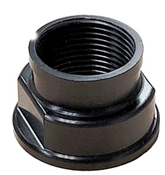
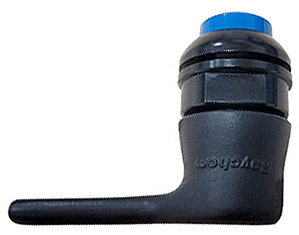
Prowire-designed
Billet Switch Boot
Adapter allows for the fitting of a
Raychem 222D91-25-0 Boot to the
back of an OTTO P7 or P9 switch. This adapter will also work with other
switches that use a 15/32" mounting thread. Furthermore, the Prowire
switch boot adapter includes an integrated washer, so you will not mar
the finish on your steering wheel or instrument panel.
You solder the wires and form a service loop for strain relief ...Then using
Resintech RT125 to seal the boot. Lead wires with 1/8" DR-25 should be abraded for
maximum RT125 adhesion. Do it right for reliability.
Grayhill 30 Series
Pushbuttons...Momentary..Machined Aluminum
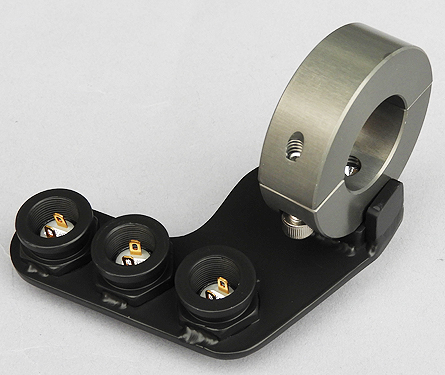
Grayhill 30
Series Momentary Pushbuttons.
These are machined aluminum with a Black Chrome finish. 1/2-32 thread.
We use these for Cosworth ICD page, mode, and trip reset buttons. IP67 rated. Threads on these are shorter that the Otto
P9 pushbuttons.
We also
machined three stainless backshells to use a Raychem Boot (222D921-25-0) and seal the
assembly with RT125 epoxy. We welded them to a bracket and epoxy coated them. Handlebar mounted. Vibration proof.
K4 Battery Disconnect
Switch
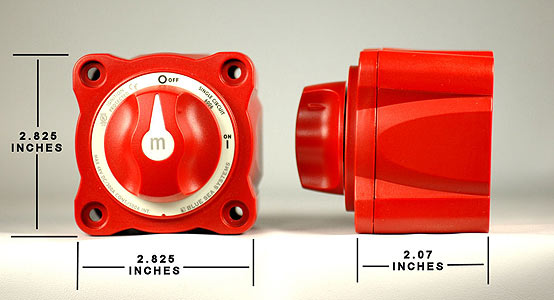
K4
Battery Disconnect Switch. If you run expensive Lithium Racing
batteries you need to remove any parasitic draw to prevent the battery
voltage from dropping when the vehicle sits for awhile. If the voltage
drops too low due to long term milliamp draws it can permanently kill
the battery unless the battery has circuitry to protect itself. The
switch also serves as a safety kill switch where
regulations require and manual disconnect.
Rotary Map Selection
Switches
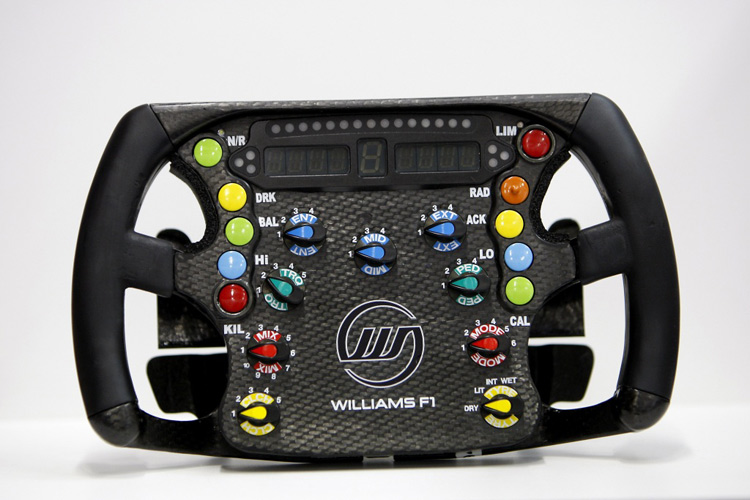
Rotary position switches are a fact of life in Formula 1...Fuel,
suspension, traction control, braking bias and whatever the rules allow
these days with the spec ecus from McLaren Electronics are all
switchable on the carbon fiber steering wheel.
We make up our own Rotary Map Switches that have to survive on a
Harley-Davidson. We set these up for four map positions. Traction
control maps, fuel and spark maps...all changeable on the fly. Four
position switch pictured uses three resistors to set voltages from 5
VDC to 0 VDC in equal steps.
Here is the final assembled switch with the laser cut stainless steel
mounting bracket and faceplate. Laser cut slots allow the faceplate and
the mounting bracket to index to each other. We stamp the switch
positions into the faceplate. The entire assembly is sealed for
reliability. We label the color of the signal wire so it can marry up
with the appropriate DTM connector on the wiring harness.
We machine the switch enclosure from Delrin plastic and encapsulate the
rotary switch in epoxy to waterproof it and use DR-25 heat shrink and
formed boots to protect the wiring and install a three position Deutsch
DTM connector. 5 VDc, Analog Ground and Signal wires (color coded). We
pot the Delrin enclosure / switch with Resintech RT125 on both ends. It
takes a few days to cure.
Eight Position Traction Control Rotary Switch. Seven resistors set
voltages from 0 VDC to 5 VDC in equal steps. Pectel SQ6M controllers
have 7 traction control settings. Position #1 will be traction control
“Off".
Stripping
& Crimping
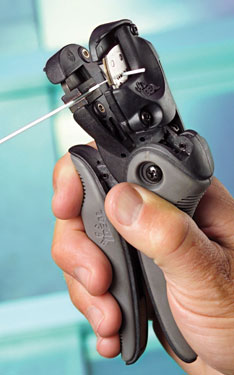
Ideal Ergo Elite, pictured on the left, is an excellent wire
stripper...Be sure you order the model 55-1987 for MIL-W-22759 wire
plus the LB-1904 Clear Plastic Wire Stop. About $250.00. The clear
plastic Wire stop cuts accurately but can trap the insulation between
the stop and the blades. Often we leave the stop off.
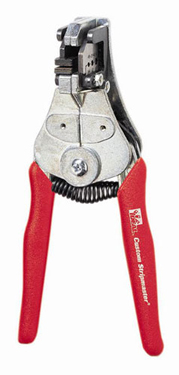
The Ideal 45-177 Stripmaster Lite (16-26 AWG, Type E Teflon), on
the right, is also an excellent choice. Keep the screws in the jaw
tightened as they tend to loosen with use. You should also order the
L5720 Wire Stop Assembly. About $150.00
We suggest you get the Ideal Ergo Elite for the most precise work.
Wire Stripping Thermal
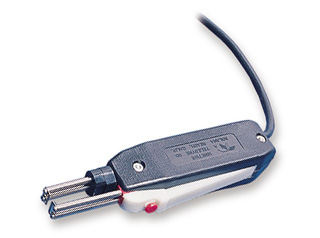
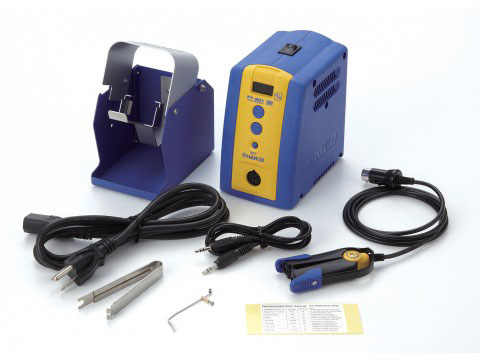
The claim is that thermal wire strippers do not nick or cut or scrape
the wiring. There
are several manufacturers like Teledyne and Hakko. The Teledyne
Strippal® Plus pictured to the left above is a self-contained hand-held
stripper that either comes with a fixed or variable temperature
control. The insulation melts and is stripped cleanly and quickly,
readying the wire for crimping or soldering. To the right is the Hakko
FT-801 thermal wire stripper.
We don't like getting burned by hot objects. We tried thermal strippers long ago but it was back
to mechanical and automatic blade strippers.
Best to skip these and use precision blade manual or production automatic strippers.
Ideal 950 Stripmaster
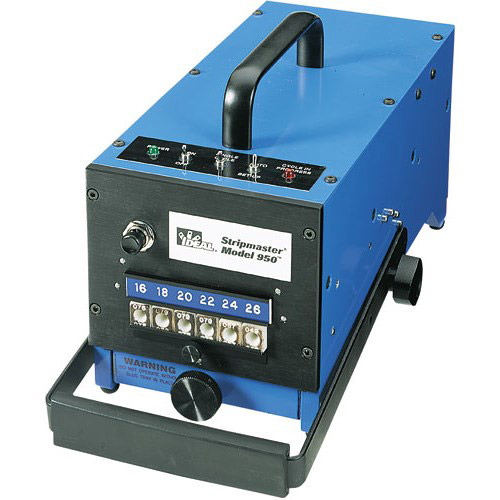
This is the pricey pneumatic stripper we use at RB Racing. It
simplifies doing production work and the stripped insulation collects
in the tray. Of course we still use hand strippers because the 950 is best used as a
stationary unit, not suited for lugging around the shop doing
prototypes in place. It's small but pneumaticall powere so it is best used as a Bench item.
Schleuniger UniStrip
2300
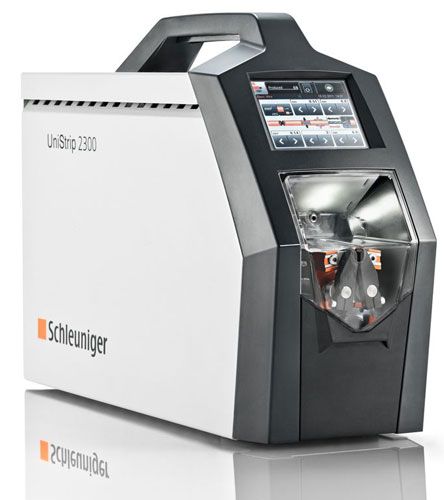
If you are doing production work and don't want to spend the day
squeezing manual crimpers then you need spend about 25 times more money
for an electric stripper like this one.
Video of it in
action.
Used by many wiring professionals.
Daniels crimping tools are the defacto standard for motorsports
connector pins and sockets. We also use specialized tools to crimp
Weatherpack connectors and Deutsch connectors.
Daniels AFM8 Turrets
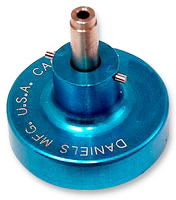
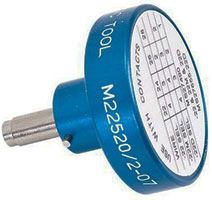
M22520/2-07 Autosport 22 gauge sockets
M22520/2-09 Autosport 22 gauge pins
M22520/2-10 Autosport 20 gauge sockets
M225034 Autosport micro sockets
M225035 Autosport micro pins
M22520/2-02 Turret for DTM and Mil Spec
Pneumatic Daniels WA22
Crimper
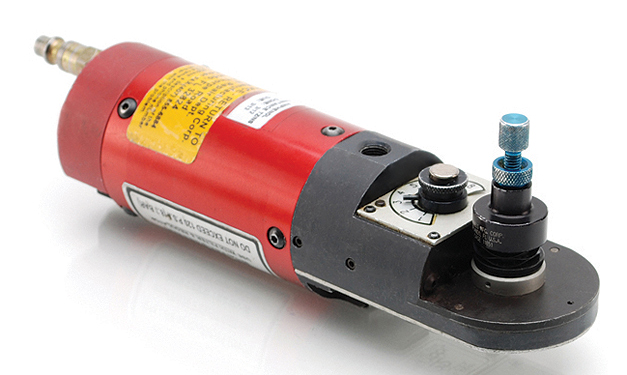
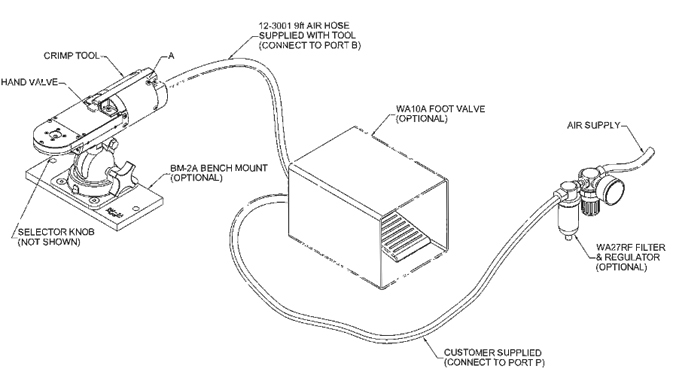
In addition to hand crimpers we use a Daniels WA22 pneumatic crimper
for consistency and to save time. Mounted on a BM-2A Bench Mount and
controlled by a WA10A foot pedal. Makes a nice whooshing sound.
This is a selection of the crimping tools that we use to make our
motorcycle harnesses. Daniels, Delphi, AMP, Rennsteig, and Deutsch
crimpers. We don't do custom wiring harnesses except for our own
products and racing.
This is a 22-16 x 1/4"
High Temperature nickel-plated ring terminal with a
22759/32-14 AWG wire crimped...It passed the Dinosaur IrwinVise-Grip and bench vise
tug of war contest. These are butted, and not brazed,
so we "F-crimp" with the crimp on the butted seam. In our documentation
we specify the ratcheting crimp tool used for this operation.
Nickel plating has a better conductivity than tin-plating.
Shrink 1" long Raychem 1/8" SCL for strain relief.
These are steel and not the VersaKrimp closed-brazed
Molex tin plated copper variety so they require more force to securely crimp.
There can be terminals that are metric, like Bosch Fuel Pumps, where
nickel-plated 1/4" ring terminals have too large a diameter (12mm) for the 12V+ 6mm (10mm O.D.cavity).
Ratcheting Crimper
Rennsteig PEW-9
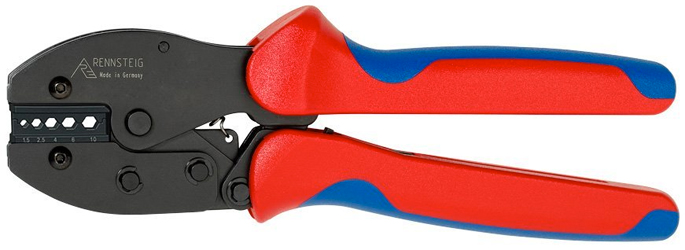
There are different types of crimps used for different purposes i.e.
insulated or non-insulated connectors. The
Rennsteig PEW-9
shown
here with a hexagonal crimp die for non-insulated splice connectors.
These are moderately expensive, around $120.00. No
interchangeable dies as it is calibrated at the factory. The hexagonal
crimp is a superior crimping method for splice connectors. For single
splices 22/20/18/16/14 ga and for multiple of smaller wires.
We use this crimper where the final crimp does not under or over-crimp
the splice. We also use AMP crimpers for splices, typically the AWG
22-10 Double Action Tool 49935.
Rennsteig MultiCrimp
Ratcheting Crimper
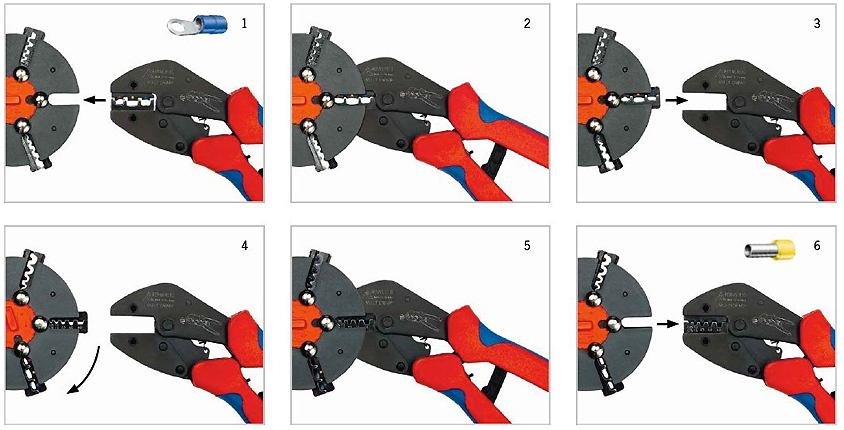
Rennsteig also has a MultiCrimp tool with interchangeable dies. About
$250.00. Fives dies are available. It normally ships with with:
- 1x (P/N 629 050 3 0 1) Die Set for Non-Insulated Plug Connectors (0.5
- 6.0 mm² | 20 - 10 AWG)
- 1x (P/N 629 060 3 0 1) Die Set for Insulated Terminals (0.5 - 6.0 mm²
| 20 - 10 AWG)
- 1x (P/N 629 090 3 0 1) Die Set for End-Sleeves/Ferrules with and
without Collar (0.25 - 6.0 | 24 - 10 AWG)
- 1x Tool magazine for up to 5 Die Sets
Less expensive ratcheting crimpers are available from Del City. Some
aerospace items can be up in the thousands of dollars.
A good guide to crimping is in the
Molex Industrial Crimp
Handbook. Page 18 of the Molex PDF describes the types of crimp
dies.
These are the best battery cables for your racing application. Don't go
looking for welding cables, get the correct motorsport ones. ProwireUSA
also has the
correct
lugs. In order to crimp the lugs you can spend
anywhere from $35.00 to $3,000.00 for specialized hexagonal crimp tools.
If you are only going to do this occasionally a cheap Hydraulic Crimper
(read China) with insertable hex dies can be had for under $40.00.
Pictured is an 8 ton crimper with 4, 6, 10, 16, 25, 35, 50, and 70mm
die sets. Definitely not Aircraft Milspec but cheap.
Metric to AWG Conversions: 10mm (6AWG); 16mm (4AWG); 25mm (3AWG); 35mm
(2AWG); 50mm (0AWG); 70mm (2/0AWG).
Crimp Guidelines
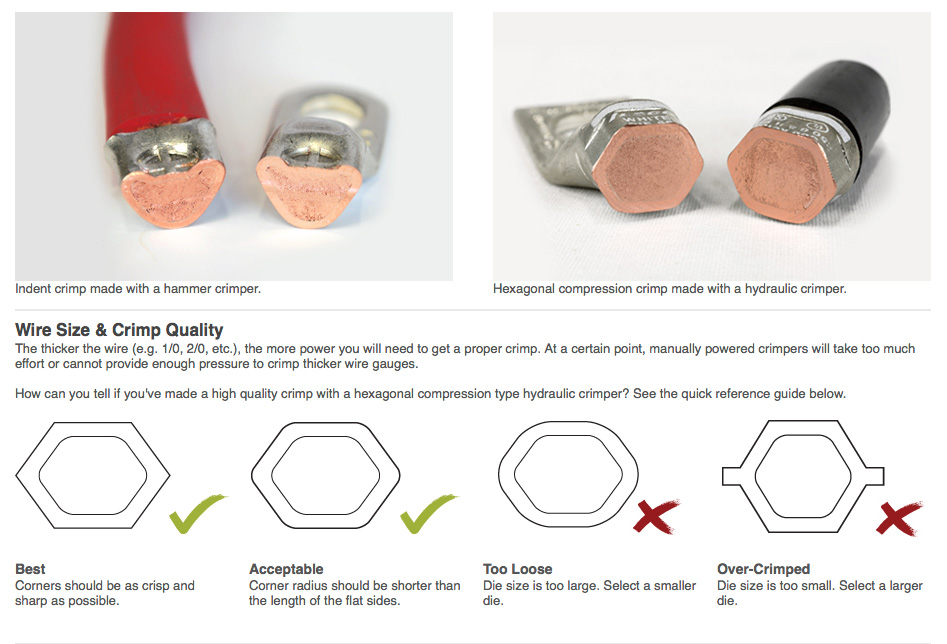 Battery and Starter Lugs and Boots
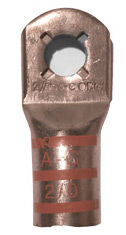
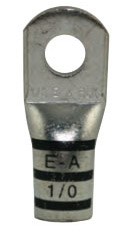
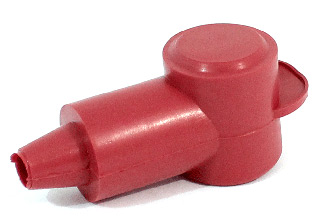
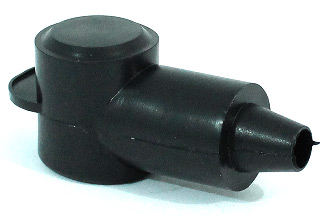
Wire
to Wire Splices

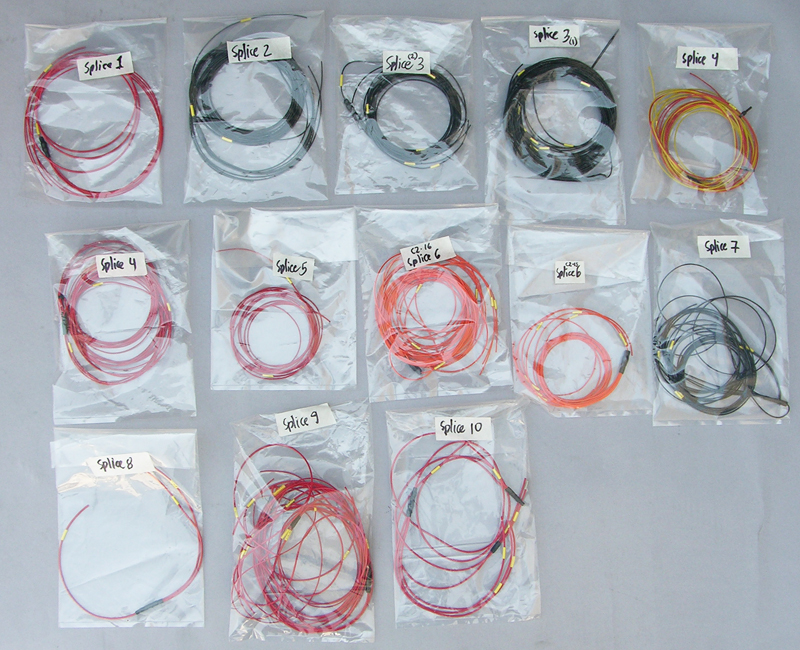
Planning for splices in your wiring
harness
represents the most complex and critical part of the design process.
Careful planning can reduce complexity and increase reliabilty. You
need to plan all your spices first as the ecu pin direct to input
circuits are easily defined. We typically have about ten or more
defined splices for the various circuits. We construct these first with
splice points typically within the Raychem boots where wires branch out.
Stub
(Parallel) Splices can be grouped in your ecu connector boots so
individual runs can be run for circuits like 5V sensors. Here we have ten 22ga wires.
Step Down butt
connectors can also be used but these take up more space so we
primarily use Stub (Parallel) splices.
ECU's like the Pectel SQ6M have two separate 5V and two separate 12V
programmable output
channels. These, in turn, can be grouped into parallel stub splices
within a
harness boots and the individual 5V and 12V outputs can be sent
downstream.
Splice planning is something that must be done at the start of the
design process.
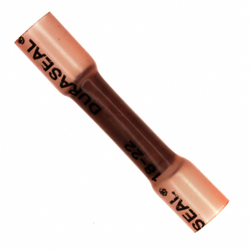
Wire to wire splices can be accomplished with Tyco Raychem D-406, or
Sumitube W79 adhesive lined shrink tube. Do not solder the wires
together. Proper crimping is the preferred method .Raychem part #
D-406-0001, Red in color, marked "Duraseal 18-22" pictured. We tend to
use the un-insulted butt, step-down and parallel splices (below) and
seal them withe Raychem SCL.
Alternatively, un-insulated step down butt connectors (left and center
above) can be used and sealed with
adhesive-lined Raychem SCL heat shrink. Often wires will branch i.e.
1-2, 1-3, 1-6 etc. and splices are necessary. To the right above
is a Raychem Mini-Seal Splice...these have an overall shorter length
and
can be sealed with SCL or ES2000-1 heat shrink.
In general we do not use Butt Connectors as we prefer the conductor to
conductor crimp in the shorter Molex parallel splices which can
offer better strain relief depending on how they are sealed with
Raychem SCL.
Number of Wires
in a Molex Parallel Splice
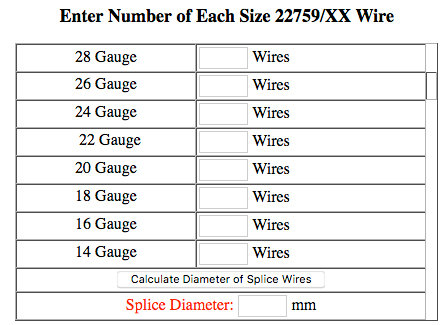
This calculator will compute the diameter of your conductor wires that can be inserted into a Molex Parallel Splice.
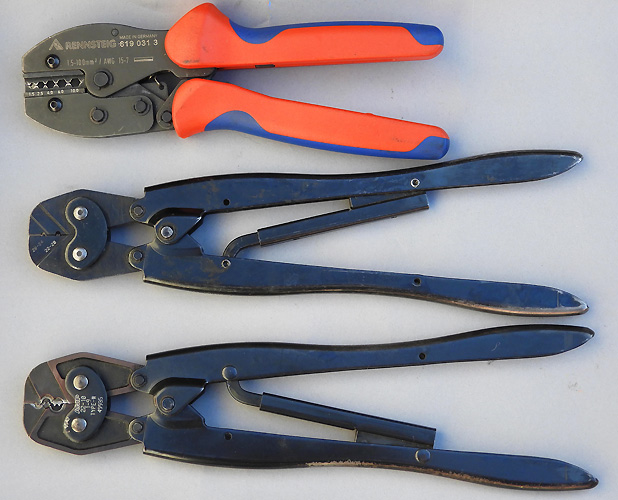
We use AMP 49935, AMP 69363 and
Rennsteig Hex crimp tools for Prowireusa Molex Parallel Splices. These are usually sealed and pinched off
(open end) with a short section of Raychem SCL heat shrink tube. The
SCL is very stiff and provides strain relief. The SCL adhesive is
black...nice aesthetically.
Below is a visual example of the diameters and number of wires that can be placed in these
connectors for your planning purposes.
When creating splices these parallel splices are the smallest package
in your
harness i.e the smallest wire to wire crimp, often within a connector
boot. Seal with the appropriate size Raychem SCL.
Ultrasonic (weld)
Splices
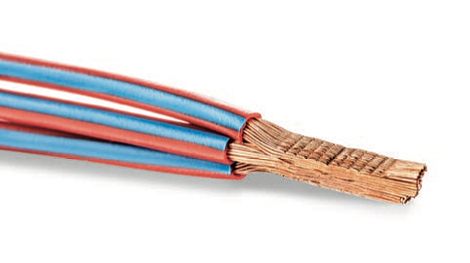
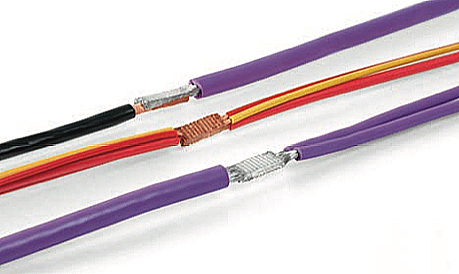
OEM production harnesses use ultrasonic welding to make splices which
are covered with shrink tubing. This is generally for bare copper wires
. Slower than automated
crimping but results in a smaller harness. Some welders have tinned
wire capability. Only increase in diameter is the thickness of the
shrink tubing.
Sonobond
SpliceRite.
A
video shows how the process works.
Splice Testing
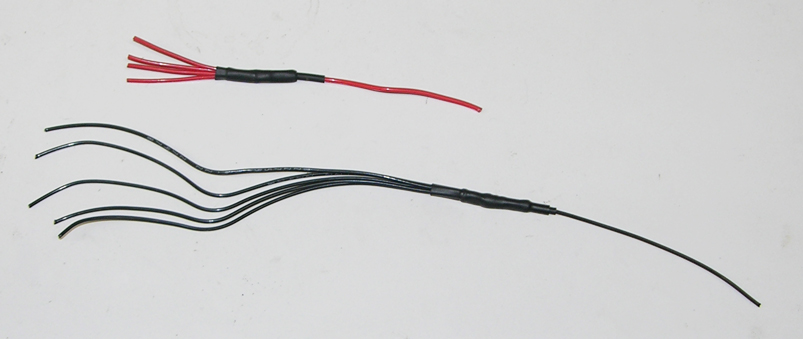
Here we have two multi-wire splices via step-down un-insulated butt
connectors: (below) five 22 gauge 22759/16 black wires going into one
black 22 gauge wire; and (above) four 18 gauge 22759/16 red wires going
into one 16 gauge 22759/16 wire. The connections are glue shrunk. In
the case of multi-wire butt splice connections we use 1/8"
adhesive lined shrink tube on the single wire and a larger size (3/16"
or 1/4") over the entire splice.
We make sample splices, in this case
stripping the wires and crimping them in the butt or parallel splice
connectors. Do
not twist or solder the multiple wires together. All connections must
be adhesive sealed, typically with 3/16" or 1/4" Raychem SCL (.750" to
1" on
Parallel Splices and 1.5"on Butt Splices). Make assembly notes as to
the crimp tool / position to use to avoid assembly errors.
For a comprehensive guide to Un-Insulated butt connectors see the TE
Connectivity/AMP
Solistrand
Un-Insulated Terminals and Splices PDF.
These go down to 26AWG-20AWG (#321198) pictured above. For these we use
AMP
Crimp Tool 69363 26-24 22-20.
For AWG 22-10 we use AMP Crimp Tool 49935.
We don't have pull testing equipment so we simply take the test
pieces and yank on the wires as hard as we can. Be careful to insure
all wires are fully seated into the butt connector. Refine your crimper
choice and crimp techniques until you can be assured your splices will
not come apart. Not sophisticated but it works.
FYI: NASA-STD 8739.4: Minimum Tensile Strengths: 22ga 13 lb; 20ga
21 lb; 18 ga 32 lb; 16 ga 41 lb.
SAE AS7928: Minimum Tensile
Strengths: 22ga 15 lb; 20 ga 19 lb; 18 ga 38 lb; 16ga 50 lb.
Solistrand (Parallel)
Splices in Boot
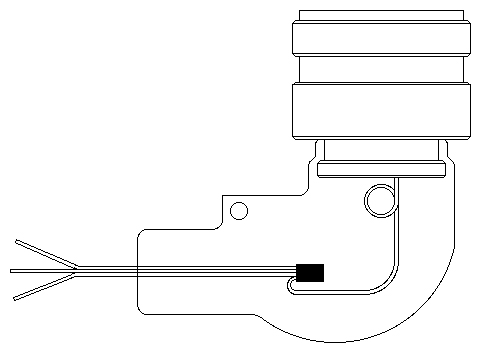
When you are terminating multiple wires in a splice in your harness,
and not a wire-to-wire butt splice, Solistrand Stub (Parallel) Splices
are called for. Use a Rennsteig Hexagonal crimp tool or an AMP
Crimping Tool and then seal the parallel splice with SCL or a Raychem
ES Cap.
In the above illustration we show a Stub (Parallel) Splice
application...
Here we have a 5V 50mA output from the #2 Autosport Connector on a
Pectel
SQ6M sending out 5V sensor power to three destinations. AS6-16-35SN
connector with a Raychem 222K152-25-0 boot. The SQ6M has four
programmable sensor supply outputs: Two @ 5V 50mA and two @ 12V
1A. Using parallel stub splices simplifies
having many butt connector splices downstream.
Lots of planning is required for concentric twisting of your harness.
Placing the parallel stub splice in the connector boot cleans up things.
Raychem ES Caps for
Parallel Stub Splicing
Wire to Wire Solder
Splices
Joining wires without crimping in a sealed manner requires the use of
specialized solder sleeves that both solder the wires together and
adhesive seal them at the same time. Pricey devils. Figure upwards of
$3.00+ each. Pictured is Raychem / Tyco
D-1744 Series
Soldersleeve Wire
Splice. Designed to provide an environment resistant in-line splice
in
wires having tin (22759/16 or 22759/32) or silver-plated conductors
(22759/44) and insulation rated for at least 125C. Example pricing via
DigiKey.
Deutsch Jiffy Single
Wire Splices
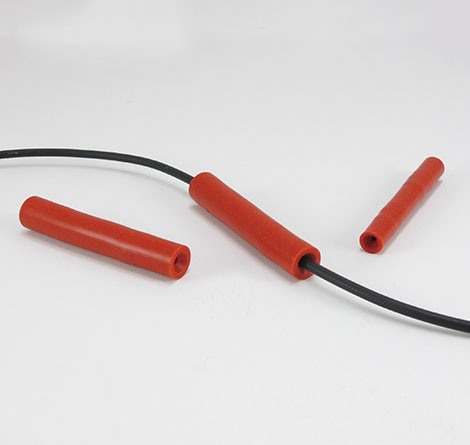
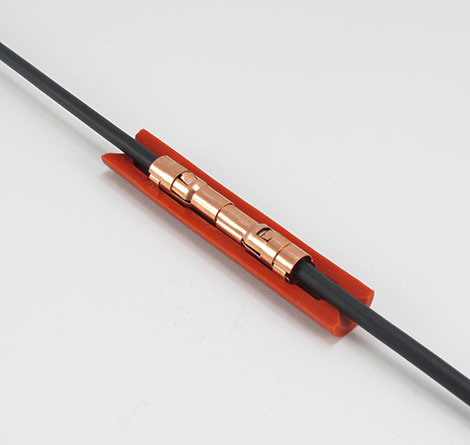
When you want to do a sealed splice on an exposed single wire, that you
may wish to take apart, these
Deutsch Jiffy
Splices will do the trick. These are for larger gauge wires.
Pin and Socket
Retention Testing
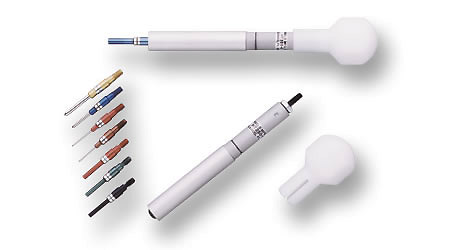
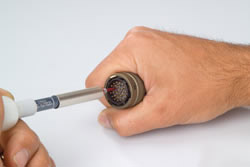
Daniels makes a
relatively
inexpensive tool to test retention of pins
and sockets...Simply push until flush and the socket/pin is tested to
about 30% of it's yield i.e. if it is actually seated.
If you are a big buck operation and you need to test your crimp
connection strengths you buy one of these from Alphatron
DR-25
Heat Shrink and Molded Parts
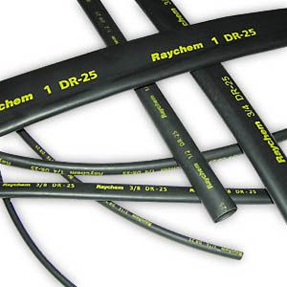
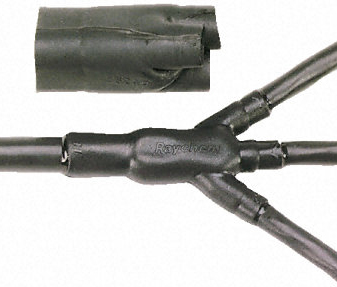
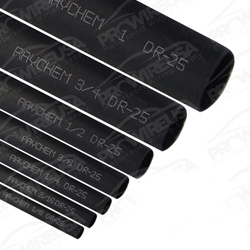
DR-25 heat shrink and transitions are joined with Raychem or
Hellerman
molded parts, To seal the ends of the transitions or boots there are
two options: Use adhesive lined boots (expensive) or use
syringe-applied Resintech RT125 black epoxy on the connector or the
DR-25 wire cover. The shrink ratio is 2-1.
This environmentally seals the wires and connectors and provides a
protective layer against abrasion.
Raychem
DR25 is simply the best wire covering. The suffix determines the
color of the printing on the tubing
DR-25-1/8-0
is Yellow; while
DR-25-1/8-UK
is White lettering.
Color of the lettering is simply customer preference as the DR25 is
exactly the same. We use DR-25 in
the standard thickness with the yellow print as it seems a bit sexier
and is visually diffrent than other suppliers being instantly
recognizeable as genuine Raychem. The special
lightweight motorsport version with white lettering
DR-25-TW saves weight.
DR-25 Longitudinal Shrinkage:
When heated, heat shrinkable tubing will shrink not only in diameter
but to a lesser extent in length as well. The amount of length
reduction ("longitudinal shrinkage") encountered is dependent upon the
amount of reduction in diameter ("diametric shrinkage") that is allowed
to occur in an application. The less shrinkage required on the harness
the less the length reduction.
Longitudinal shrinkage should be taken into account in any heat
shrinkable tubing application, but in most situations the reduction in
length is less than 10% of the original length..typically a minimal 5%.
In applications using longer lengths of heat shrinkable tubing in which
longitudinal shrinkage is undesirable, it is possible to essentially
eliminate longitudinal shrinkage by first applying heat to both ends of
the tubing to shrink it to the substrate and secure it in place before
completing the shrinking process along the remaining mid-section of the
tubing.
In short, fudge for additional length.
Motorsport Raychem
HFT5000 and DR-25-TW
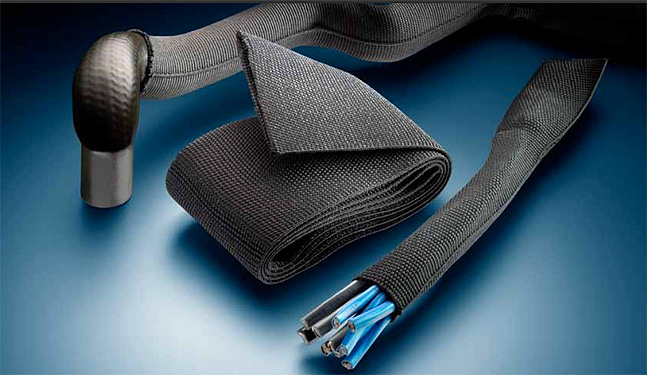
The special
lightweight motorsport DR-25-TW should be covered with
Raychem HFT5000
in areas where abrasion can be an issue. For harness planning purposes
you might use the standard thickness DR-25 in other harness runs and
the thin wall plus the HFT in other areas...for example, in vehicle
cabins, or under the gas tank on a motorcycle. Vibration and contact
with various surfaces can cause failures, most likely where you did not
suspect them.
You will normally tuck either end of the shrunk HFT5000 and DR-25 under
your harness boots to prevent fraying and then seal with Resintech
RT125.
The DR-25-TW provides the
fluid /immersion sealing and the flexible HFT5000 the abrasion
resistance. DR-25-TW is usually specified for race-spec applications
where
every ounce matters...at least to the engineers.
The picture above shows HFT5000 can also be used to cover hoses for
added protection.
Raychem HFT5000 is available from ProWire USA.
High Temp PTFE/FEP
Adhesive Lined Shrink Tube 450F/232C

ZEUS
Dual-Shrink®
tubing (Page 33 PDF) of fluoropolymer PTFE/FEP is constructed with an
exterior of
heat shrink PTFE and an inner layer of FEP. It is easy to apply, and is
designed to provide a tight, moisture-proof bond over wires, ables,
connectors, splices, terminals, etc.
The PTFE shrinks tightly over inserted parts when the covered section
is heated, while the FEP melts and flows into a solid or near-solid
encapsulation with a fit so tight that it can withstand the most severe
stresses involving pull or vibration. Shrink Ratio 1.6:1
ZEUS Dual-Shrink® tubing provides all the outstanding electrical,
chemical, and mechanical properties of PTFE including a service
temperature up to 450°F/232°C. In comparison ATUM and SCL have a
service temperature of 110C and DR-25 150C.
Bundle Diameters
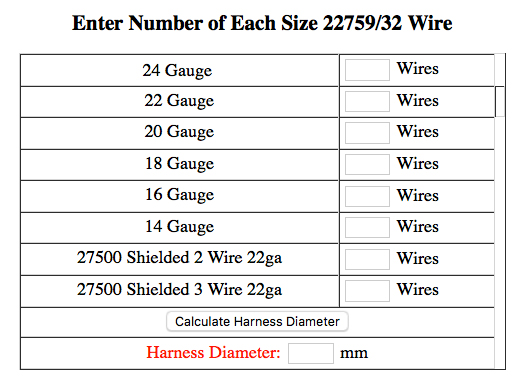
This calculator will give you the diameter of legs of your wiring harness which is helpful in choosing Raychem Boots.
To choose a size of DR-25 for your harness sections choose the largest
size that will shrink firmly to your wiring cross-section diameter. In
other words if your wiring bundle is 3/8" in diameter you don't use
3/8" DR-25 as it has a shrink ratio of 2:1 (.375 start to .1875 final).
The above dimensions are for several diameters of 20 gauge Spec55
wires, .058" in diameter.
An alternative to DR-25 is Raceline 150 from Whitmor
Wirenetics.
Basically the same specifications you just don't get "DR-25" printed in
yellow. We all know how important labels are these days.
A second source for a less expensive alternative to Raychem DR-25 is
Deray V25
from
DSG-Canusa.which also has
the same 2:1 shrink ratio as
Raychem DR-25.
Pull don't Push
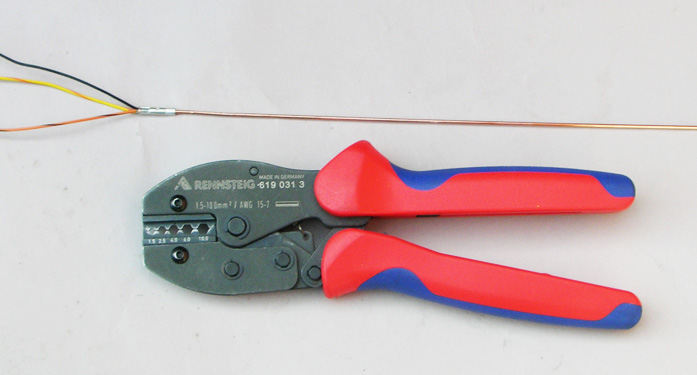
Trying to push some 22 gauge wires through 1/8"or 3/16" DR-25 is an
exercise in frustration. Crimp the wires to something like a length of
welding rod and pull them through.
Sealing DR-25 with
Raychem ES2000
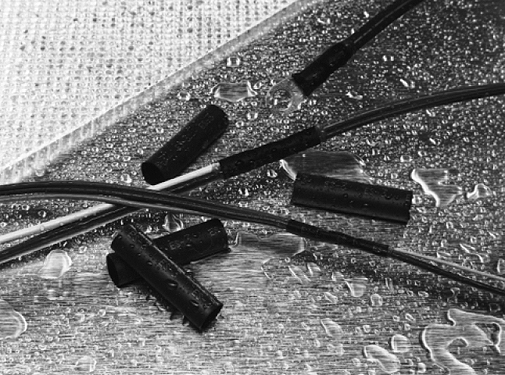
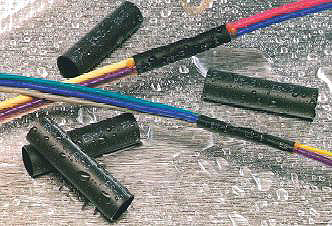
Semi-rigid 4-1 shrink ratio adhesive lined
Raychem ES2000 seals DR-25
to wires as well as serving as a strain relief for wire splices,
terminals and other components.
Keeping Shrink
Tubing...ES-2000 / SCL / ATUM / RBK
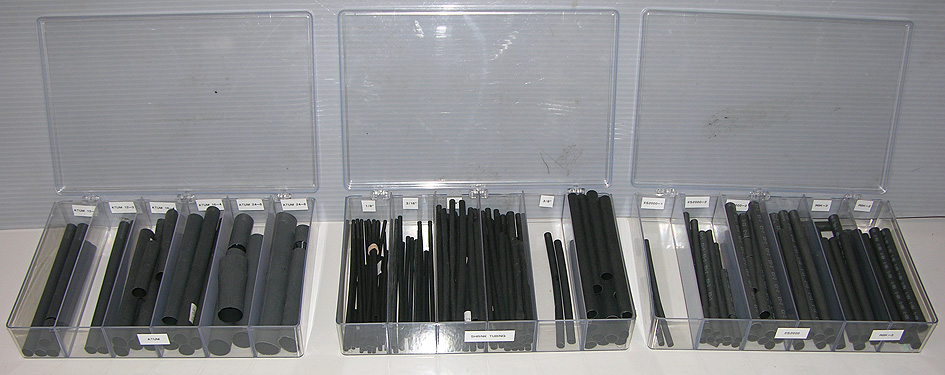
.
Shrink tubing typically comes in four foot long sticks. We cut these to
fit McMaster Carr clear boxes 4629T2. For the most part this is rigid
or
semi-rigid adhesive-lined tubing, typically, for harnesses, cut in
lengths less than 2.5" for connectors and sealing DR-25. It easy to
keep track of the various types and wall thicknesses as well as 2-1,
3-1 and 4-1 shrink ratios. You're always cutting parts and have lengths
left over. It's easier to keep track of these in some form of
compartments.
Cutting Shrink Tubing
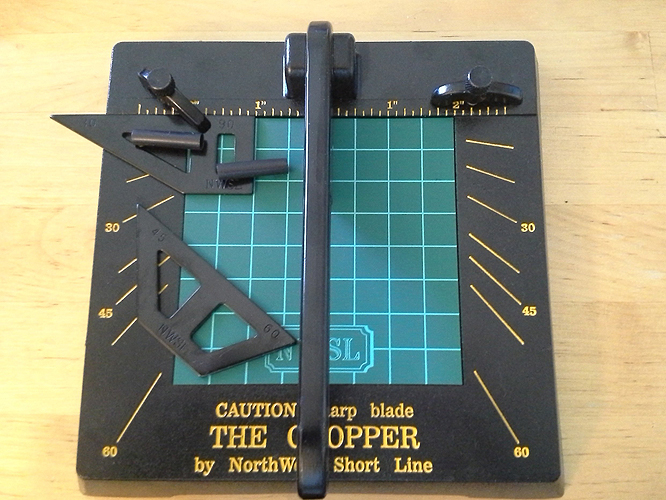
Cutting small pieces if shrink tubing perfectly square with a pair of
scissors simply does not work and a really sharp pair of Kershaw
scissors can snip your hand (we've done that). This handy little cutter
takes standard razor blades, has an adjustable stop and makes clean
square cuts. The
Northwest
Short Line Chopper II
is a hobby cutter that works perfectly.
At RB Racing we buy some
pre-cut shrink tubes but we use this cutter for cuts of Raychem SCL 3-1
shrink tubing to terminate the ends of our Raychem DR-25 harness
covering as well as trimming labels and clear RT-375. About $50.00
shipped from various sources.
Small, effective, and handy for making precise, square cuts in all your
types of shrink tubing...no more scissors.
Heat Guns and Heat
Blowers
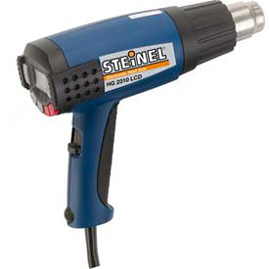
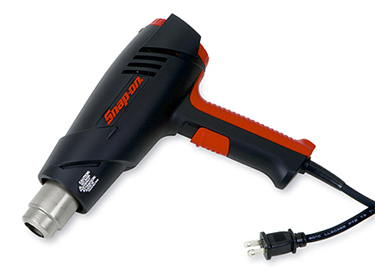
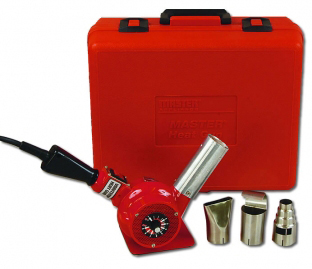
Heat Guns and Heat Blowers are different animals. The Steinel and the
Snap-On to the left are Heat Guns whereas the Master Appliance pedestal
mount is a Heat Blower. They all apply hot air but the Heat Guns are
easier to work with, especially when dealing with Raychem Shrink Shapes
and Boots as you must quickly rotate about the part to cause the
controlled shrinkage. The larger Heat Blower is too unwieldy for this
fine controlled shrinkage. Being able to regulate the temperature is
also important.
DR-25 and various boots are rated at about 150C to 175C (350F) and will
shrink at these temperatures. Heat guns and blowers can go to
1000F to 1200F...that is too hot and can damage the DR-25.
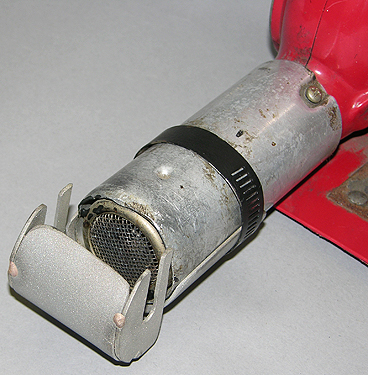
When you are labeling individual wires
with 1/8" heat shrink tubing and RT375 clear you sort of have to hold
both ends of the wire and cook your fingers. We fabbed up a slotted cup
to an old Master Appliance pedestal heat blower we have had for over 30
years. No more toasted fingers. Simple.
Ideal
Probably the best value in a heat gun is the Ideal 46-204. Lots of
bells and whistles. You can regulate the temperature and the blower.
About $200.00 as pictured above. We use both this "gun" and the Master
Appliance pedestal blower. Four nozzles 1500 Watts.
Leister Ghibli AW
Moving upstream a bit is the Swiss made Industrial quality
Leister Ghibli AW Shrink Gun ....with
dozens of different nozzles
available.
Two of the shrink tubing stainless steel nozzles are shown
above...As you would expect the Swiss are a bit anal about this nozzle
business. Makes quick work of 1" DR-25. Our gun of choice. 1800 Watts,
five step air control, specifically designed for shrink tube
applications.
Raychem / TE Connectivity has sold Leister Hot Air Guns. The Ghibli AW
is a newer model than the TRIAC Leister Guns that Raychem sold in the
past.
Motorsport professionals like
Renvale in F1, WRC, Indy all use Leister Hot Air
Guns...As one professional told us " Fastest shrink tool for DR-25". If
you want the best heat shrink gun for motorsports wiring this is the
one. Fast shrinking at 400C or 752F being careful not to damage the DR-25.
Installing a 202K132 Raychem Boot on this Autosport Connector has to be
done with a Heat Gun, not a Heat Blower. A Heat Blower will cause a too
quick and uncontrolled shrinkage and ruin the Boot.
Heat Shrink Ovens (Tunnels)
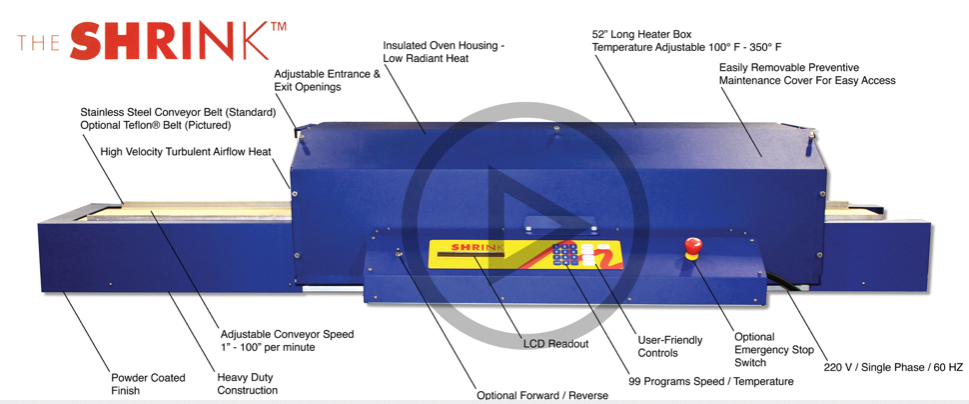
If you have an extra $10,000.00 and
don't want to hand shrink things there are a variety of
Heat
Shrink Ovens
(tunnels) to fully recover shrink products. Now you are still going to
have to hand-shrink and epoxy your Raychem boots and connector seals.
Ovens are used to fully recover all of the heat shrink in a uniform
basis. If you've wrestled with a long length of 3/4 and 1" DR-25 and
transitions you can appreciate the idea of an oven doing the job for
you.
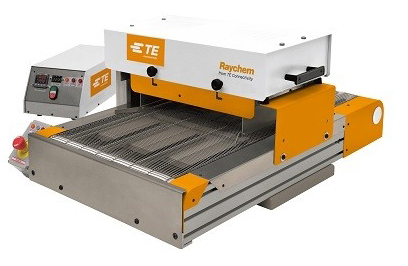
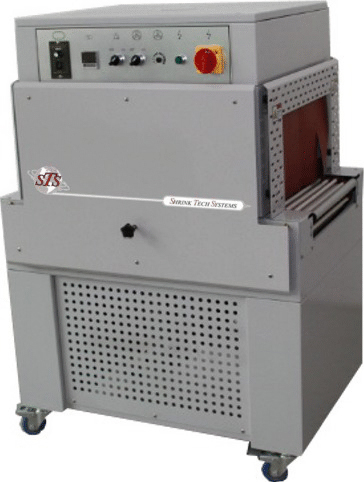
TE Connectivity Model 105 Tunnel
Oven
for recovering shrink products. Ovens are the most reliable way to
recover heat shrink products due because of their ability to ensure
even heating and reduce the risk of overheating the material (which can
lead to brittleness and cracking). ShrinkTechSystems
above right makes a variety of tunnel systems.
Raychem DR-25 fully recovers at 175C. Resintech RT125 has a maximum
continuous operating temperature of 150C. DTM Connectors have a maximum
continuous operating temperature of 125C. You bypass the harness at
higher temperatures to fully recover the DR-25.
These conveyor ovens are not the hot ticket for wiring harnesses but are best suited for high volume small parts.
Epoxy Curing
Ovens...Like Baking Cakes
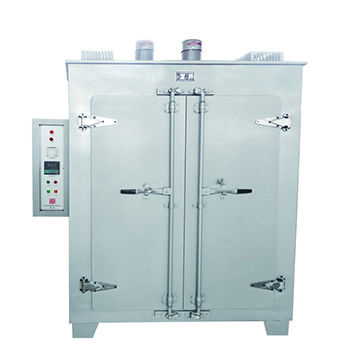
Closed door epoxy curing ovens, as
opposed to tunnel conveyor ovens,
recirculate hot air at a controlled time and temperature. Once the
boots and RT125 are set, the final recovery and cure of the complete
harness can be done.
Curing the RT125 is two hours at 85C. Sort of like baking
cakes...
Simply place your harneses on large trays
with parchment paper, blocking connectors and transitions off the
paper, and place in the oven and bake. No more wrestling with heat guns
to shrink the 3/4" and 1.0" DR-25. DR-25 fully recovers at 175C.
You need fine temperature control and timers to prevent damaging your
work. Cheap convection ovens should be avoided.. In general you won't
find epoxy and heat shrink curing ovens unless there is large volume of production work.
Sensor Leads Parallel
Twisting
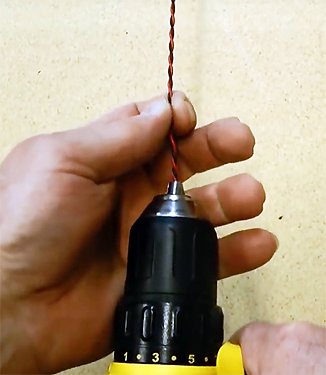
Twisting your sensor lead wires will
provide electrical protection and give more flexibility inside the
Raychem DR-25 covering. This is a simple process but, as the video
shows, you need to release the tension on the wires as a last step in
the process.The
video
mentions 3 twists per inch but this would be for perhaps 24 gauge wire.
20 or 22 gauge wire can be one to two twists per inch.
A trick with doing this is to shrink adhesive tubing over about 2" of
the ends of the wires before you tighten them in the chuck. Typical
Jacob chucks are about 1" deep.
You can
reheat the shrink and pull it off after twisting to leave the 2"
straight and not twisted. It's easier to deal with stripping and
pin/socket insertion if the wires are straight. They take a set
otherwise.
Concentric
Twist Layers... Race-Spec (non-aircraft)

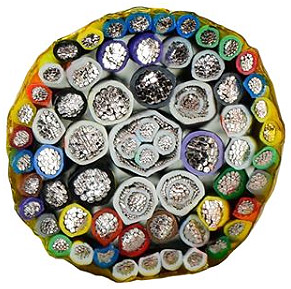
Prowire
USA Concentric Twisting:
Left above is a 63 conductor Concentric Twisted bundle as an example of
Concentric Twisting planning. It does require a bit of thinking. Not a
Mil-Spec technique but recommended by Raychem for motorsports
applications for both reliability and flexibility. Race-Spec if
you will.
22759/32 mil-spec wire has 19 conductor strands in 26 gauge to 14
gauge.
This 63 conductor bundle is coming in at just over .500" (1/2" O.D.) to
be covered with DR-25 Sleeve. Inner Core is : 3 X 22 Ga /32 single
conductor shielded cable 1 X 22 Ga /32 4 conductor shielded cable 4 X
14 Ga /32 wire. Middle Core is: 19 X 18 Ga /32 wire. Top
Layer is: 32 X 22 Ga /32 wire. Lacing cord used is
Prowire
Black Waxed Lacing Cord.
Kapton tape, visible on the periphery, was used to hold everything
together while in the construction phase.
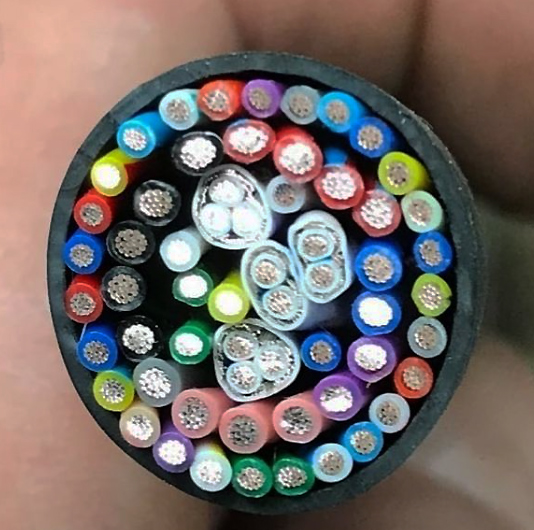
Above is another concentric twist by Prowire. Study it and learn. Do whatever it takes. Rules are not rigid.
. Lots of information and alerts on new products and tips
on motorsports wiring.
Logical Concentric Twist Layers
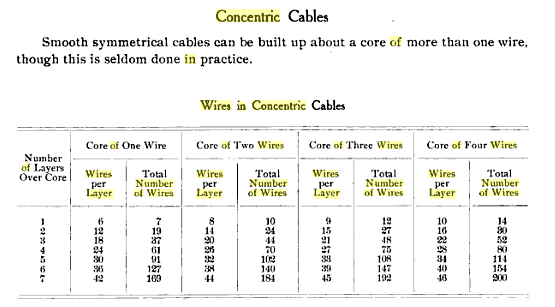
The stiffness of the harness will depend largely on how the underlying
wires are arranged. The correct method is concentric twisting where
successive layers are twisted in opposite directions...One wire
surrounded by six wires, with each successive layer adding six
additional wires i.e. 1-6-12-18. The twisting of the wires gives the
harness additional flexibility and reduces strain on the wires. The
above table provides some insight into the methodology. TE Connectivity
offers a
PDF
Guideline for Concentric Twisting.
The 1-6-12 etc is not inviolate i.e. you may have a central bundle of
say, twisted pairs, that may approximate the diameter of six
wires...Then the other layers 12 etc may follow.
In that you are dealing with shielded and twisted pairs and varying AWG
wire sizes it is not a 1-6-12-18 situation. You only use filler wires
where necessary. Bit of an art form.
For 2/3/4 position connectors, when they finally branch out of the harness, you still twist the wires even though you
are in a less than "7" situation. They are more flexible this way. In
general you place any two or three wire, shielded or twisted sets, in the central core of the
bundle.
This is a motorsports Race-Spec technique and is not an aerospace
standard where weight is critical. Concentric twisting adds flexibilty
to the harness were routing and possible removal are involved. 22759
19 strand Mil-Spec wires are twisted internally for the same reason.
CW and CCW Twisting
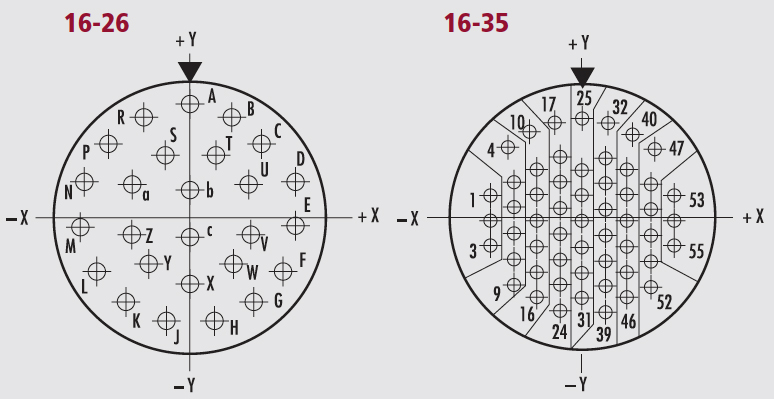
Here we have the connectors on a Cosworth Pectel
SQ6M,
pins facing out
from the ECU, two 26 Pin Autosport and one 55 pin Autosport.
Service loops can be done in a parallel fashion, held in place
by stainless ChiaoGoo knitting needles. For
example on the 55 pin Connector 16-35 we will insert the wires
sequentially 1-2-3-4 etc and as we complete each column i.e. 1-2-3 and
4-5-6-7-8-9 we will hold the service loops for each column with 1/8" or
in some cases 1/4" rods.
55 Pin Connector C2:
When
wires are populated with service loops and can turn or exit the
eventual boot the wires can be bound and the contra twisting can begin.
Things get a bit more complicated where there are internal splice
points in the harness i.e 1 into 2 wires or 1 into 4 wires such as in
5V supply or digital / analog grounds. Shielded or twisted pairs
are placed
in the center of the harness. Here the red dots indicate where the
signal wires come from 2 and 3 wire shielded cables on Connector #2 of
the SQ6M.
In this case the 55 pin connector actually has 79 wires exiting including splices.
One technique is to group the thickest wires in the center, typically
the twisted pairs and shielded, and plan on, as you proceed to
each branch point to have the branching wires on the outside of the
bundle. In a general sense, the wires are twisted with the furthest
branches towards the center and arranged so branch points have the
wires on the outside of the bundle.
Note: Unused positions in the harness must have the contacts installed
and use either plugs or filler wires to maintain sealing integrity.
Filler wires can be used to populate the concentric twisting. Clever twisting can minimize the use of filler wires.
Concentric twisting of a motorsports harness requires a lot of planning
when you have different gauge wires, multiple connectors, filler wires,
splices, service loops etc. Here
Zac
Perkins
(zac@motorsportselectronics.com) of
Motorsportselectronics
shows you
how it should be done. Kevlar braided lacing cord secures the bundle.
Zach is a master fabricator and motorsports electronics specialist.
Check here to see his
portfolio.
Zac can be reached via his website (or
email) to schedule your project. BMW and Porsche 911 projects.
Zac doing M1 Series Motec integration in a
Porsche 911
project. A complete rewire of a
Porsche 911T
by
Zac. Zac was the Senior Engineering Technician -
Special Programs & Motorsport at Faraday Futures (Electric
Car), and electrical systems consulting engineer at another electric
car startup here in California as well as holding
a second hat at
motorsportselectronics
with Tim Whitteridge.
Besides winning the
2019 Pikes
Peak Race to the Clouds doing all the
fabrication, turbocharger and electronics integration,
Motorsports electronics also did this (above)...A complex wiring
and Motec system on a period Nissan GTP car. Lots of connectors and
many hundreds of terminations. 1000+ horsepower on intial startup.
Zac Perkins resume and contact
information.
Tim Whitteridge
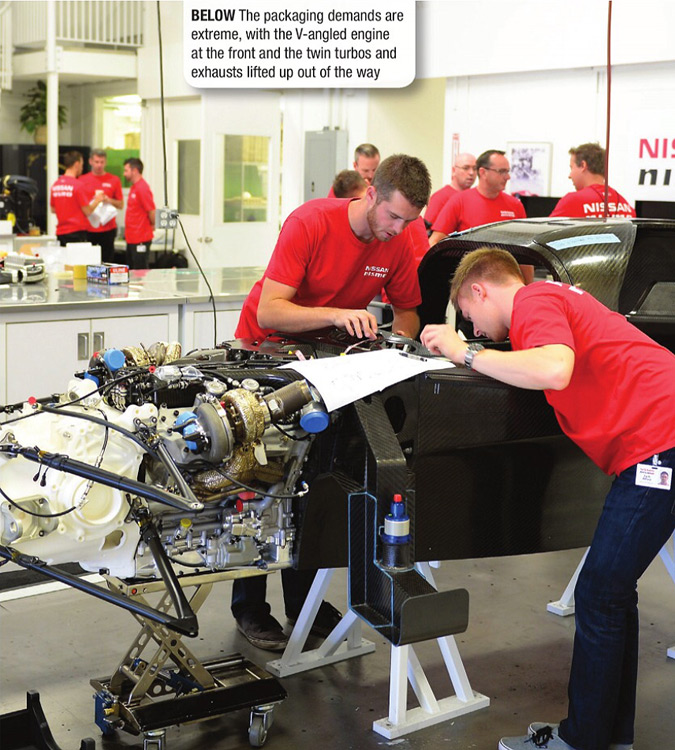
Center above, Tim Whitteridge, one of
the good guys in Motorsports Electronics, working on the late
Nissan LMP1 car. Tim did some top notch work for us at his previous
employer before he joined the Nissan LMP1 effort and went to LeMans.
Tim's
resume is lengthy and we can vouch for his expertise. Besides his
duties as an Electrical/Data Engineer at Magnus Racing and
Dragonspeed he wears a dual
hat at
Motorsportselectronics.com
doing wiring and systems integration with Motec, Pectel and other
systems.
He has worked at the highest levels in motorsports. Tim can be
contacted at tim@motorsportselectronics.com for your special projects.
Tim at Petit LeMans in 2016. Ten 24 Hour Daytonas...does not get any
easier.
In Tank Looms
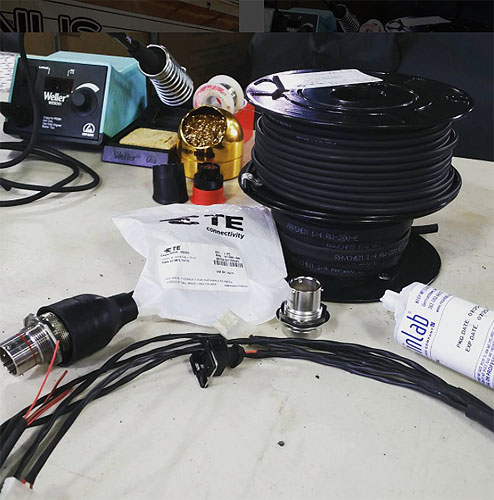
Zach Perkins: "Building an in tank fuel cell loom. It's important to
use the correct supplies, especially when dealing with ethanol or
alcohol fuels. Pictured here: Deutsch hermetic fuel safe flange mount
connectors, Raychem -12 chemical resistant boots, Raychem RW-200 viton
shrink and Resinlab EP1385 epoxy- specially formulated for E85 and
alcohol fuels. It's always better to test chemical resistance of what
you're putting in you're fuel tank BEFORE you gum up all your fuel
pumps, luckily with these products I know they're up for it!
Motorsportselectronics.
Tying or Lacing
Motorsport Wire
Harnesses
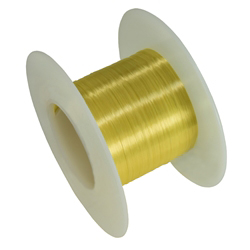
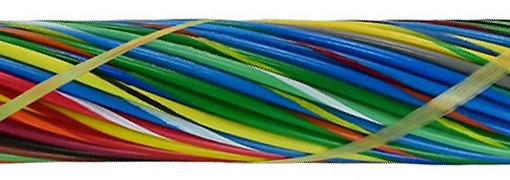
For Motorsports wiring, where you wish
to have a minimum profile lacing cord twisting in the opposite
direction from your outermost concentric twist layer, Kevlar Lace
is the preferred product. It is essentially invisible under the
DR-25 after final shrink recovery as it is so thin. Sort of an art-form
deal not an aerospace standard.
Available in economical, user-friendly,
250
foot spools for $35.00 ($0.14 per foot) from Prowire USA or in
large
1800 meter (5905 ft) spools for maximum savings...$0.052 per foot.
Aerospace Tying or
Lacing
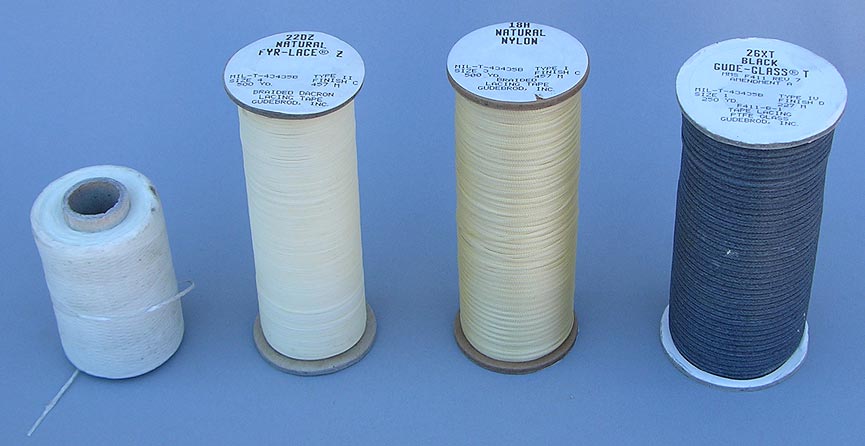
Braided Lacing Cord is commonly used, bound to the twisted cables in
the opposite direction of the cable twist, secured at each end by tape.
There are a wide variety of these in nylon yarn, polyester yarn, Teflon
yarn, glass yarn, and aramid (Kevlar/nomex) yarn.
MIL-T-43435B Lacing Cord (Left Above): Braided nylon lacing cord
meeting specification MIL-T43435B, Type I, Size 3, Finish B:
Micro-crystalline wax with melting point above 55/ C ° 130° F and
non flaking characteristics it is compounded to develop excellent knot
retention, yet not giving a waxy feel to the user. Used to tie wiring
bundles together. Less bulky than plastic tie wraps which can actually
cut into wires and, when cut, leave a sharp edge that can cut your
hands.
MIL-T-43435B Lacing Cord size 4, Dacron, 2nd from Left, Finish C
MIL-T-43435B Lacing Cord size 3, Nylon, 3rd from Left, Finish C
MIL-T-43435B Lacing Cord (Far Right Above): Flat Braided Glass Yarn,
Type IV, Size 1, Finish D: TFE-fluorocarbon coating, Black Color.
Widest
(size 1) .180" to .220". Stable to 427C (800 Deg F).
Gudebrod.
Continuous loops with the waxed MIL-T-43435B Lacing Cord (Left Above)
should tied in the above manner with continual lock stitches. Normally
you just put a wrap and a square knot every 6-12".
Kevlar (Para-Aramid)
and Nomex (Aromatic Polyamide) Flat Braided Lacing Tapes
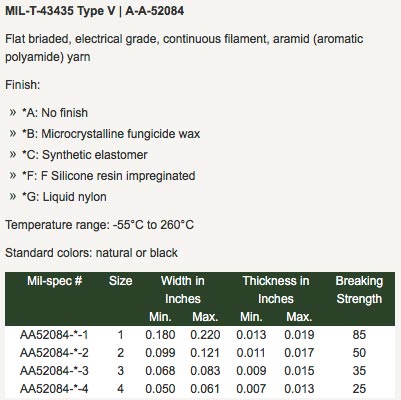
A-A-52084 Lacing Cord available in 250 or 500 yard rolls from suppliers
like
Ryan
Electronics,
Western
Filament, or Atkins
& Pearce.
Formerly known as MIL-T-43435 Type V it is available in four different
sizes in natural or black finishes. Lacing tapes are wrapped in an
opposite spiral direction from the last upper layer left-hand
concentric twist. Lacing techniques are described in this
TE Connectivity
Brochure.
Boeing
Specification Nomex Lacing Tapes...Continuous Filament
Yarn...Race-Spec
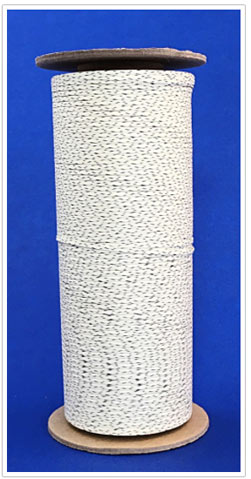
These are the gold standard in Nomex lacing
tapes. Manufactured from continuous filament yarns in accordance to CID
AA52080-AA52084 (formerly MIL-T-43435B). Keyword is "yarns".
BMS 13-54 Boeing Specification Nomex® Lacing Tape.
Western Filament
Inc.
Flat braided Nomex lacing tape. Type III, Grade D, Finish C, Class
I with cross-tracer.
Available colors: White, Black, Blue, Brown, Green, Gray, Magenta,
Orange, Pink, Purple, Red, Yellow.
Western Filament Inc.Part Number Width
Inches Thickness Inches PutUp
(yds)
HOF40RTR 0.075"
0.012"
500
Western Filament Part
Number Width
Inches Thickness Inches
PutUp (yds)
HOF70RTR 0.110 "
.014
250
Wire Spoon
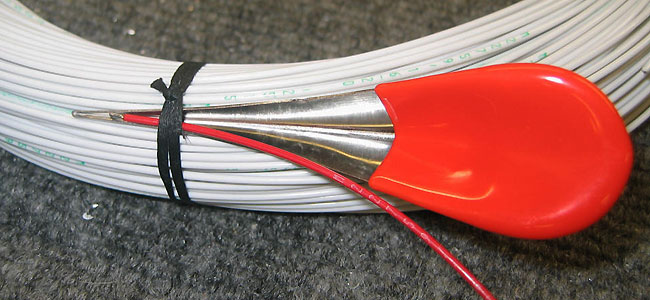
After you've laced your wire harness together with neat little square
knots, how do you insert extra wires? The answer is a
Wire
Spoon.
Note that all the wires are white which is a normal practice in many
applications. Spec 55 wire is available in up to 10 color and or color
stripe combinations which makes keeping track of things much easier.
Without laser-marking of each wire it can be a real chore to track down
issues when all the wires are white. You can also label each wire (we
do) as we have so many interruptions it's easy to lose track after
numerous phone calls.
For your information a typical late model Harley-Davidson Touring bike
uses about 77 different wire colors (color and stripes) in its wiring
harness. 100 color and color/stripe combinations are delineated in this
Glenair
MIL-STD-681 PDF. In aerospace applications wires are white and
Ultra Vilolet (UV) laser marked.
Portable Shrink Tube Thermal Printers
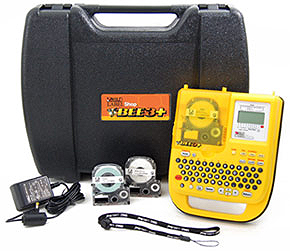
You can, however, label each wire with 1/8" 3:1 heat shrink labels near
the terminations to keep track of things and use one color mil-spec
wire. Low end heat shrink printers can be purchased way under $100.00
or you can spend many thousands of dollars on commercial units. We
label all our wires anyway, even with different colors.
BEE3+ unit from K-SUN pictured above is about as cheap as it gets.
Lists for about $250.00 but sells for about $150.00 or less. It prints
on 1/8" (single MIL-SPEC wire), 3/16", 1/4", 3/8", 1/2" and up to 3/4"
wire shrink tubing. It also prints labels in widths of 1/6"(4mm),
1/4"(6mm), 3/8"(9mm) 1/2"(12mm) and 3/4"(18mm) widths. The catch is the
cartridges are expensive. There is always a catch. Expendables. Oddly
the 3/8" shrink tubing is only available in white.
The lower priced BEE3 unit will only print up to 3/16" shrink tubing.
Best get the BEE3+.
Use either KYNAR or Tyco Raychem RT-375 clear 2:1 heat shrink over your
printed labels
The Rhino 6000 will print wire shrink tubing up to 1" I.D. and flat
labels up to 1" in width. These are in the mid to low $200.00 range.
For labeling individual wires they do not go down to the 1/8" size
shrink tubing that the BEE3+ does.
Production Shrink Tube Printer Kroy K4350 (Note: Discontinued)
Some Available in Distribution Channels
If you plan on doing production work the
Kroy K4350 used to be good bet...It was in
the $600.00 range. You use 100 to 500 foot reels of shrink tubing. It
still has the older serial and parallel printer ports so you will need
adaptors.
It has been discontinued.
This printer is a few hundred dollars more that the Kroy but has more
features...Prnters above this go into the multiple thousands of dollars.
The above chart is a guideline
for letter / logo heights.
Prowire Indent Kits 10 Colors
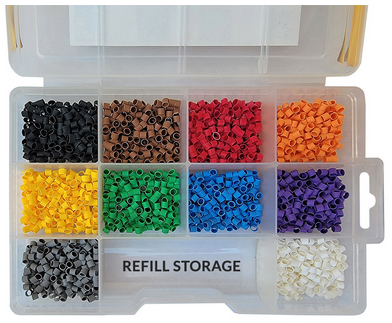
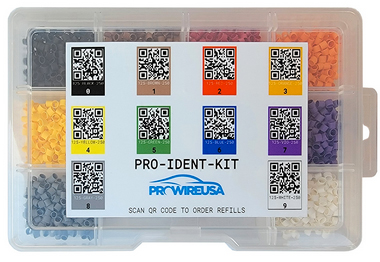
Best deal in town for these 3-1 shrink tube wire markers for 22759/32, 22759/16, and TXL wires.
Really useful on M27500SB Shielded Cables and in situations where you
are using the same colored wires. 2500 pieces for pennies each. Refills
of 250 pieces ship immediately.
Use all White wires like in F1 and WRC and go crazy. Why all White
wires?...Well with all White you just cannot make assumptions and 100
percent inspection and Hi-Pot testing is the rule.
Black on Black...Stealth Harnesses
Everyone seems to use yellow shrink labels with black lettering for
marking
motorsport cables. For a more stealthy appearance we use black
Autosport, DTM and D369 connectors and black labels with white
text...We tend to just do
connector numbers with suffix "S" for sub harness rather that spell out
all the functions like "LAM1", "FUEL PUMP", "INJ1" etc...
Having 50 or more of gray
connectors with yellow labels sticks out visually on motorcycles where
almost everything is exposed. Black, DTM, DT, D369, and Autosport
connectors with black labels and white lettering, more or less,
disappears. Our typical harness may have 75 connectors and we try to keep connectors and lables all black.
It's a bit difficult to find all the shrink tubing sizes to do black
labels with white lettering for everything. Using the Kroy 4350
printer you can get all the black shrink tubing sizes (100' reels) from
Dasco.
High End Design: TE Connectivity HarnWare/HarnVis & Catia V6
HarnWare Version 6
offers 2D and 3D modeling of harnesses. Complete
libraries of all Raychem TE components. License must be purchased
(dongle). Based on 32 bit Microsoft VISIO.
HarnWare (2D)
and
HarnVis
(3D) are developed and maintaned by
ADE Analysis & Design
Engineering LTD.
A three part video
explains the software. There is a large purchase price with an annual
maintenance fee and requires, typically, a three day training session.
Pretty much beyond the time and financial costraints of most.
Catia V6 is the high end OEM tool. Aircraft and OEM manufacturers.
Way overkill for motorsports but necesary for planning and documentation for things that fly or OEM automotive.
Visio Professional 2013
for Motorsport
Race-Spec Harness Design and Initial Layout
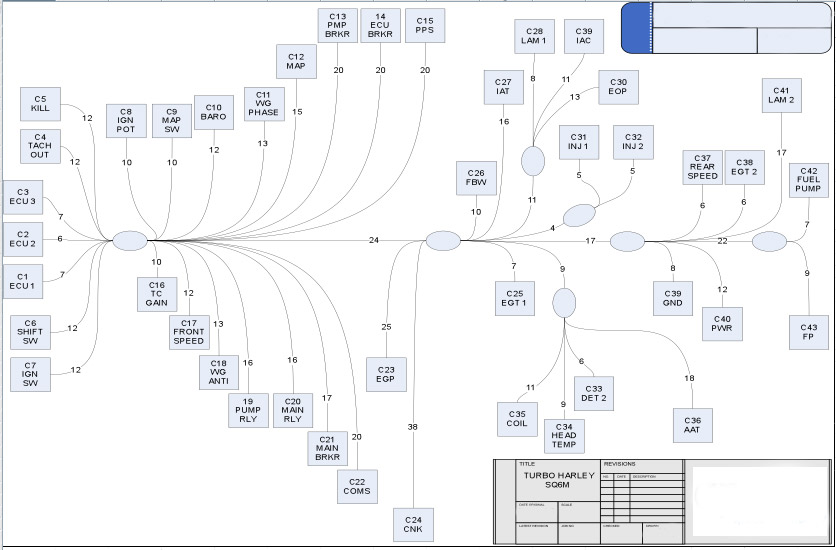
The above is a typical Microsoft Visio diagram for motorsports wiring
and harness design.
We can make an initial Visio drawing of the wiring diagram but this
will only aid
in planning purposes. The actual harness has to be measured on the
application with all the hardware in place. It is critical that there
be no strain or interference issues and that serviceability is planned
for. This is often done in
Microsoft Visio
Professional 2013. Template included on the Visio link.
Typically you organize your wiring in an Excel Spreadsheet and, in
calculating wire lengths, you have to add in extra lengths to account
for concentric twisting, splices etc.
In the drawing above C2 ECU2 to the first Raychem boot is 6". In Excel
you would list this length as 10" to connections made there. Downstream
from this connection simply add up the breakpoint lengths and add
another 4" to 6" depending on how far downstream you are going to allow
for final termination.
Basic Visio Tutorial.
We basically skip Visio drawings and construct a detailed harness
description in a CAD Program (above) which
lists where things go. This puts everything on one sheet to avoid
looking
through various documents. Lots and lots of details like part numbers,
wire sizes, terminals uses, crimping tools etc. are all listed in a
comprehensive spreadsheet. Lengths between breakout points are measured
in place using solid wire electrical cables (not string or rope) and
wires are left long and, for the most part, are terminated in place on the
vehicle.
Wires in the above harness are MIL-22759/16 in 14/16/18/20 and 22 gauge.
Deutsch DTM Plugs and Receptacles use a mix or gold and nickel plated
pins and sockets. Deutsch Autosport Connectors are used for the
SQ6M
ECU on this harness. Different wire colors prevent confusion. This particular harness has 75 outboard
connectors. The SQ6M itself has 107 pins. In the case with splices we
exit the SQ6M C1.C2,C3 plus splices totaling 125 wires.
There are a total of 83 Raychem boots in the harness. Every connector, pin, socket, wire etc is delineated in an Excel document
For planning purposes we determine which and how many wires exit the
harness at each break point and also the diameter of the runs between
the break points.
Wire bundle diameter is important in choosing the
correct diameter of DR-25 shrink tubing. You need to plan the number of layers in
contra-twisting so the top layer is CCW.
We do complete documentation in Excel and Pages (Mac) and Word
listing every component, pin, socket, splice points, Raychem boots,
basic wire lengths etc. In addition, we make CAD drawings of all the splices
as that gets a bit confusing.
We end up with a bunch of PDFs that we create from our CAD program
that we can print out in large format (13 x 19) to clarify things as we
go along.
We use 4' x 8' whiteboard to layout the wiring harness. We use 3/4"
adhesive tie wrap pads, plastic tie wraps, Velcro, and white gaffers
tape to hold the main harness and connector leads in place. The
adhesive pads can be removed or relocated without damaging the boards
surface. No need to replace the surface.
We twist the wires CW and CCW the best we can by the above format, but
we always run into issues with 2-1 and 3-1 splices so we don't go the
extra mile to put in dummy filler wires to get the 1-6-12-18 etc
layers. We do the concentric twisting and secure the runs with
Mil-T-43435B Lacing Cord. We label each wire with 1/8" yellow shrink
tube covered by clear Raychem RT-375 clear shrink tubing.
We leave the exit branches about 4" longer than necessary and then trim
the wires to length for the connector. You can slide the labels up and
down the wire with a bit of force. Labels are necessary for us as we
are constantly interrupted and brain fade sets in.
DR-25 1", 3/4", 1/2", 3/8". 1/4" and 1/8" is being used in this
harness. Raychem 202A153, 202A142, 202A132 and 202A111 straight boots
are being used with Resintech RT125 epoxy sealing the branches exiting
the boots. Raychem ES2000-1, -2 and -3 tubing seals wires exiting the
DR-25 on branch legs to sensors, circuit breakers, relays etc. Raychem
ATUM is used to seal the back of connectors
Raychem DR-25 covers the main harness and the branches. Connectors are
installed and sealed. Each branch is labeled with the connector number
as well as the function. Kapton tape covers exposed wires before they
have Raychem boots heat shrunk. In this application we have 49 outboard
connectors to keep track of. Without documentation future issues as
well as current assembly would be very difficult.
Labels on all connectors help keep track of things. Documentation is
maintained on both the internal and external structure of the harness.
Pectel SQ6M ECU.
Hi-Pot testing is used in aerospace and high-end motorsports wiring
houses to verify wiring harness integrity. Any poor connection, nick in
wiring insulation, or short can be isolated and fixed. Simple
continuity checks are OK but are not foolproof.
CH2 pictured
above. A
PDF lising
costs for various cable testers.
The hipot test is a nondestructive test that determines the adequacy of
electrical insulation for the normally occurring over voltage
transient. This is a high-voltage test that is applied to all devices
for a specific time in order to ensure that the insulation is not
marginal.
An
explanation of Hi-Pot testing is offered by Cirris. Cirris
CH2 pictured.
Hi-Pot CableEye testers from CAMI Research. PC based i.e. software
driven Hi-Pot testing makes isolating things a lot easier.
Wideband Sensor Wiring
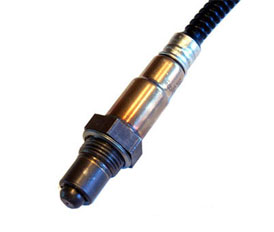
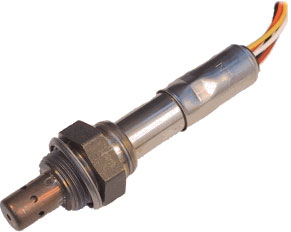
The Bosch LSU-4.2 (left) or the NTK (right) wideband sensors are
typically married with six position Deutsch DTM connectors. In that
they are five wire sensors the sixth position uses a seal plug. LSU 4.9
is the newest version and is not compatible with 4.2 electronics.
Wiring colors for the different sensors is as follows:
Bosch LSU-4.2 Typical DTM positions: DTM Terminal 1, Red Wire, WB_Pump;
DTM Terminal 2, Black Wire, WB_Cell; DTM Terminal 3, Yellow Wire,
WB_Com; DTM Terminal 4, White wire, WB_Htr-; DTM Terminal 5, Gray wire,
WB Htr+; DTM Terminal 6, seal plug.
Bosch LSU-4.9 Typical DTM positions:DTM Terminal 1, Red Wire, Pumping
Current; DTM Terminal 2, Yellow Wire, Virtual Ground; DTM Terminal 3,
White, Heater Minus (H-); DTM Terminal 4, Grey wire, Heater VBat (H+);
DTM Terminal 5, Green wire, Trim Current; DTM Terminal 6, Black Wire,
Nernst Voltage. LSU-4.9 Data.
Interesting analysis of why Bosch Widebands fail.
NTK L1H1 Wire Colors: Yellow Wire: Heater -; Blue: Heater Wire +;
Black: Signal Ground; Grey: Nernst Cell Voltage; White: Ion Pump
Current.
NTK L2H2 Wire Colors (8 pin Sumitomo H90 Connector): Pin1: Blue
Heater Wire +; Pin 2: Yellow: Heater Wire -; Pin 3: Rc (cal resistor);
Pin 4: Rc 0V; Pin 5: NC; Pin 6: Grey Wire Vs; Pin 7: White Wire Ion
Pump; Pin 8: Black Wire Sensor 0V.
L2H2 Cal Resistor shown above between pins 3-4 which is read by oem
application or devices like Motec PLM. These are individual to each
sensor. High end ecus like the Pectel SQ6M do not use a Cal Resistor.
NTK sensors are extremely accurate at Lambda 1.0 (14.57 AFR) but should
be custom calibrated between Lambda 0.75 (10.92 AFR) and Lambda 1.25
(18.21:1 AFR). Nitrogen gas can be used to test for Lambda 1.0
(14.57:1). Calibration data can be entered into your ecu. Free Air has
20.95% Oxygen with a Lambda 1.43 (20.80AFR).
In general NTK sensors are higher temperature rated. We use them
pre-turbo with pressure compensation tables as under rich conditions
they show richer under boost pressure and leaner in lean conditions
under boost pressure. Pectel SQ6 / SQ6M controllers are designed for
the
NTK sensors. NTK sensors are tolerant of leaded fuels whereas Bosch
LSU-4.9 are not. Connectors for the L2H2 LZA-09-E1 sensors are
available from Ballenger Motorsports.
Another consideration is that the NTK sensors are about twice as fast
as the Bosch 4.2 / 4.9 Sensors. No matter what anyone tells you the
response times to correct injector output have a latency of 500Ms up to
980Ms which is why you do steady state step testing on a dyno. A fast
dyno "sweep" can point out deficiencies but not exactly pinpoint them.
The base mapping has to be correct.
NTK L2H2 LZA-09-E1
Sensors
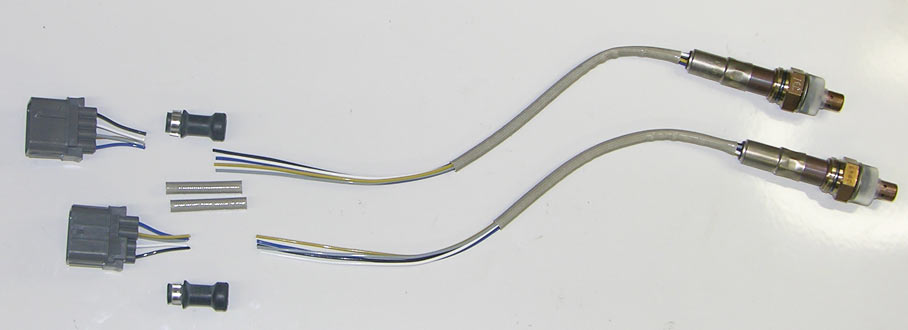
Cut and remove connector with calibration resistor. Leave longer
silicone heat sheath.
Cover wires with 1/4" DR-25 overlapping the long NTK silicone
heat sheath. Heat shrink the DR-25 and seal both ends with 1" ES2000-1.
Heat shrink 11mm label and seal with RT375 clear. Slip over 1.5"ATUM
12-3. Strip wires, crimp pins or sockets and insert these in the
connector. Filler wire with pin or socket for the unused pin 6. Heat
shrink the ATUM 12-3. Slip 2" ATUM 24-6 over the sensor and heat shrink
to the DTM six position connector.
When mounting the NGK/NTK wideband lambda sensor pre-turbo you need to
create pressure compensation tables in your ECU. We made a
Back pressure
Lambda Calculator that shows how lambda reading are skewed under
exhaust back pressure....Or simply change your aim.
NTK ZFAS®-U2
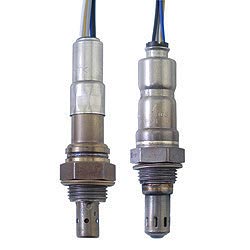
NGK Spark Plugs (NTK) has two families
of wideband sensors, non-cofired (on left) and the newer
co-fired (ZFAS) on right).
Both have five wires and they can be identified by appearance.
The non co-fired has a longer portion sticking out of the exhaust pipe
and a thinner body. The newer are less expensive and more robust and
use advanced ceramics.
NTK Part Number: UAR0004-EE001; NTK Stock Number 91091.
New Bosch LSU ADV...
Pre-Turbo
Lambda
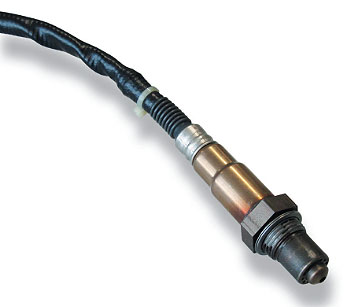
New
Bosch
Lambda ADV Sensor for pre-turbo installation. Previous LSU 4.2 and
4.9 sensors could not be placed pre-turbo.
NTK L2H2 Lambda Test
Stand Calibration
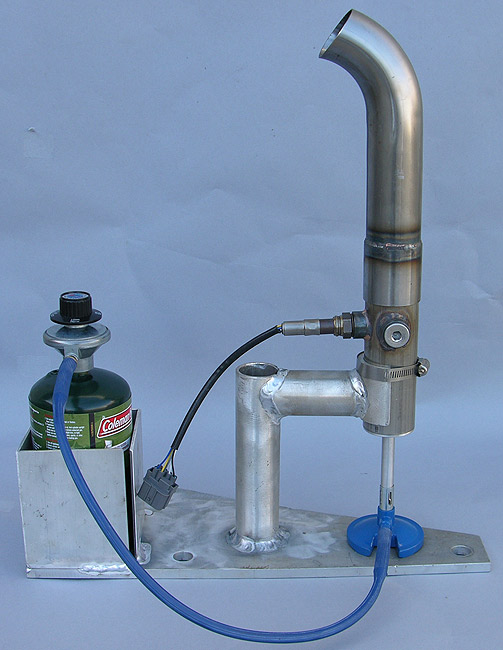
NTK L2H2 Test Stand for sensor linearization: Propane with a variable
air bleed and three 18mm x 1.5 ports. Used for calibrating two NTK L2H2
Lambda meters against a known calibrated meter. Flowing Nitrogen gives
Lambda 1.0 (14.57:1 AFR). Free Air at one end of the scale 100% propane
on the other and propane/varying air mixtures for in-between. We
burn the propane as so as not to vent unburned propane.
Pectel SQ6M engine controllers have 33 points to linearize or calibrate
for each of the two NTK sensors. The SQ6M has internal NTK amplifier
and heater circuits, so no external devices are required. Alternatively
you can purchase a $1,200.00 drum of test gasoline and a $1,200.00
bottle of Lambda calibration gas to do your testing.
Keep in mind although NTK sensors are fas responding, around 1.3Ms,
your
fuel map must be correct as sensor latency in fast closed loop sweeps
is an issue. Step tests on Dynamometers is recommended.
Pectel offers specifically calibrated five wire
NTK "Band 10" wideband
sensors for their engine control systems that come with Deutsch
Autosport Connectors.
We use Hella or Bosch 30 Amp relays in our wiring harnesses. This is a
pictorial reference as to how they work.
Caterpillar Extreme Environment Relays
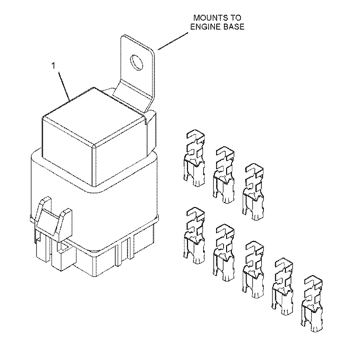
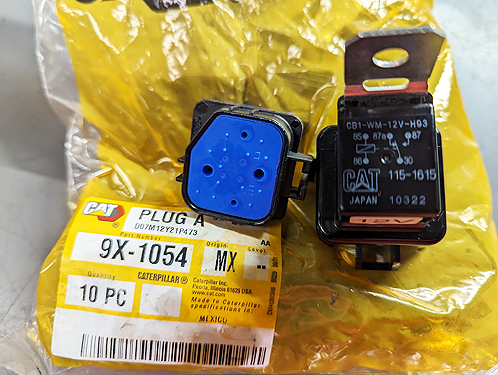
CATERPILLAR SIS
Part No Qty Parts name
359-5142 [1] RELAY AS (12-VOLT)
9X-1054 [1] PLUG AS-CONNECTOR (4-PIN)
9X-1055
[5]
TERMINAL-RECEPTACLE (12-GA)
9X-1056
[3]
TERMINAL-RECEPTACLE (14-GA TO 16-GA)
115-1615 [1] RELAY AS (12-VOLT)
Photo courtesy Gary Phelps
Corrosion Protection
At the Bonneville Salt Flats the salt air and salt eats everything.
Internal cavities in relays turn into green gardens. Starter relays and
switches die sooner or later. Cadmium plated hardware corrodes quickly.
Battery terminals and any metal exposed that isn't stainless or chrome
plated begins its ugly descent to mother earth from whence it
came.
Boeshield T-9 is the
best thing we've found to protect
metal surfaces. WD-40 seems to disappear after a time. This stuff stays.
Saltproofing USA Fluid sounds a
bit like snake oil but it really works.
Protects about everything including alternators, relays, switches, and
electrical motors.
Motorsport Wire:
Raychem Spec 55 Wire
(XLETFE Polymer) The standard for high end motorsports wiring.
Mil-STD-861 Color
Codes
For Mil-Spec Wiring. 100's of possible combinations. 10 basic colors
are
normally available. Adding one or more stripes differentiates things
more.
Aircraft will typically use "white" only wire as
will Formula1 and WRC cars. They will have 100% Hi-Pot testing of the
harnesses. During the assembly they may place temporary tape tags on
the wires and assemble them on a 1:1 layout board. Once sealed there
are no "colors" visible anyway. This does require planning and
discipline.
It's a bit easier to keep track of things at the typical motorsport
level using solid and striped wires. However, there are no conventions
for this.
A Harley-Davidson wiring harness can have 80 or more different color
coded wires to aid in servicing. They publish the color-coded wiring
harness diagrams.
Master Catalog Raychem Heatshrink
Products:
Raychem Heatshrink Products Covers everything including tubing, all
molded shapes (with dimensions), tools, and materials
Wire Covering:
DR-25 Heat Shrink
Used to cover XLETFE wires in wiring harnesses. Has a 2-1 shrink ratio.
Single Wall. Motorsports std. Yellow or White Lettering.
Available
from Prowire USA.
DSG-Canusa
Deray V25 a less expensive alternative to DR-25
Raychem RT-375
Clear heat shrink tubing. Use to cover your yellow/black wire heat
shrink labels.
Available
by the foot from Prowire USA.
Kynar Clear Heat
Shrink Tubing to cover wire and cable heat shrink labels.
Adhesive-Lined Shrink Tubing:
Raychem ES2000 Adhesive
heat shrink. Semi Rigid 4-1 shrink ratio. Sealing wire transitions.
Strain relief.
Tyco_RBK_Dual
Wall Adhesive heat shrink. Used to seal wire transitions and
connectors. Less flexible than ATUM. Strain relief.
Raychem SCL Heat Shrink
Used to seal shapes like switches and relays in
lieu of specific "boot". Adhesive lined. 2.5:1 shrink ratio.
Available in
4 foot lengths from Prowire USA.
Tyco
ATUM_semi-flexible Adhesive-lined heat shrink. Sealing Boots and
transitions and shapes. 3-1 and 4-1 shrink ratio available. Here a
three wire Cherry Hall Sensor has 1/4"DR-25, Resintech RT125 epoxy
sealing the DR-25 ends, and 16mm ATUM semi-flexible adhesive shrunk to
the assembly.
Available in
4 foot lengths from Prowire USA. Last digit is Color Code.
Black is "0" (Zero).
3-1 Shrink Ratio
|
4-1 Shrink Ratio
|
ATUM-3/1-0
|
ATUM-4/1-0 |
| ATUM-6/2-0 |
ATUM-8/2-0 |
| ATUM-9/3-0 |
ATUM-12/3-0 |
| ATUM-12/4-0 |
ATUM-16/4-0 |
| ATUM-19/6-0 |
ATUM-24/6-0 |
| ATUM-24/8-0 |
ATUM-32/8-0 |
| ATUM-40/13-0 |
ATUM-52/13-0 |
DSG-Canusa
CDR Adhesive lined shrink tube. 4:1 shrink ratio. Semi-rigid. More
rigid than Tyco ATUM. Splice covering.
DSG-Canusa
CPA Adhesive lined shrink tube. 3:1 shrink ratio. Connector sealing.
Molded Parts:
Raychem
Heatshrink Products Covers everything including tubing, all molded
shapes (with dimensions), tools, and materials
Raychem
Molded Parts Heat Shrinkable, adhesive or non-adhesive lined, for
wiring harness transitions and connectors.
Hellermann-Tyton
Molded Shapes, Heat shrinkable up to 5-1 ratio shapes for
transition and connector sealing.
Resintech RT125
Wiring Harness Epoxy.
Molded
Parts (Boots) Cross Reference Raychem, Hellermann-Tyton etc.
Wire Stripping:
Tyco
Wire Stripping Guide
Teledyne Stripall
Thermal Stripper
Ideal Wire
Processing (Stripper) Catalog
Motorsport Connectors:
Deutsch
Autosport (connectors) Catalog
Deutsch DTM
Series Connectors (thermoplastic)
Sureseal Rubber Connector
Souriau
Equivalent
parts to Deutsch Autosport
Delphi
Metri-Pack GT150 Connectors used for various sensors like Cherry
Hall etc. (See Page 22: Pull to seat)
Circuit Breakers:
ETA 483 Circuit Breaker
Tyco W23 Circuit
Breaker
Klixon 2TC14 Circuit Breaker
Bussman 227 Manual Reset ATC
Standards:
NAVAIR Aircraft
Electrical and Electronic Wiring (Over 1000 pages) 12.8
Mb. Lots of mil-spec reference #'s, data and techniques.
Wire Harness Lacing
Techniques
NASA wiring and Harness Standards
NASA
Pictorial Standards
IP
Protection Ratings Chart Explains "IP" or Ingress Protection
ratings
of connectors from water, dust, etc..Not a military specification.
In WWII we were cranking out bombers and fighter aircraft faster than
they could be shot down. Extremely high crew losses were backed up by a
system of production and training not seen since. Women were a major
part of the work force and kicked butt. After the war their jobs were
taken away from them. There went 50% of the talent.
Production and aerospace wiring harness construction is still largely
done by women whether in the USA or elsewhere. Seems to be an ego deal
in motorsports for males to twist and glue motorsport
harnesses....probably Instragram wiring photos aren't part of the
Defense contractor routines. Would you have the patience?
F1 Wiring

Renvale Ltd. (Formerly Tony James
Wiring) in the United Kingdom is a
specialist in high end motorsports wiring.
This is a video
of their
work for the now defunct USA F1 Team. Let's hope they got paid. HAAS is
up and running these days. Renvale does the current HAAS as well as Ferrari F1 wiring.
Prodrive

ProjectDC : UK and USA
Professional Wiring

With clients like Prodrive, Ford
Performance, Gulf Racing. and Multimatic
Project
DC executes projects for clients and providesrace support and
maintenance.
Contact
Callum Blakemore for
your immediate project needs.
Color Coding White Mil-W-22759/44 Wire
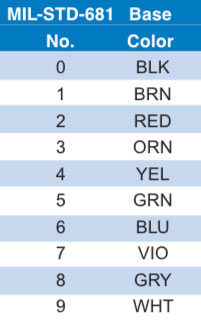
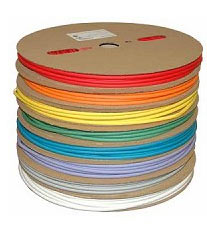
The highest density in a motorsport
harness is typically at the ECU Connector where wires are placed one by
one. From there they head for connectors or splices and with a hundred
or more white 22759/44 wires of various gauges it's easy to lose track
save keep doing continuity checks and or strips of tape with notes.
Of course you could print out a label i.e. "C25-4" to denote the
connector and pin number for every termination...that's lots of typing
and printing.
There are ten base colors for wire (see above). You can use 3-1 shrink
tubing, typically 1/16" to 1/8", cut into 3/8" lengths to code the
connector number and pin location. As you cut your wires extra long
place your color codes at the end of the wire reading towards the ECU.
Brown/Red would be connector 12. Brown/Red/Brown would be connector 12
pin 1. You can buy precut colored coded wire markers (10 colors) from
various
suppliers.
Motorsports Pectel SQ6
Wiring Example
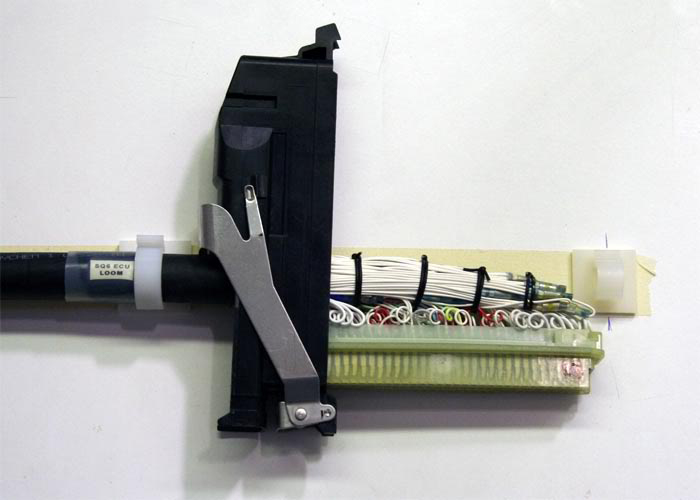
Here we have an 88-way Cosworth Pectel SQ6 connector with service loops
twisted just before the connector sockets. Follow the construction of a
Cosworth Pectel SQ6 Wiring Harness.
It requires a lot of money, time and supplies. In this case all the
wires are all white in color...This makes servicing things down the
road as well as construction much more difficult. If you label each
wire and use colors codes it's easier.
An excellent source for your wiring supplies for you go it alone types
is
ProwireUSA as
they stock
about everything you need and sell in small
quantities. It a good place to pick up your MIL-W-22759/32 wire and
supplies. They have 140 Mil-Spec wire color combinations in stock.
Quick service and excellent prices.
Costs:
A Reality Check

The simple fact is that a professional motorsports wiring harness costs
a lot of money. Unless it is some kind of production item, which it
never is, these are going to be expensive whether you like it or not
and a rule of thumb is that it is going to cost as much as your engine
controller of choice and almost certainly likely more. One of the
people we know typically spends about 200 man hours designing and
fabricating a custom wiring harness. If you were a lawyer that would be
about $70,000.00 billable hours...Low end shop rate for a mechanic is
about $50.00 per hour...that's $10,000.00.
Even at a proposed minimum wage of $15.00 per hour the labor alone for
a 200 hour plan and build would be $3,000.00 not including parts. Sort
of depends on what you think your ass is worth after years and years of
experience. Do you work for minimum wage? Do you expect your harness
supplier to? Instagram photos and glory does not pay the bills, nor
does
a pat on the back. Hobby versus business, the eternal struggle.
To wire a complete race car i.e. something way short of F1, WEC, or WRC
complexity, can take up to 400 man hours in planning and execution.
There are multiple issues in this "Time Business":
1. First: There is the planning and documentation in Excel, Visio, and
other supporting CAD software. Several weeks of work verifying all
components, pins, sockets, boots wiring etc not to mention connection
logic.
2. Second: There is the ordering and or stocking of all the parts.
3. Thirdly: Then there is the actual execution of the harness... 100 to
200 man hours.
4. Lastly: There is the testing and verification of the harness...hipot
or simple continuity checks and or complete simulation in a specific
test rig.
What can you expect to pay? Well for a garden variety Mil-Spec sealed
harness that is a semi-production item by some experienced specialist
figure
$3,000.00 minimum. Normal costs are in the $4,000.00 to $6,000.00
range.
For more complex harnesses involving firewall bulkhead connectors and
multiple sub-harnesses figure $8,000.00 and up...An
experienced specialist who has everything in stock and is efficient in
his / her production methods might complete a complex harness in 150
hours. Complete vehicle wiring...$25,000.00 and
up depending on the complexity. F1, WEC,WRC... don't ask.
A person we know used to wire high end off the road racing
vehicles where the total wiring bill was often North of $25,000.00 for
parts and labor and he did not want to do it anymore as it was tough
getting paid for the work, not to mention all the travel and fighting
clients. He cut back on that work and just sells parts these days and
deals with clients who he can bill and get paid.
It's the old adage "Time is Money". Add up all the hours in planning,
ordering and stocking parts, buying tooling, plus the actual
fabrication and write yourself a fat check...Or let someone else do it.
Letting someone else do it implies there is a solid design template or
that person is going to have access to the project where it can be
planned and executed in place. Travel expenses may be involved as
remote designing is a bit of a risk. Sometimes it's best to pay
and get on
with your life.
We do our own harnesses and have for over 30 years as we have our
projects in-house and don't like running around...and these days life
is a lot more complicated. Time is money as they say. When it's your
time and money people don't care and have little appreciation for the
effort involved. Been there as they say.
Sakata Motorsport
(1-714-446-9473 1241 N. Patt St., Anaheim, CA, 92801)has been
making Mil-Spec Motorsports wiring harnesses
on a contract basis for a long time. There are many others but you can
research these out. Professional Motec Tuners like
Shane Tecklenburg ,
Greg Pyles ,
Electron Speed ,
Racegrade (Motec
East/West), and
Race-Spec,
have solid reputations and are well versed
in harness construction. UK/USA based
dce
builds the highest quality
harnesses. The new firm of
Zac Perkins
and Tim Whitteridge
(tim@motorsportselectronics.com)
at
Motorsportselectronics
does excellent wiring, ecu calibration and systems integration work
with Motec and Pectel systems.
Jeremy Gibson at
Indy
Wiring Services LLC does the highest level of
motorsport wiring and provides full documentation and Cirris Hi-Pot
testing of every harness. Jeremy can be reached by phone at 1 (317)
371-7044 and by e-mail at jeremy@indywiring.net. Jeremy provides
Formula 1 level quality and adheres to all current Mil-Spec testing
standards and specifcations.
He is familiar with the wiring
requirements for the Cosworth Pectel SQ6, SQ6M and MQ12 series of
engine controllers as well as Bosch Motorsport controllers. Jeremy does
Indy Car, NASCAR as well as complete harness construction for club
racing. Jeremy did harness design, construction, and repair
for Cosworth/Pi Research/Pectel for 9+ years. He has more than 20 years
experience in motorsports wiring. Nissan LMP1 above work by Indy Wiring
Services LLC
Jeremy gave an
interesting interview about motorsports wiring and his 20 year history in motorsports.
For higher end electronics you can, after the all the wiring is done,
figure on around $1,200.00 per day on site tuning support.... Plus
expenses of course.
We once built a new harness for a long term racing project, ready for
installation. Due to unrealistic attitudes and unappreciative
recipients we simply cut up the harness and saved the connectors.
Expensive 200 hour lesson.


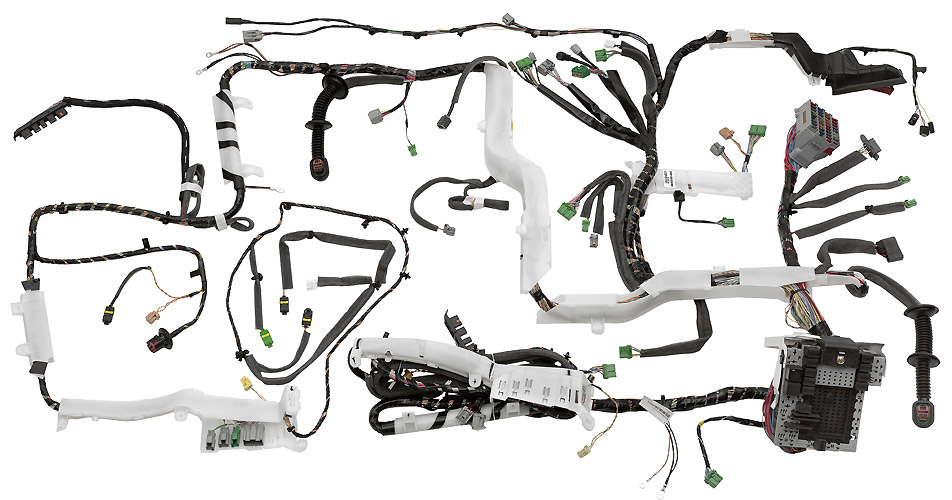


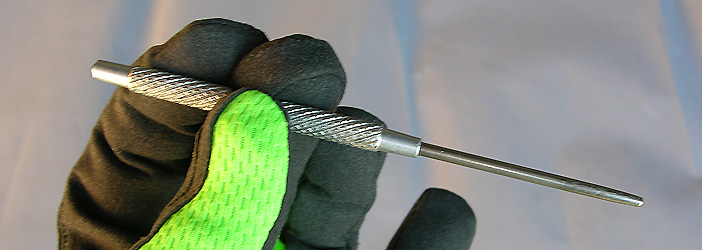
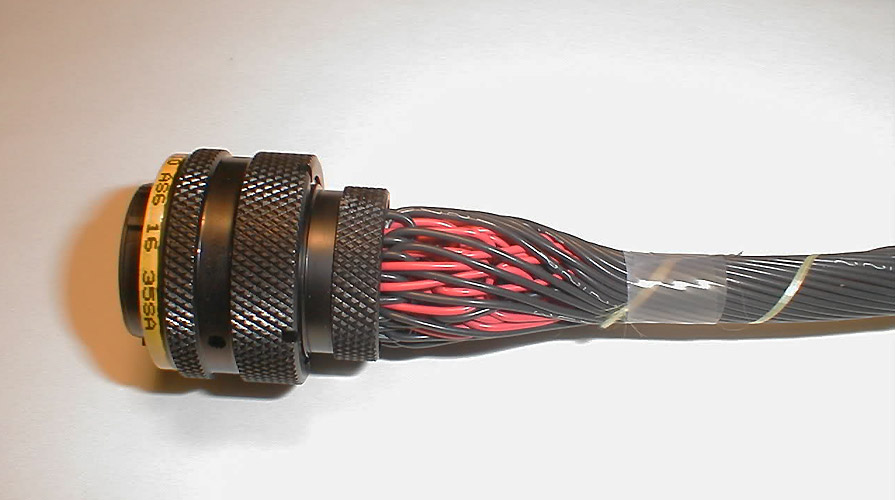
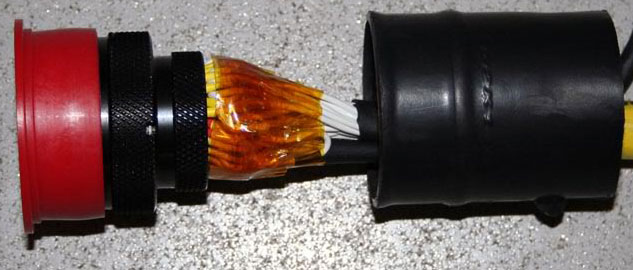
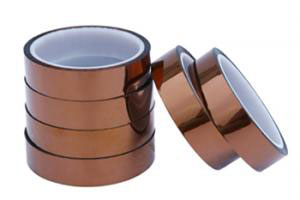
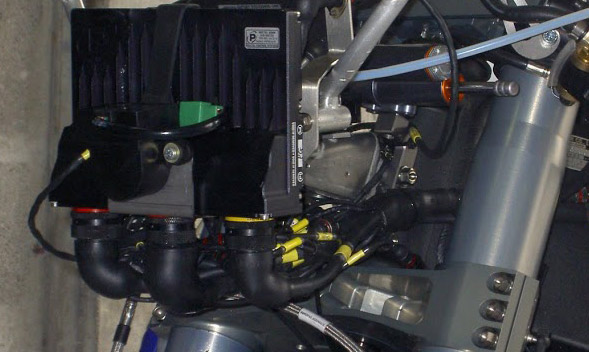


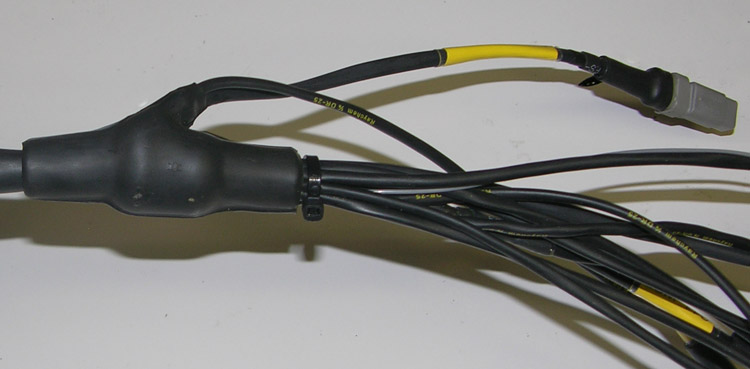
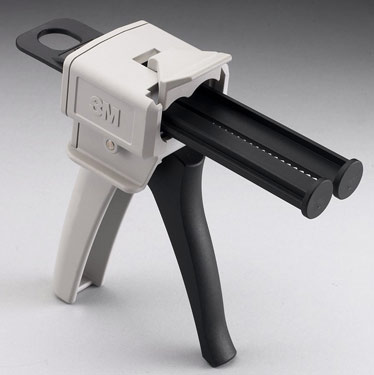
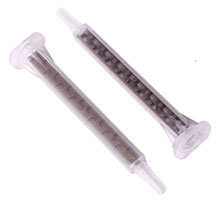

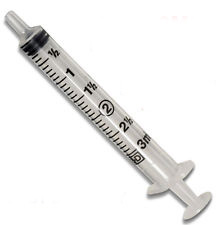

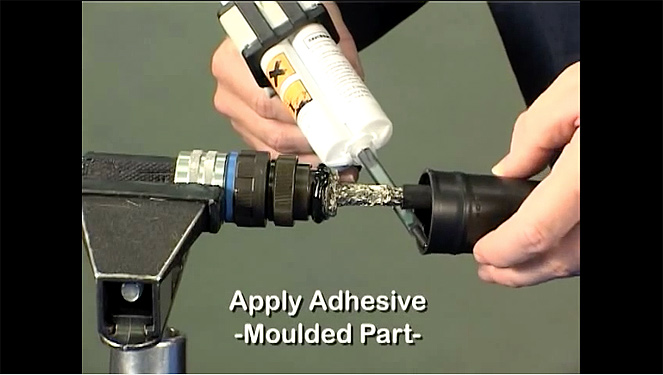


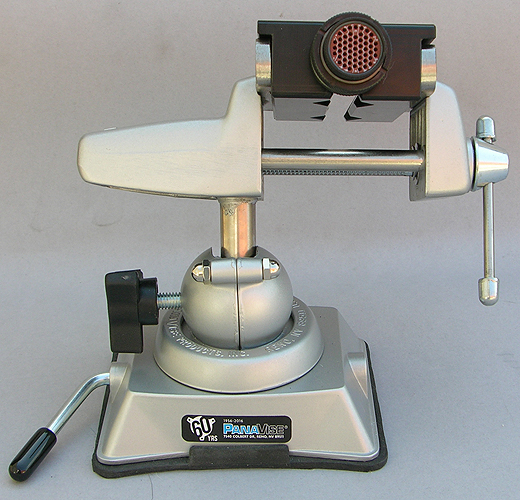


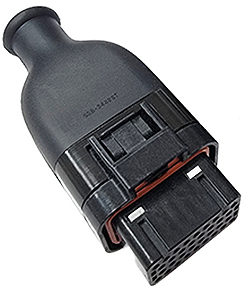
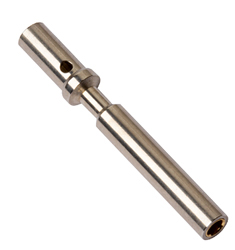


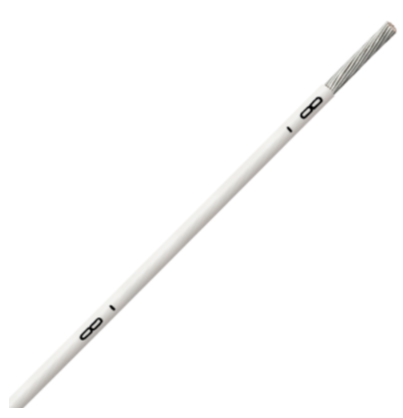


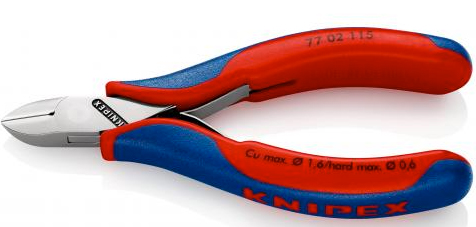

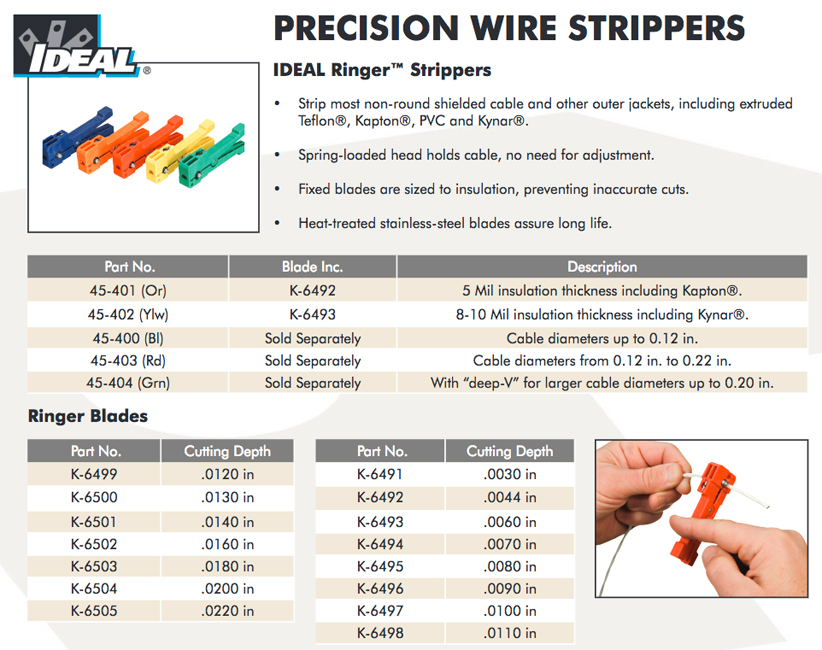
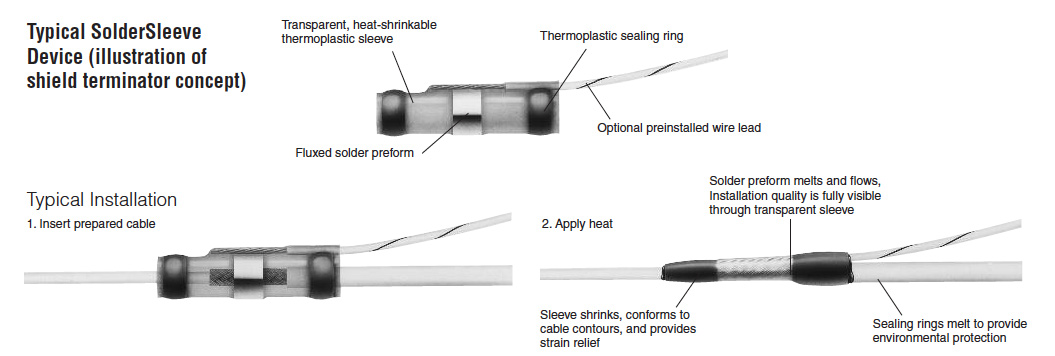
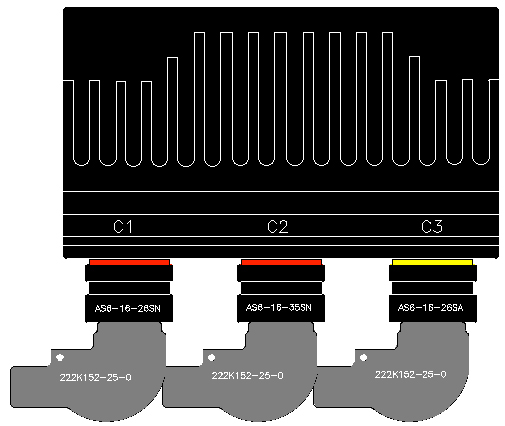

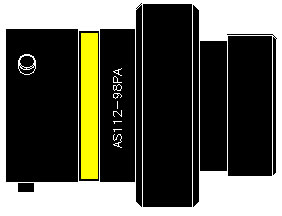
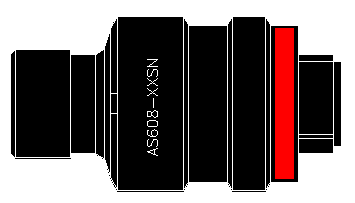
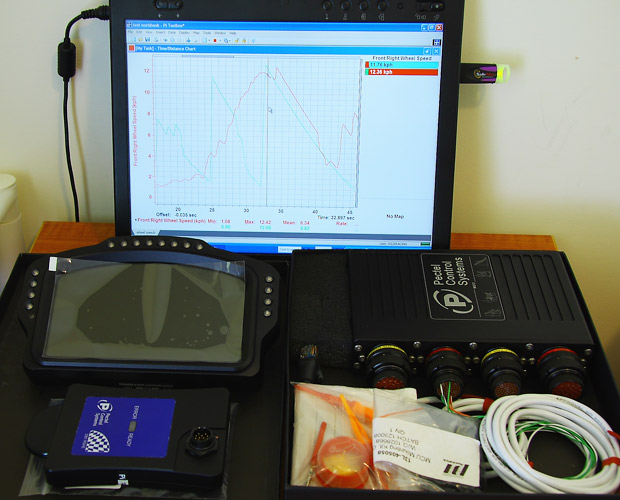


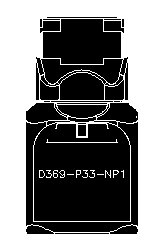


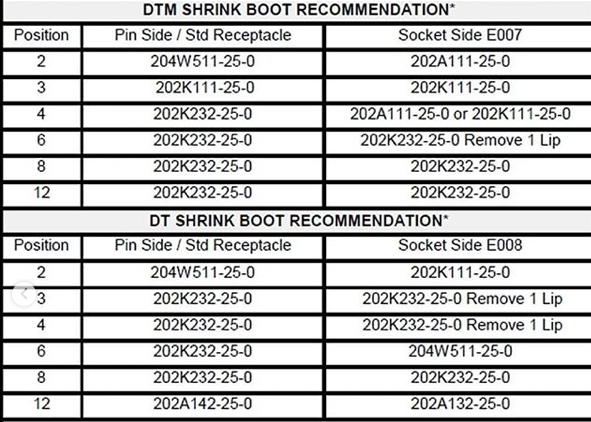

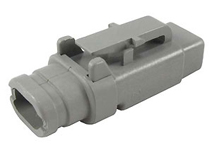
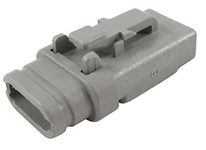
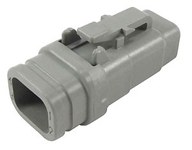
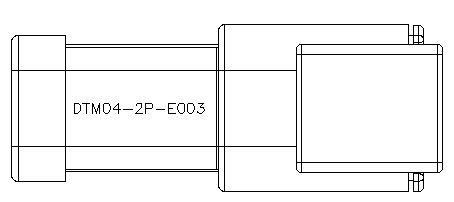
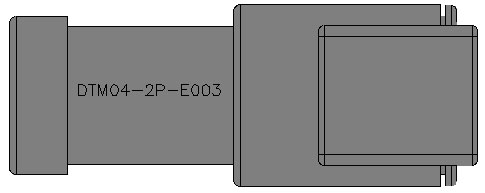
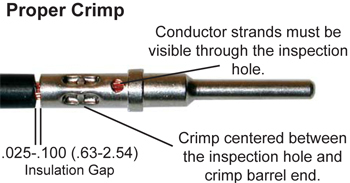

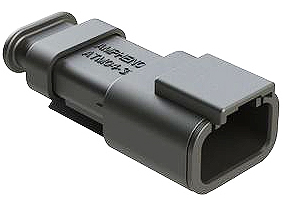
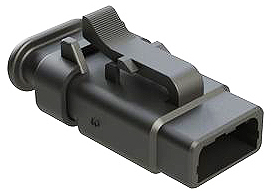


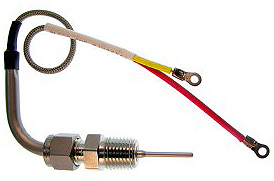
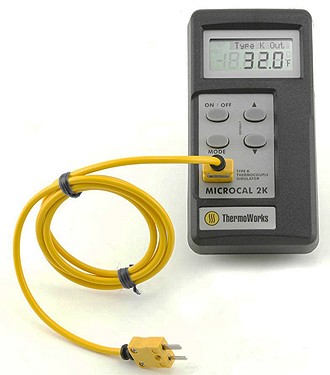


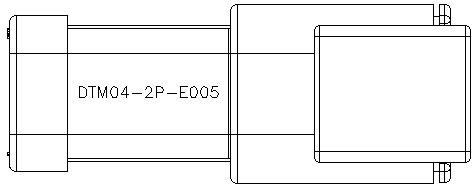
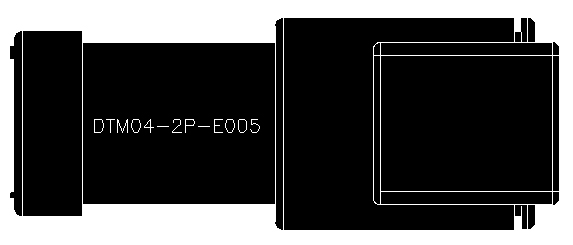
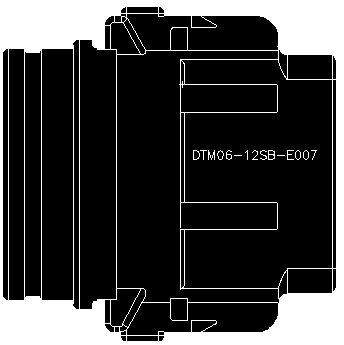


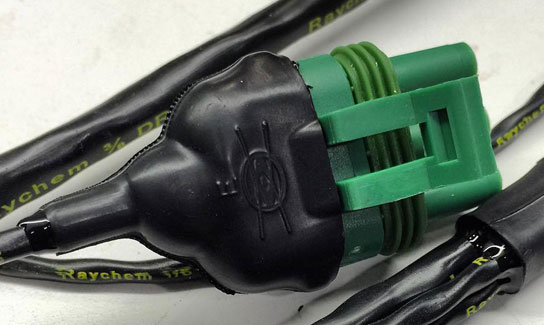
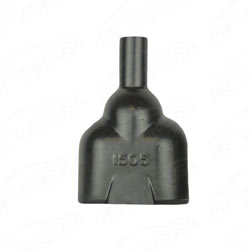
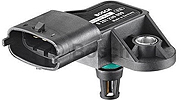


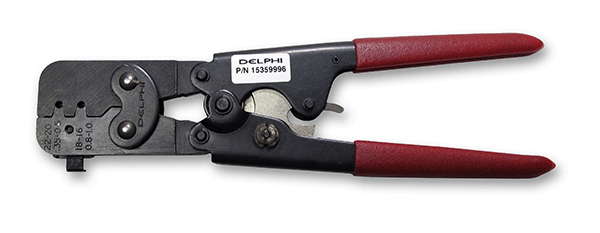
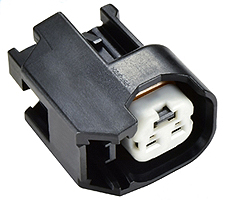
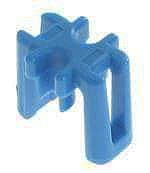

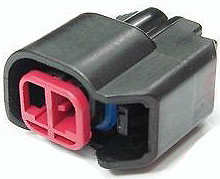

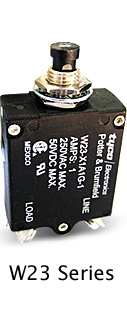
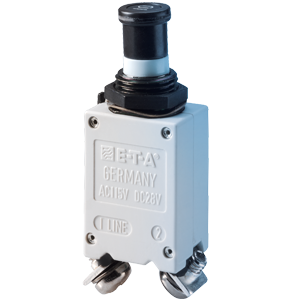
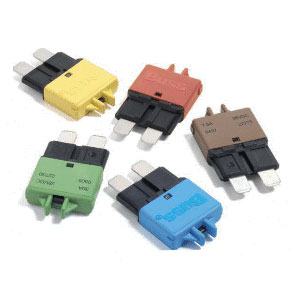
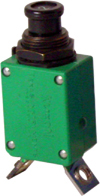
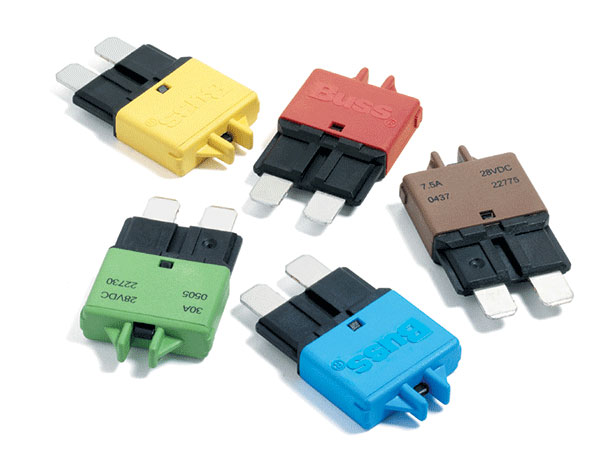


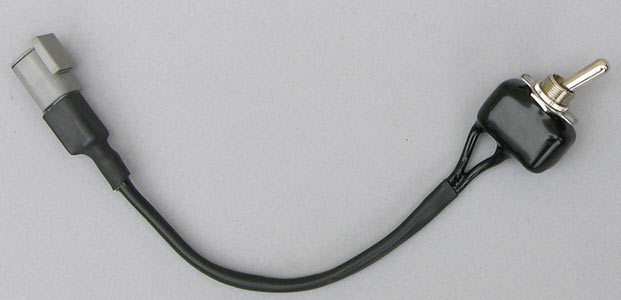


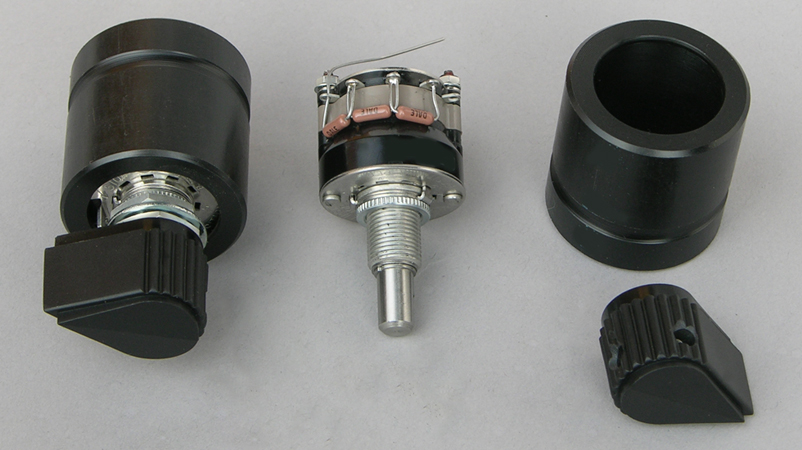
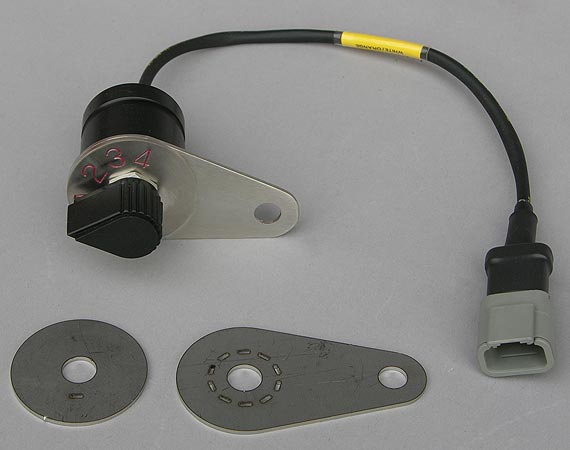
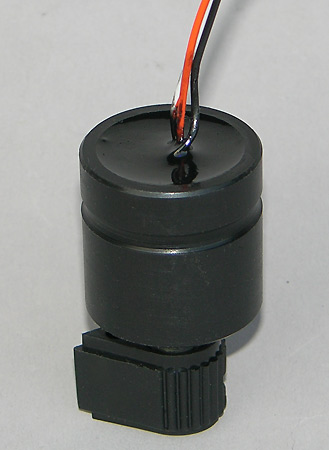
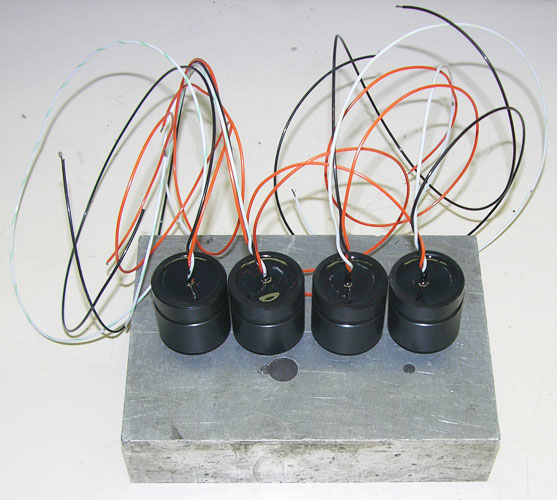
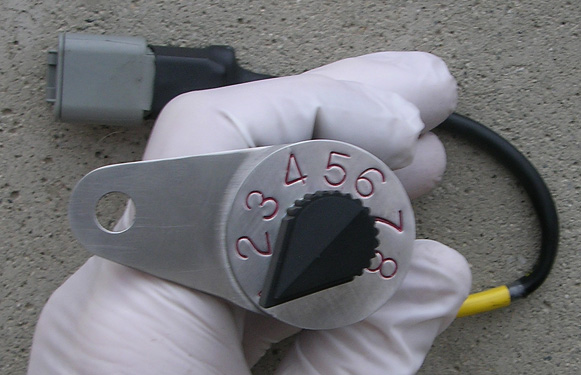


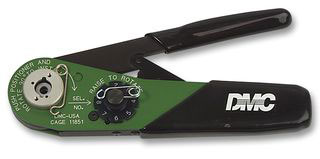
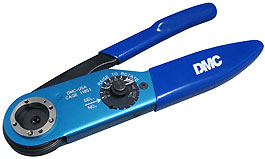
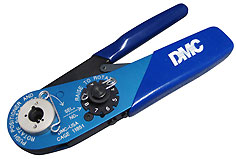


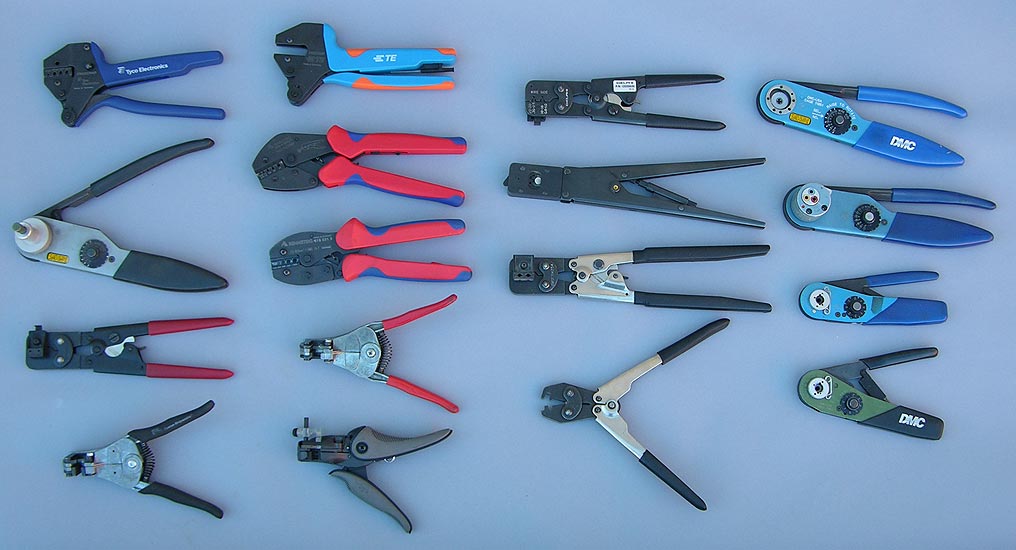
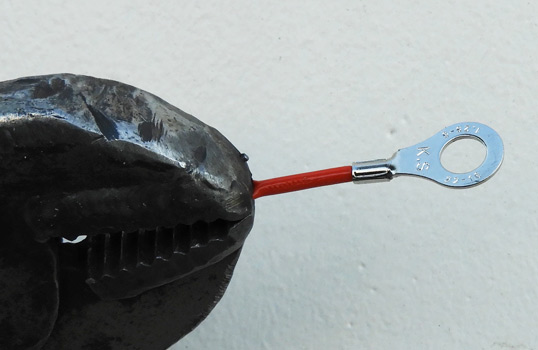


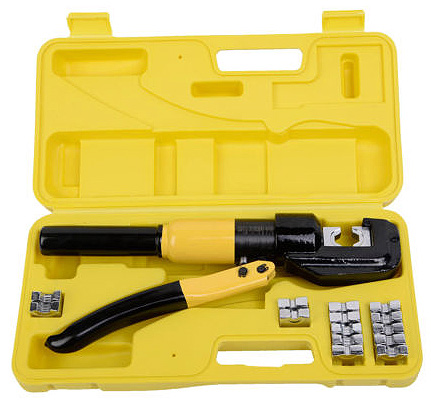


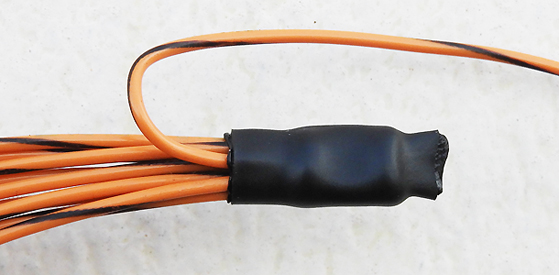


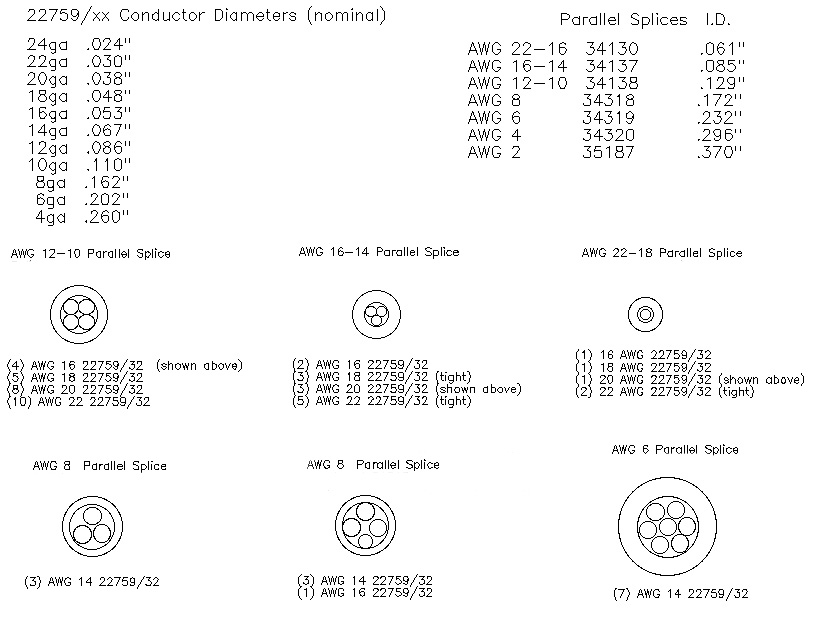


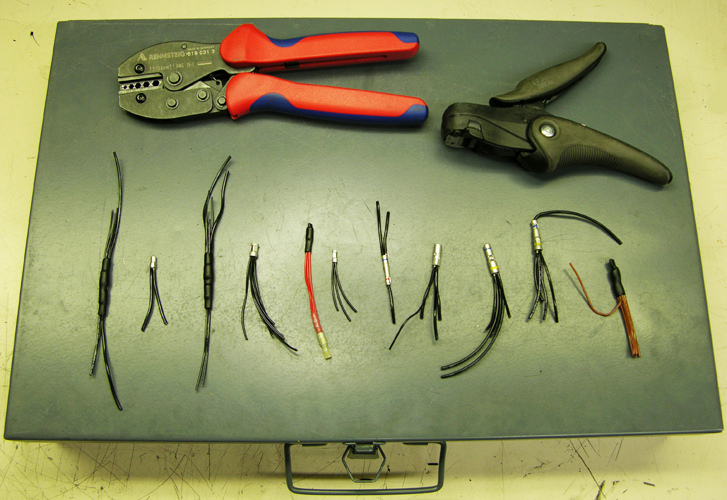
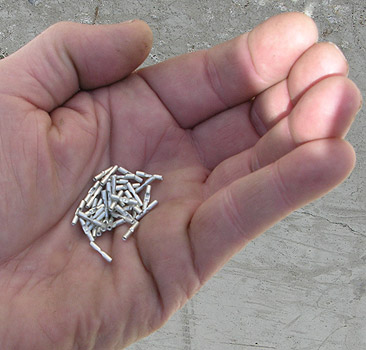

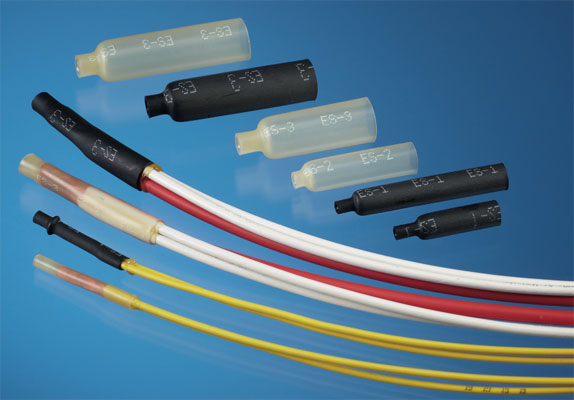

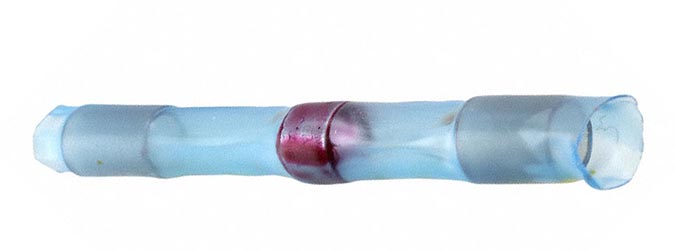


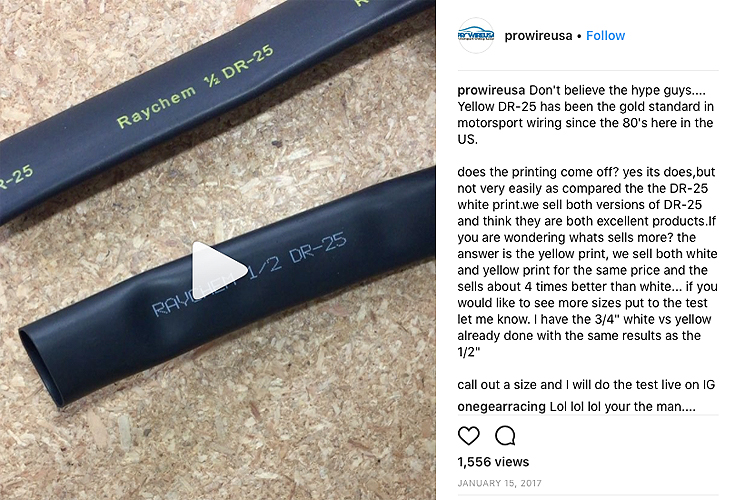


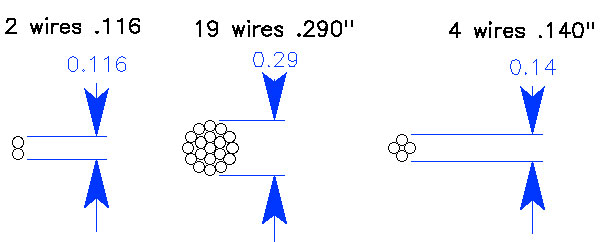
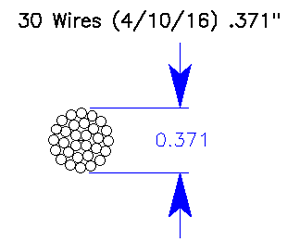
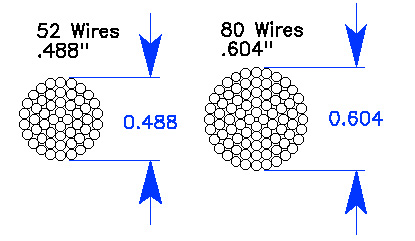


 .
.

