 |
||
LSR 2-1 V-Rod Exhausts
No 1950's megaphones, No Aluminum Butt Plugs
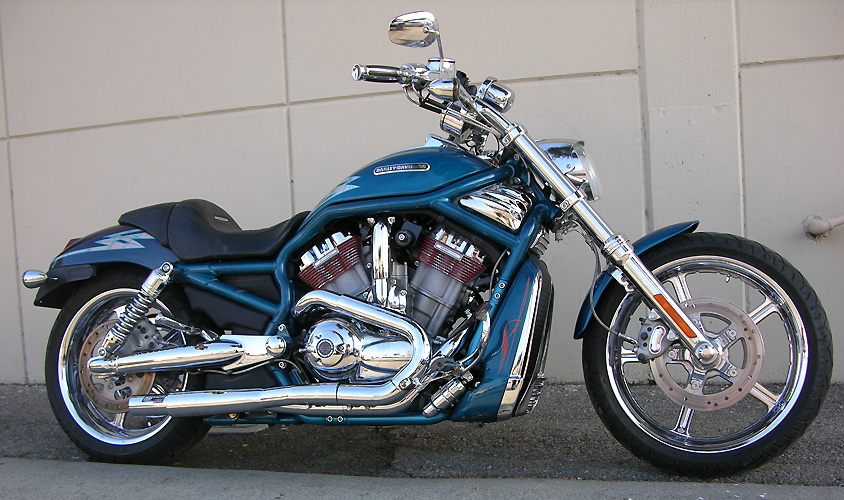
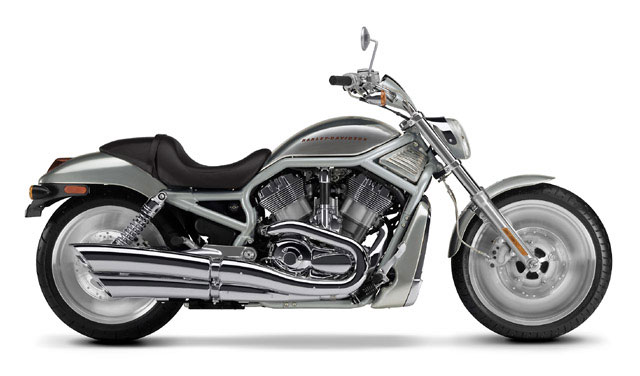
VRCSA, VRCSAW, VRSCB, VRSCD, VRSCDX, VRSCF V, VRSCSE, VRSCE2, VRSCR, VRSCX, VRXSE
This sure is a complicated
alphabet. More Harley Willie G. trickery to part you from your
money for the latest limited edition model.
First
they came in silver with some exhaust that looks a bit like the Double
Megs we did for Mickey Rourke's bike in Harley Davidson and the
Marlboro Man a long, long, time ago....back in 1991. We decided to wait
about 10 years before we jumped into the V-Rod performance. Everyone
else seems to build some slip-ons or long useless pieces
of crap. We had other work to do. No one was racing V-Rods nor really
doing much with their complex engine...even S&S left it off the
table.
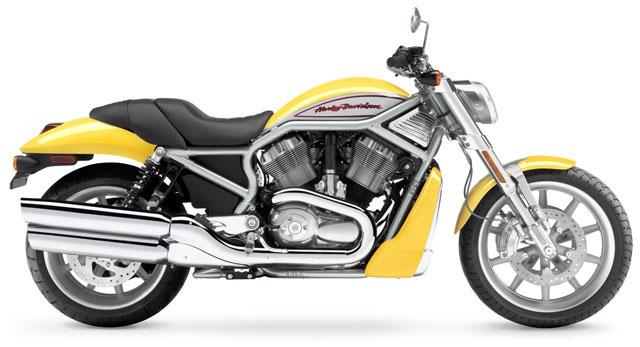
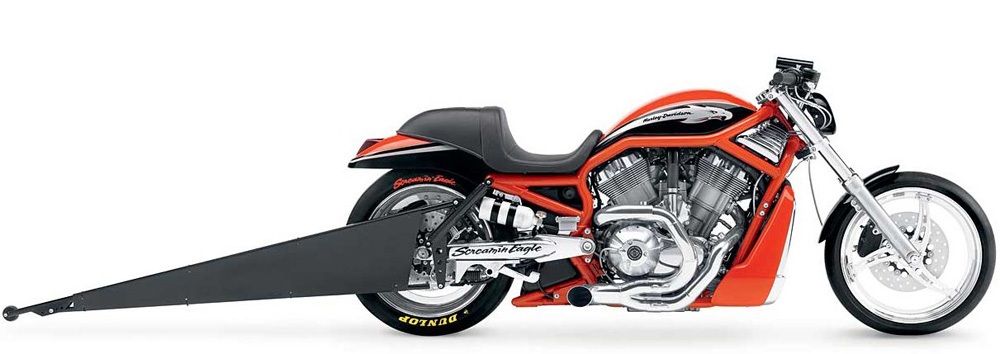
Street Rod VRSCR version kept the
double pipes whereas the V-Rod Destroyer Race Bike went to a 2-1
design.You always go to a 2-1 when you want power.
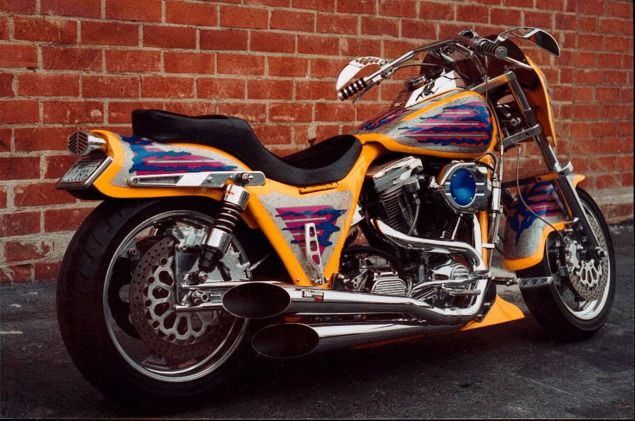
Above is the exhaust we designed
for Mickey Rourke's movie bike...for the story check out our Mega Meg Page.
We don't make these exhausts anymore they were originally just designed
for the movie. We made a few then discontinued them. We're go, not show.
Pro Stock V-Rod Exhausts

Above is our LSR 2-1
Pro Sock exhaust 00-1388 in chrome with heat shields. No baffle, merge
collector, dual O2 ports..ready to rumble.
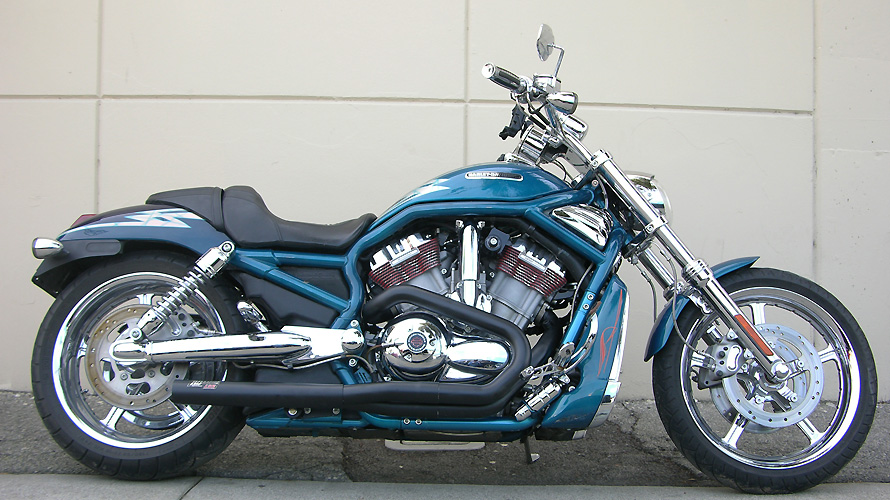
V-Rod LSR 2-1 Pro Stock
exhaust with 2" primary tubes and a sophisticated merge collector. Pure
race system. 2005 CVO model pictured. Clearance for wide tires. Ceramic black, no heat shields pictured.
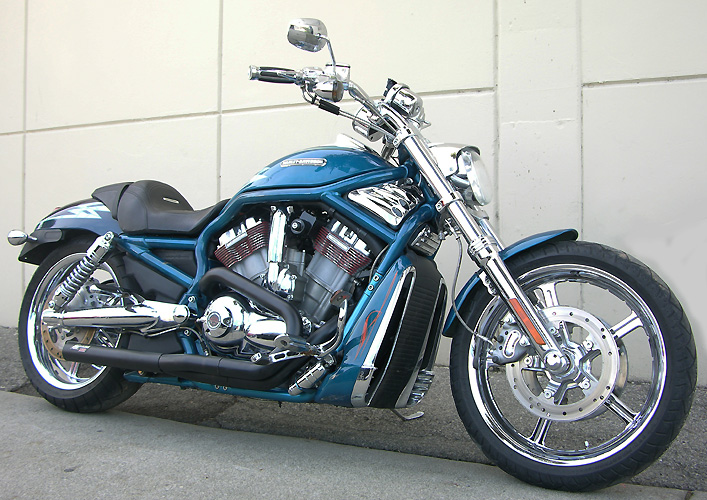
Comes complete with new mounting system. Custom V-Rod Billet gaskets required. V-Rod owners have been requesting Pro Stock LSR 2-1 exhaust systems as they have seen them on the Big Twins. We're always busy so it has been difficult to tool up for these and to evaluate the designs. In this business you have to spend a lot of money in R&D. After testing this is what we determined the optimum configuration was. Clean, functional and it works.
Available in LSR 2-1 Pro Stock 00-1388 and LSR 2-1 Pro Stock Challenger (00-1306) designs.
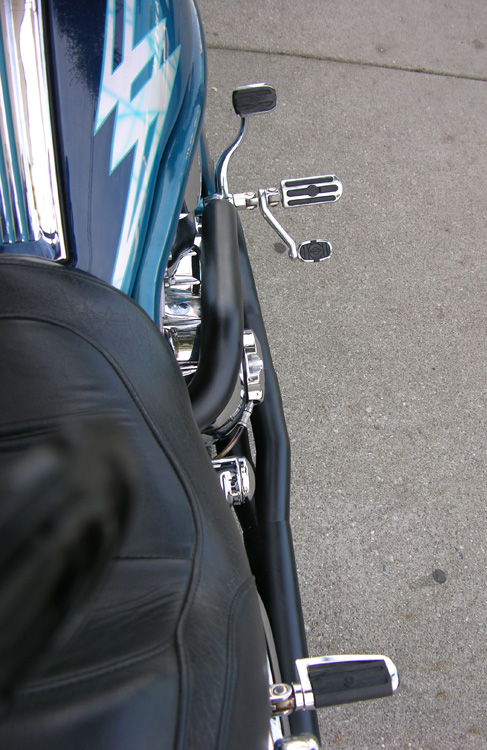
V-Rod LSR 2-1 Pro Stock
exhaust tucks in tight inboard of the clutch. Two heat shields are
available: rear and collector.
V-Rod Pro Stock Spyder Exhausts
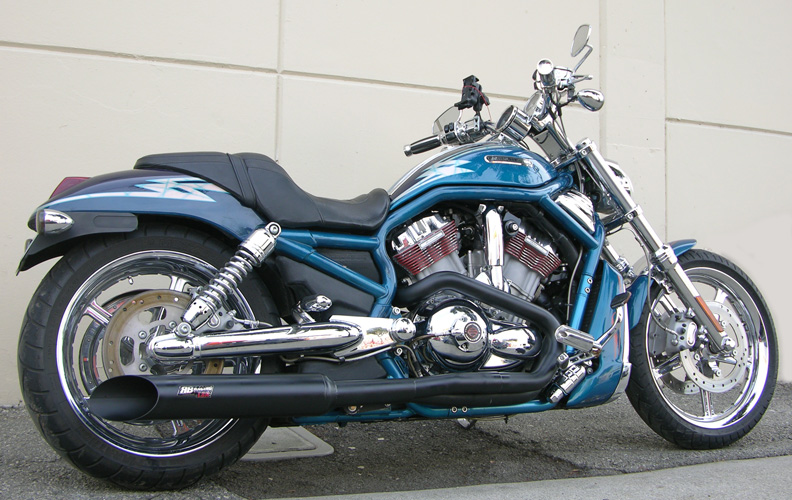
V-Rod LSR 2-1 Pro Stock
Spyder. Sound cancelling Black Hole Technology married with our Pro
Stock Challenger race design for a 10 decibel noise reduction. We had to develop
the Pro Stock designs first and then we added our proven Black Hole
technology. Race design for the street. 00-1387
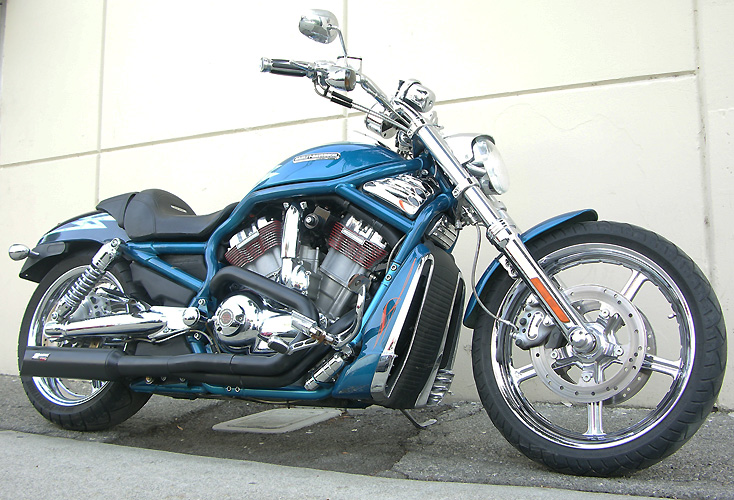
2" Primary Tubes, merge
collector. Proven technology from our Pro Stock Spyder line of
exhausts. Comes complete with new mounting system. Custom V-Rod Billet gaskets
required. Two heat shields are
available: rear and collector. Pipe is tucked inboard of the clutch cover. 00-1387
V-Rod Turbos...
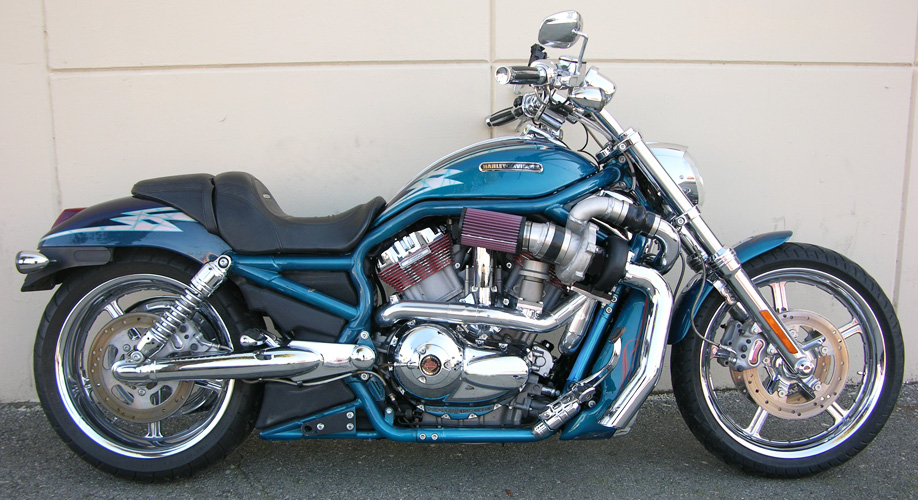
Right side
view RB Racing V-Rod Turbo. BoostMaster Billet wastegate (rider
adjustable). 2 1/2" Chromed exhaust. 360 hp turbocharger.
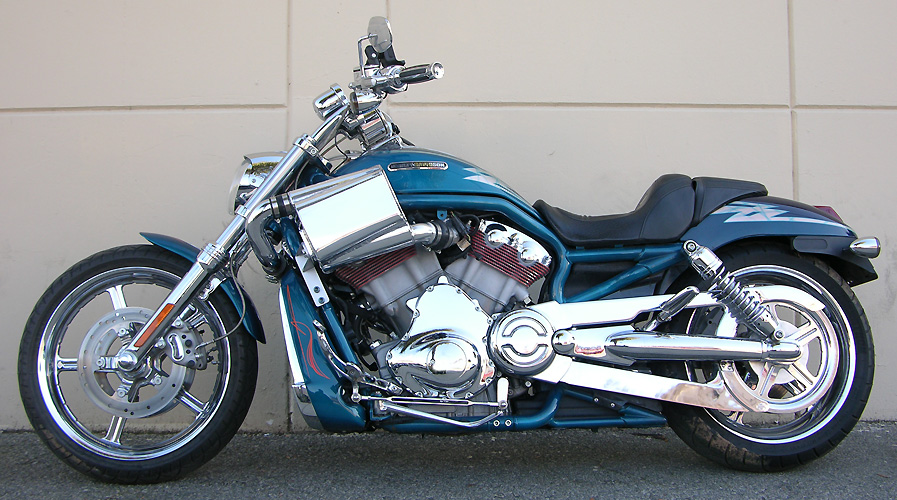
We sort of
left V-Rods alone as we are always busy and new projects take an awful
lot of time and resources if you want to do things right. More than a
decade after Willie G and Porsche came up with a 60 degree street bike
and after the failed water buffalo road race VR1000 we decided to turbo
the
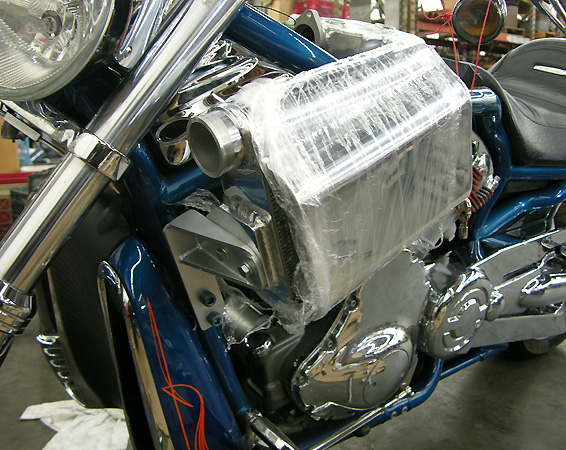
V-Rods. Time, money, resources. Left side view showing ram air 360 hp
intercooler. Horn and clock switch get relocated. No need to cut any
coolant lines.
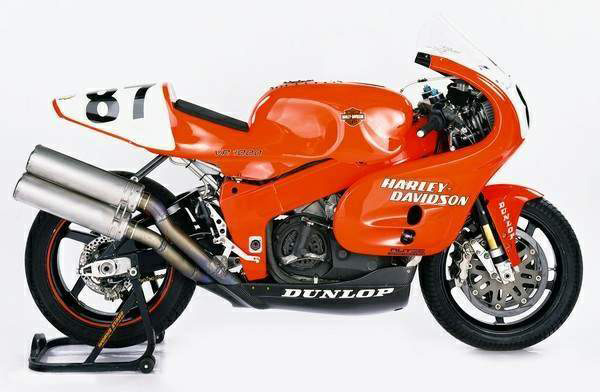
The VR1000 came to the show heavier than the competition and with less power. This is not a formula for success. The V-Rods are sort of the same way. They are high RPM 4 valve engines that are pretty quick but not real fast...and they are a bitch to work on or hop-up... Harley's answer to the metric crowd. There is no end to the hop-up route on the big twins, but nowhere to go on the V-Rods.

Harley's answer to the slow and heavy formula was to crank out a
factory drag bike, the V-Rod Destroyer, that had about 165 hp and ran 9
second quarter miles. We'd go to the races working on our friend Carl
Pelletier's Top Fuel Harley and gaggles of these would show up..mostly
Dealer owned. A few times some V-Rod Turbos by two other manufacturers
would show up and run in the 11's. That was pretty embarrassing. There
really isn't any point in showing up with a turbo if you can't outrun a
normally aspirated V-Rod Destroyer. A 165 hp turbo that only makes
boost high in the rpm range with a small turbo has no chance against
the Destroyer. Tuck your tail between your legs and go hide.
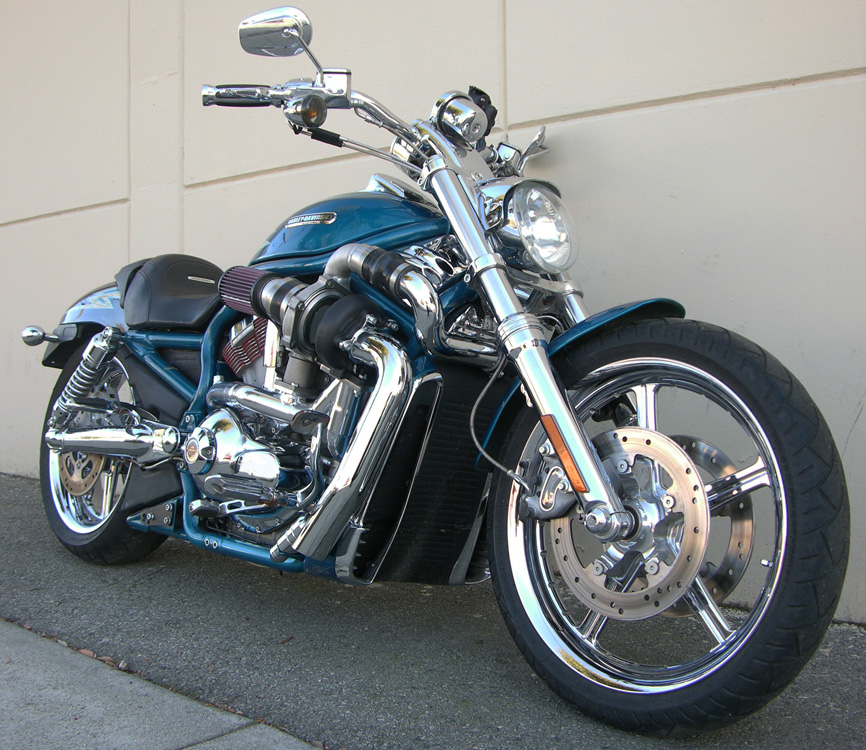
RB Racing V-Rod Turbo: RB Racing
uses 360 hp turbos, not 160 hp turbos. Our turbos move a lot of air at
low pressure ratios and are rider adjustable. You want to be able to
cruise at high speed, not be under boost, but go into boost instantly
when you roll on the throttle. You can adjust the boost from the
handlebars while you are driving...5 to 25 psi. No muffler goes inside
your legs.
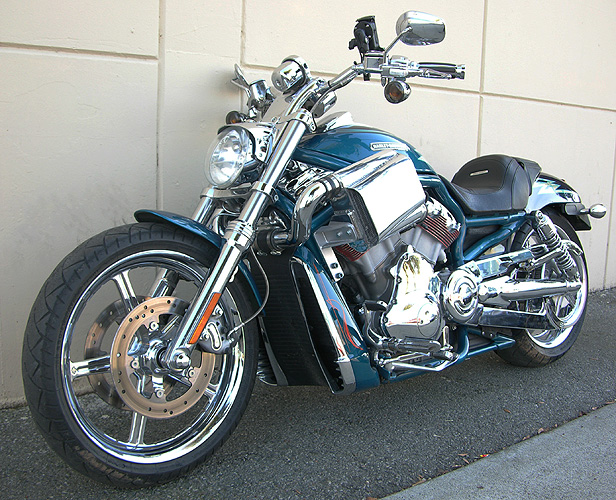
These are
strange bikes. The bike is a narrow V-Twin but the bars and the pegs
stick way out in the wind. We put on 360 hp worth of intercooler on the V-Rod but
had to use ram air to keep the bike narrow. Dating back to 1985 with
our work on BMW K100's we knew the intercooler could not block the
radiator. If you do not drop the charge temperatures you simply cannot
run higher boost levels.
Fixtures, R&D
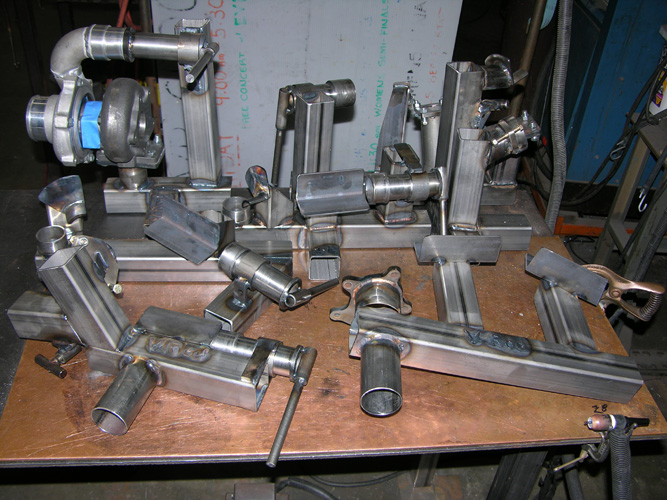
After 35 years of turbocharging
motorcycles we have come to some conclusions:
2. The fuel delivery system has to be engineered in advance.
3. Exhaust manifold design is critical for tuning, performance, and reliability.
4. Inlet manifolding and plenum design is just as critical as #3 above.
5. Large capacity charge cooling is mandatory.
6. Oil feed and scavenge must be planned before fabrication begins.
7. Parts must be so well designed that long term reliability is insured.
8. It takes many years and thousands of hours and endless testing to do 1-7 above.
9. Most people do not appreciate 1-8 above.
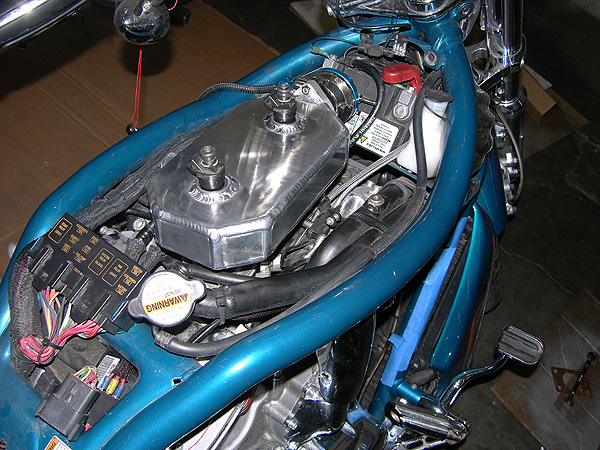
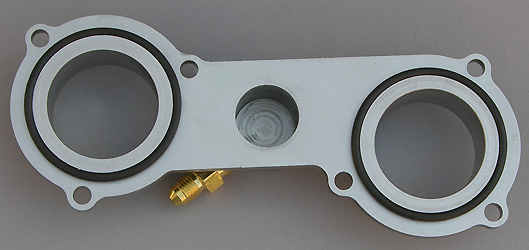
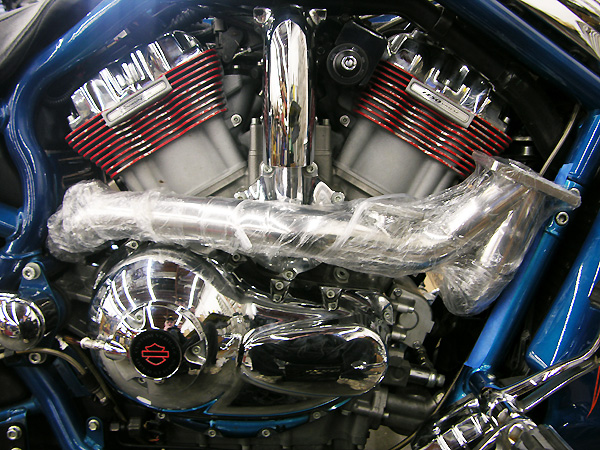
INLET SYSTEM: Inlet volume is defined as the swept volume from the turbo compressor discharge to the engine's inlet valves. RB Racing’s V-Rod inlet system has sufficient volume for the large bore pistons to breathe freely unlike cheap designs that actually “starve” the engine and stall the compressor due to inelasticity of the small plenum volume. RB Racing’s V-Rod inlet volume from the turbo discharge to connector tubing to the intercooler to the inlet plenum to the inlet valves is a multiple of the engine's volume...not one "coke can sized" plenum.
OIL SYSTEM: You do not have to alter or modify your engine's dip stick for a turbo drain. No drilling or taping required for feed or drain lines.
RELIABILITY: We routinely spent a year or more in development. Unless it qualifies as a daily driver we don’t do it. Unless you can go on trip with it we don’t do it.
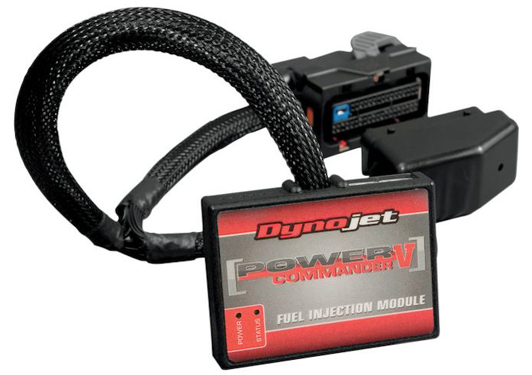
ELECTRONICS: The stock Delphi controller is a very sophisticated engine controller that should be left in place a supplemented by our RSR AIC 400 for most street and high performance use. The same strategy we use on our big twin Evo and Twin Cam turbos. Stock injectors are horsepower limited. Changing the efi system to another ecu/ecm involves a number of drawbacks, the most important being is that you negate thousands of manhours of Delphi development. We keep it simple.
For pure race use, where sophisticated motorsport electronics are required, we supply Cosworth SQ6M engine management systems for complete control of all engine functions as well as integrated data logging at up to 2000Hz. Costs are well North of $10,000.00 for the SQ6M in terms of electronics, custom mil-spec wiring, tuning and sensors. Expensive, but cheaper than all the other money you will spend trying to get multiple systems to handle spark, fuel, data acquisition, and other functions like traction and boost control. The real expenses are not the hardware...it’s everything else that follows. If you have to ask about costs you probably should not be doing it. We use the Cosworth Pectel SQ6M on our Bonneville Bullett race bike and our Road Glide Turbo.
COSTS: V-Rods are quoted on an individual basis due to options, finishes etc. Currently we recommend they be installed at RB Racing due to variances in individual V-Rods. You must schedule this well in advance. Bikes must be delivered and leave trailered. No ride in and outs.
New V-Rod Turbo Systems
|
|
|
|
|
|
|
|
|
|
|
|
|
|
|
| 05-0001 | Orca Digital Turbo Dash | Dual EGT Display, 3Bar |
|
|
|
|
Anodized Reservoir, Dual Stage, 220 PSI |
|
|
03-1013
|
Glycerin Filled Boost gauge Non-lighted
|
|
$149.50
|
|
|
Dual Delphi EFI O2 Display (NB) Specify Year/Model of bike. Special Model that is connected to RSR AIC 400 Additional Injector Controller |
|
$295.00 |
| TTS Master Tune Software and Tuning Cable (see line below) | When purchased with Turbo |
|
Ordering and Payment Details
1.
V-Rod Turbos are sold on a cash basis with a Bank to Bank Transfer of funds.
We provide transfer details at time of shipment. No credit card sales. Order online 24/7, specify Bank to Bank
Transfer, and we will provide details for Bank to Bank Transfer of
funds. There
is a minimum surcharge of $50.00 on all bank transfers due to bank fees
which occur on both ends of the transaction. Shipping charges are paid
for separately by credit card. We negotiate the best shipping prices at
time of shipment.
Customer is responsible
for transferring the correct amount as the sending bank will deduct
fees and
end up transferring less than the agreed invoice which causes
delays. Note: These items are sold
on a
direct basis only. They are not an item sold through any form of
"Distributor".
2. Mandatory Items to Order: You must order Dual O2 Display 06-1003T. You must also order either the Glycerin filled Boost Gauge 03-1013 or the Orca Turbo Dash 05-0001.
3. If you
wish to order the 03-1052 water injection system it must be ordered at
the time of your initial order as we must install a water nozzles in
your inlet system. It cannot be added later.
4. Finishes are Chrome, silver ceramic, black ceramic etc depending on customer preference. We build to order.
V-Rod Turbo..$9995.00
For a Delphi EFI Late model
Harley this is about what you can expect to pay for more horsepower and
civility than you can get by any other method. Terms and conditions and
ordering details are listed above. Note: These items are sold on a
direct basis only. They are not an item sold through any form of
"Distributor".
Part Number Description
03-0008 250 hp 2 Bar Delphi Blackbird Turbo Kit $9995.00
Screaming Eagle Super Tuner...SEST (discontinued)
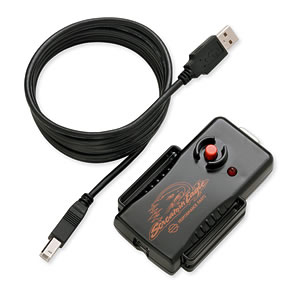
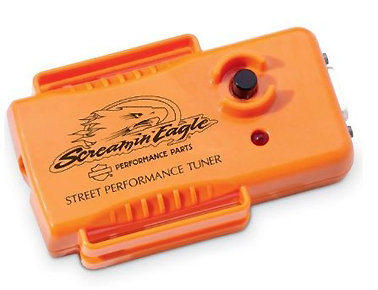
"SEST" or Greek for the worst written instruction manual we've ever seen. We defy you to figure out how to get various charts and graphs to open and how to get to the advanced versus basic tuning options. We suggest you look around the internet as the manual is of little help.
A few years ago we bought one of these to see what was involved. If you can figure out the software navigation issues and install a map that somewhat matches your bike, you simply ride around, observe the RSR Air Fuel Ratio Meter display and make edits. The tuning is fairly straight forward. Without the Dual Gauge we don't know how you would do it. We just ride.
Harley had to recall these after being fined. They are no longer available.
Communication Interfaces
Part Number 2000020
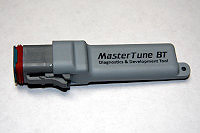
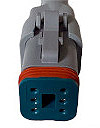
When used for calibration development, this interface marries to the ECM during the first ECM flash and further calibration development can only be performed on that ECM.
When used for vehicle diagnostics and data logging, this interface can be used on any compatible vehicle, even if already married to an ECM.
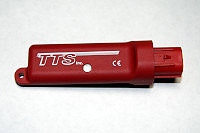
Mastertune BT Interface communicates to the PC via a wireless Bluetooth connection. Also includes a support loop to attach the interface to the bike via a wire tie.
• Touring models 2014-2020
• Softail models 2011-2020
• XL Sportster models 2014-2020
• Street models 2015-2020
• Dyna models 2012-2017
Works with the following MasterTune software products:
• MasterTune BT
• DataMaster BT
• VTune BT
• Flight Recorder
$459.95
Part Number 2000021
When used for calibration development, this interface marries to the ECM during the first ECM flash and further calibration development can only be performed on that ECM.
When used for vehicle diagnostics and data logging, this interface can be used on any compatible vehicle, even if already married to an ECM.
Mastertune BT Interface communicates to the PC via a wireless Bluetooth connection. Also includes a support loop to attach the interface to the bike via a wire tie.
Compatible with the following Harley-Davidson Motorcycles:
• Touring models 2021-present
• Softail models 2021-present
• RevMax models 2021-present
• (Sportster & PanAm)
Works with the following MasterTune software products:
• MasterTune BT
• DataMaster BT
• VTune BT
• Flight Recorder
$459.95
ITTS & Exhaust Combo Military Discount
We offer a combined 10%
discount to active or prior service both US Military and the Coast
Guard on LSR 2-1 exhaust purchases with TTS Tuners and Cable Kits,
Soot
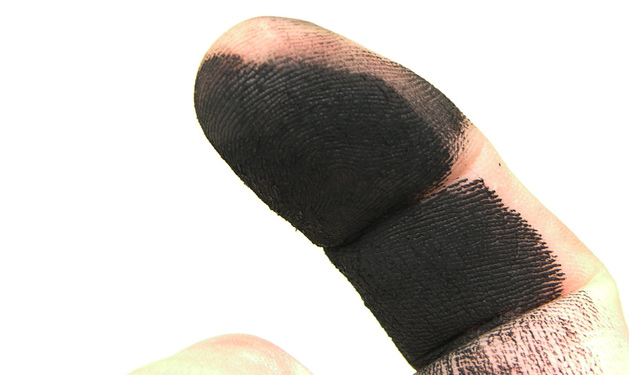
Whenever you look at an exhaust and see it caked in black soot you know the bike is not running or tuned correctly. Back in the mid 1980's we did a carburetor development program for Keihin Corporation for their 41mm CR Race carbs on both Shovelheads and the new Evolution motors. When we were finished the bikes got 56 mpg cruising and 46 mpg if you ran them harder...and after 500 mile tests the pipes were perfectly clean inside and the exhaust ports were dead clean.
If you take the exhaust
system off a modern Closed Loop BMW, as we have, you will find them
dead clean or whitish inside. Harleys should be the same.
We always ask what mileage
people get from their "tuned" or modified Harleys after "Dyno
tuning"....The universal answer is 37 mpg or less. If they don't know,
we ask them if they have to gas at 100 miles. Most do.
Once a customer bought an exhaust from us and took his bike to two different dynos in search of the "117 Hp" he was looking for for his 103...He got 110Hp. After pissing and moaning we told the guy to give us our exhaust back and we found it caked in soot. So much for tuners and their tail pipe sniffers that see lean reversions...They just kept adding fuel. You tell the customer to put on our RSR Air Fuel Gauge to monitor the mixtures F/R in the real world...No, they want a "Dyno Tune". We have dynos...we know what they do and can't do.
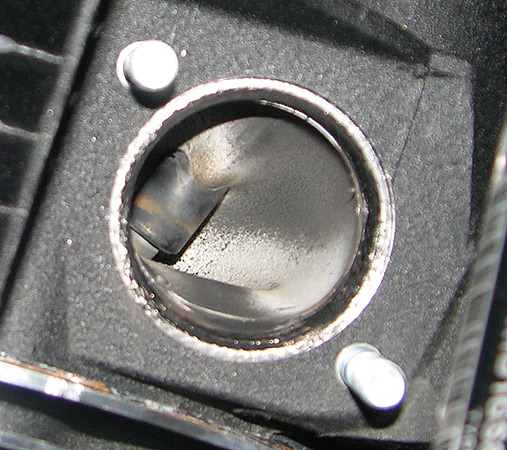
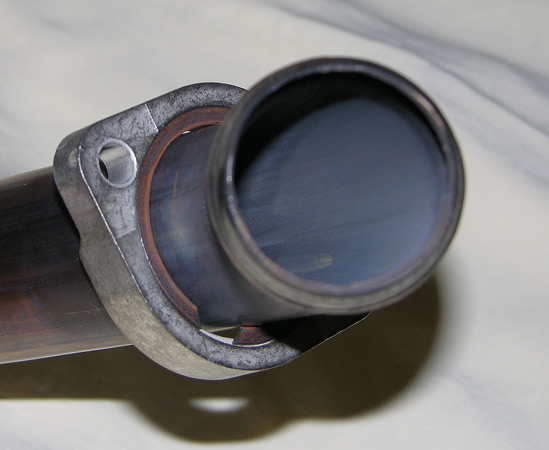
Pictured above is the exhaust port from a 2017 Dyna Low Rider S with about 100 miles on it. No soot. Delphi engineers seem to have done a very good job. Looks like the port you would see on a BMW. Now, when your "Tuner" gets finished with it, it will most likely be full of soot. Logic plays no part in people and their toys. EFI is complex...put in different cams, change air cleaners, port the heads and all this goes out the window. Brave new world.
No soot.
Fuel Injection..A Reality Check
OEM Harley Delphi Injectors
come in various ratings: 3.91 grams/second; 4.35 grams/second; 4.89
grams per second (CVO); and 6.00 grams per second. These ratings are
static i.e. shorted open. Pulsed static is about 90% of this i.e. what
you could expect if you maxed them out in your ecu calibration
software. If you hold them to an 85% duty cycle they, respectively,
offer the following horsepower potentials: 105 hp; 117 hp; 131 hp and
161 hp. Now, you can squeeze more out of them by going past 85%, but
this is the point where they are still controllable.
We get calls from people
building wazoo big engines and they are still running the stock
injectors. We suggest you get the right injectors for your engine
building projects. We offer a several calculators for those messing
with efi systems. Fuel Injector Calculator Professional Injector Pulse width Calculator.
Band-Aid...Not Needed
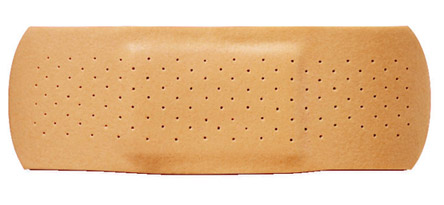
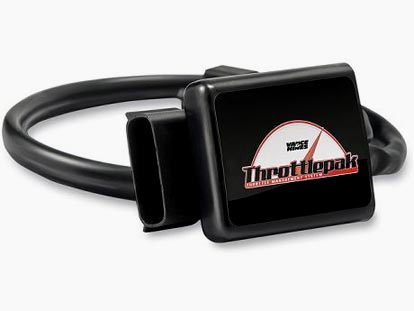
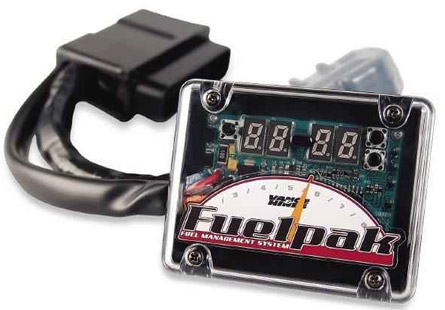
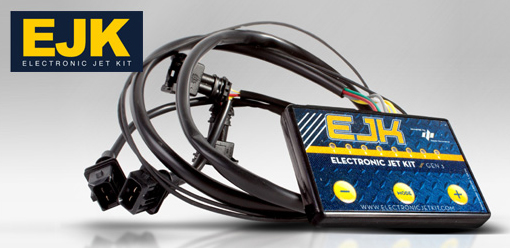
If you have a late model Harley with a Fly-By-Wire throttle you do not need an add-on gizmo. We suggest you get Steve Cole's TTS Master Tune software described above. When purchased with RB Racing exhausts and turbocharger systems we offer a $50.00 discount i.e. $375.00 v $425.00 list. TTS MasterTune allows you to adjust your electronic throttle without the expense of additional add-on devices as well as your fueling and everything else in the Delphi ECU.
New Small (12mm) and Older (18mm) O2 Sensors
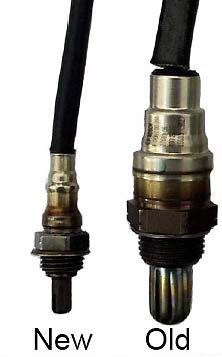
In 2010 FLT/H series went to the new small heated O2 sensors. The Dynas and Softails went to these in 2012 and the Sportsters in 2014.
We are tooled for these smaller sensors on all the newer models. The small O2 Sensor models have a floating ground voltage offset that has a complex scheme that varies the signal to meet emissions purposes. If you think you are going to trick these you are in for a surprise.
You must specify the year of your motorcycle when ordering the RSR Dual O2 Gauge. Models with the small OEM O2 sensors will require two 18mm O2 ports in addition to the 12mm ones to monitor your bike as you ride. Our RSR Dual Gauges will monitor the 18mm high temperature O2 sensors we supply. It is the only method to monitor both front and rear cylinders of your bike as you ride. Real world observations to perfect your tune. Better than a dyno which tends to overheat your motor quickly skewing your tune.
If you are running a Tuner that disconnects the 12mm or 18mm Oxygen Sensors with "O2 Optimizers", putting your bike into
Full-Time Open Loop, then you should order our RSR Dual Air Fuel Ratio Gauge.
When you order the Gauge, for real-time, as you ride, monitoring for
tuning purposes, we provide you the specialized harness plugs and
wiring to connect your OEM O2 Sensors to our RSR Dual Air Fuel Ratio
Gauge. It's the proven way to perfect your fueling.
Dual RSR Air Fuel Ratio Gauge: Late Model (12mm) O2 Sensors (Open Loop Only)
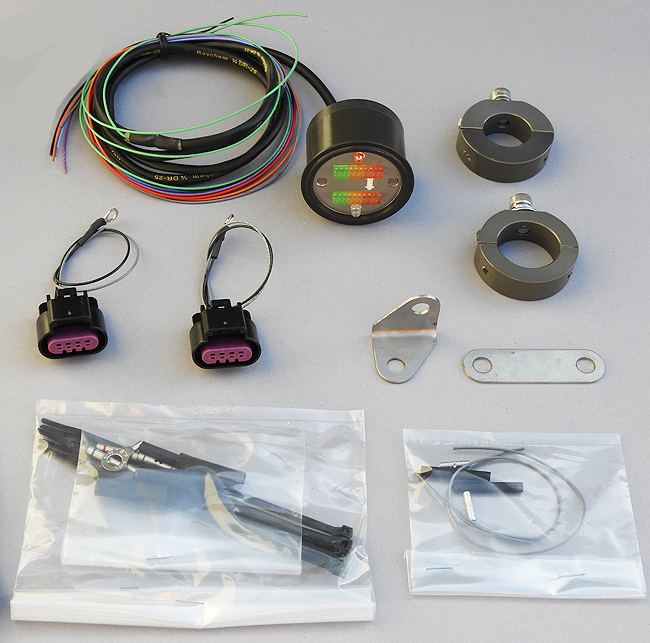
RSR O2 Gauge Billet Handlebar Clamp: 06-1025
RSR O2 Gauge Stainless Brackets: 06-1024
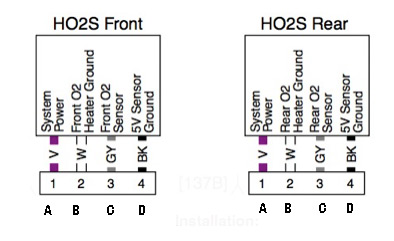
12mm Delphi Sensor Wiring Harness and Connectors: 06-1028 Required for either Open Loop Tuning (PCV, Dobek).
RSR Air Fuel Ratio Gauges...Real World Tuning
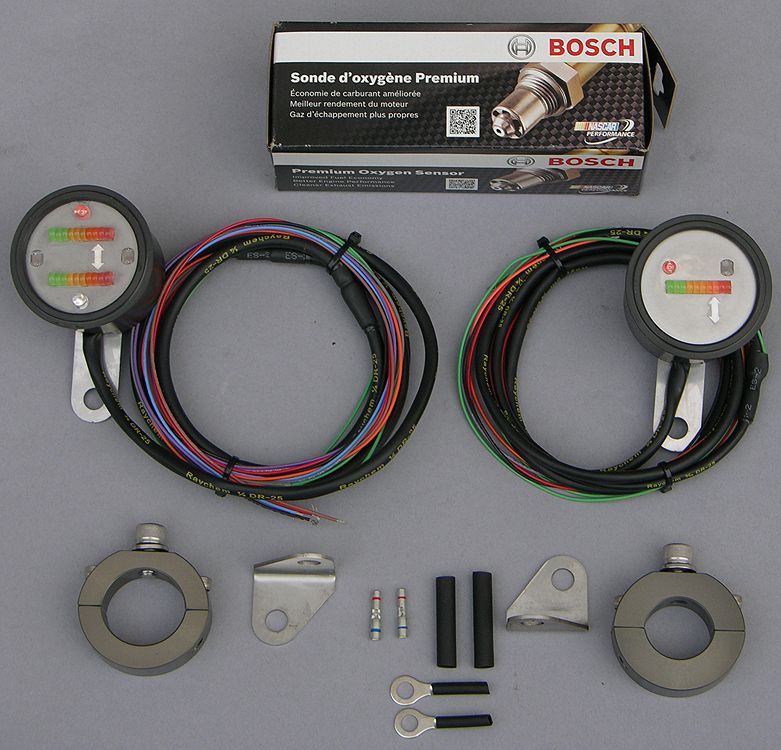
The Mother of all gauges! Not a gauge, but a precision tool that will tell you exactly what your engine is doing in real-time. Gives you instantaneous read-outs of air/fuel ratios from 17:1 to 10.5:1 and indicates maximum power ratios. Four color display is easily read in direct sunlight and automatically dims at night. Waterproof, billet aluminum construction. Your significant other will cheat on you but this gauge will never lie! It won't keep you warm at night, but a perfectly running engine will look and sound the same when you wake up next to it the morning after.
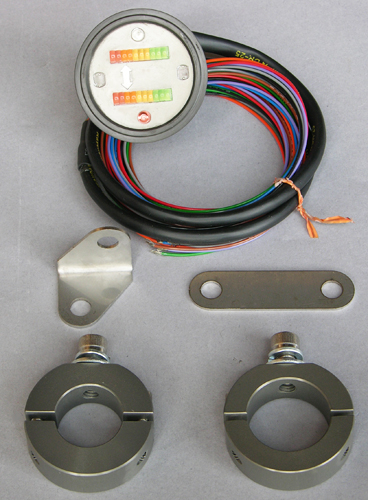
Single RSR O2 Gauge: Reads the front cylinder in non-efi models. It is simply the best way to evaluate the tune of your motorcycle and saves expensive and often inaccurate dyno time. Real world tuning while you ride...Observe and then make adjustments. Mounted permanently. Waterproof.
Mounts....Roll Your Own or Buy One
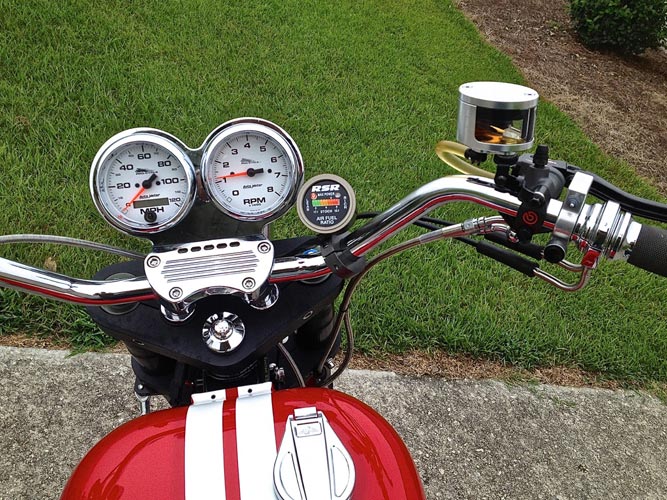
The gauges have a center back mount 5/16" x 18 x 1/2" Stainless Socket Head Cap Screw and stainless lock washer. You can fab your own bracket for this or use the 06-1025 hard anodized Billet Mount System for either 1.00" or 1.25" handlebars $49.95. Optional is the 06-1024 two piece laser cut 304 Stainless Steel mounting tabs for either near handlebar clamp or up the handlebar mounting: $9.95.
Since we have been doing closed loop fuel injection systems
for Harleys for more than 30 years and have been putting O-Sensor Ports
in our exhausts for the same amount of time, we have both single and dual O2 ports for our full range of exhausts. Our RSR Air Fuel Ratio Gauge is the best investment you can make for monitoring and optimizing your engine tune.
All
LSR 2-1 exhausts come standard with one or two O2 ports (Sequential EFI models)...18mm or 12.5mm. O2
or Lambda sensors
are a necessity for either carbureted or non closed loop efi
(Weber Marelli and Early Delphi) Harleys. We should know, as we have a
lot of experience
with them and have been doing Closed Loop EFI systems since 1989.
The Single and Dual gauges ship with six feet of MIL-W-22759/32 wire. The first 24" is Raychem DR-25 sealed on both ends. If you wish to have a connector at the 24" point there is a $50.00 charge to install either six position (single gauge) or eight position male/female Deutsch DTM connectors with Raychem DR-25 sleeving.
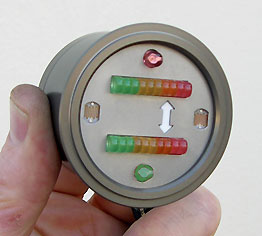
The gauge is housed in a hard anodized round enclosure in a standard 2" format with a 2.250" bezel, center back mount, with a 5/16" x 18 stainless socket head cap screw. The gauge will show fuel ratios from 17:1 to 12.0:1 (or richer). The gauge is visible in daylight and automatically dims for nighttime operation. Only a single L.E.D. illuminates.
Very easy to interpret at a glance.
Scale is, left to right, lean to rich: three greens, three yellows, two
orange and two red l.e.d.s. You simply cannot "read" spooling digital
numbers.
The white arrow indicates the maximum power mixture, the second orange light, which is 13.2:1. Transitory enrichments should not, if the engine is warm (>200F Oil temp), go past the first red light. Readings at the far right side of the scale, the second red light, are simply too rich. Proper closed loop operation will cycle back and forth from green to orange around the center of the display.
It is simply the best way to evaluate the tune of your motorcycle and saves valuable dyno time. Mounted permanently. Waterproof.
Whether your bike is carb
or efi this is the best way to tune...By riding and observing, not on a
static dyno. Dynos are not exactly real world in terms of loads,
airflow, or transitionals, and even if you had a million dollar AC
Transient dyno room, you would still have to do real world testing. The
gauges are dead accurate and are millisecond fast responding which
makes it very simple to
interpret or remember, even at a glance, while you are dodging cars
watching for cops. We have a Superflow CycleDyn which gives a better real world correlation than other dynamometers but we still evaluate air fuel ratios when riding.
Anyone who tells you
optimizing tuning is easy is full of shit. Engineers at Ford say they
spend two years just perfecting tip-in or initial throttle openings.
Ride, observe,..then change or edit. Real world.
Pretty soon Harleys will all be watercooled then you really won't be able to tell the difference between Milwaukee and Hammatsu. "The Man" will be sniffing your butt and planting microchips and gps modules up your ass so they can mail you a speeding ticket and keep track of your movements. They already have data recorders on your car so they know what you were doing when the biggie happened. Brave new world. Monitor your engine to get the most out of it before the NSA monitors your tail pipe.
Customer Comments
Customer writes: "When the gauge arrived I knew it would be of a very high quality, it has far surpassed my expectations. I was very eager to get this installed and take a look at my tune. Amazing to see how little adjustments on the carb effect the AFR. As a result of this gauge, I have dropped one size on the low speed jet, raised the clip on notch and confirmed the main jet on my Mik48. Thank you, I really like this gauge. Ed"
"Just wanted to follow up with you. This AFR gauge is a game changer. I think the tune on this bike is just about perfect, or as perfect as a one can get with a carb. I have every needle, main and idle jet available for the Mik48 and think I used everyone of them chasing the tune. Now with everything dialed in, warm idle will flicker between the orange and red light, cruise is at the left orange light and hard acceleration toggles between last orange and first red. Plugs look terrific, bike starts first thing in the morning without any choke, while riding around town the lights are relatively stable, some moving around but not much. Again, I couldn’t be happier with how this gauge works.
I am building a 124” TC to put into another FXR that I am building. This gauge is already on the build list, can’t imagine not having this gauge on any of my bikes. Thanks, Ed"
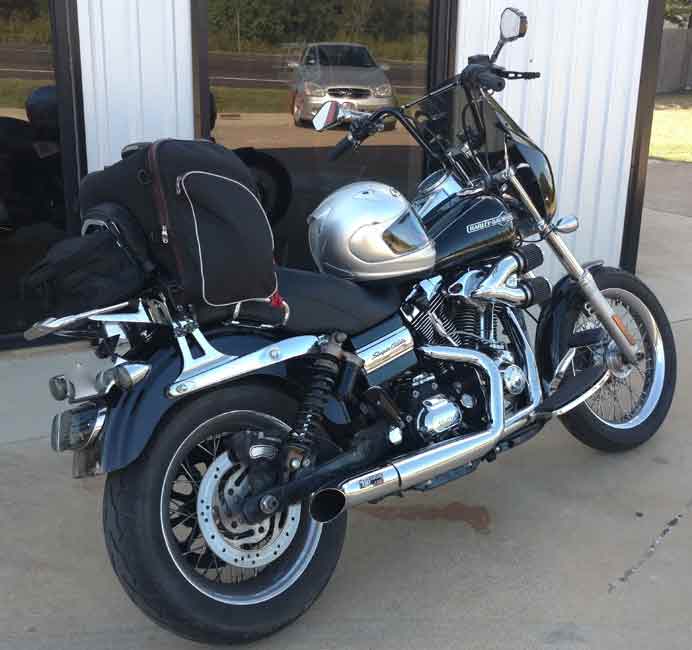
Customer writes: "Sounds like a FAST Harley! Revs quicker. Everyone that knows the bike immediately notices how the engine has better throttle response now. One blip of the throttle is all it takes to spark envy. It has a noticeable volume and powerful sound on acceleration complimented by a smooth deceleration growl. Cruising volume is somehow arguably quieter than the V&H slip-ons that were on the bike previously. The chrome is flawless. Packaging was excellent. It’s amazing how spot-on the fitment of the slip joints are. The mounting bracket is perfect in form, fit and function. Everything eases into place with a slow methodical hand. Don’t force or rush the installation and you will complete it without frustration. I bought the Dual AFR meter at the same time as the pipe. I cannot imagine an easier way to tune with my TTS MasterTune! I was able to actually improve the tune and power while maintaining 43 mpg. Thanks! Ryan"
Wideband O2 Adaptations
Systems that typically use Bosch LSU 4.2/4.9 wideband sensors for self-tuning have a built-in problem. First, the "map" has to be correct before any of this self-tuning takes place. Secondly, the real issue is the sensor response time, i.e. the time it takes the sensor to stabilize, and for the ecu to make a corrected output. No matter what they tell your there is a significant delay between the reading and the correction, during which time the engine will be at another rpm/load site . This can be on the order of 980 Ms for the Bosch sensors which is why, in dyno testing, they use step tests for a number of seconds, letting the engine stabilize at specific load/rpm points, before any measurements or changes can be done. Constantly rewriting RAM locations with "corrections" on the fly is never going to be correct.
The OEM narrowband Delphi system
actually works twice as fast 500 Ms and the map, as delivered by
Harley, is correct. The Delphi ecm has the ability to adjust about 20%
in small increments (block learn multipliers) to factor for air
cleaners slowly getting dirty etc. It already is self-tuning ecept at
wide open throttle.
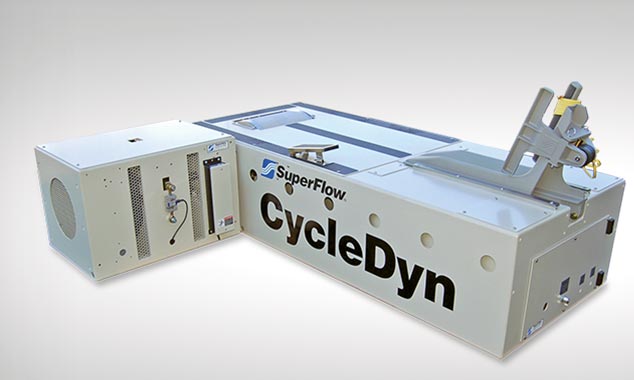
If you are going to use a chassis dyno it has to be a tool and not a toy. At RB Racing we use the Superflow CycleDyn as it best emulates the real world. We use it for development and not for publishing "dyno charts". Most of our work is with Pectel SQ6M controllers which have extensive internal datalogging and playback capabilities up to 2000Hz sampling rates. With the Superflow we can program specific tests and transient sweeps with our turbocharger systems up 750 hp in inertial mode or 500 hp in Eddy Current controlled accelerations.
For those of you who like Dynojet "Dyno Graphs"..read this article.
Steve Cole (TTS MasterTune) who has spent untold thousands of hours on every dyno imagineable has this to say about CycleDyns:
Steve Cole: "In the
development side what I can say is the SuperFlow when setup properly
emulates the real world much better. As an example the only way to get
a DynoJet to give you HP and TQ is a WOT unloaded run. The SuperFlow
allows that plus just about any other combination you like with real
torque output. So what does any of it buy you becomes the question. I
can tell you that if we tune to a DJ and get the best we can, then
repeat on the SuperFlow using real world acceleration rates for the
engine being tested the results are very different. Take the final
calibrations and run them in both dyno's unloaded and the DJ developed
type calibration will show the most HP and TQ in those conditions, on
both the SuperFlow in DJ mode and the DJ. Then take the SuperFlow
controlled condition calibration and load it in the bike the power will
go up when tested in the SuperFlow mode again which can only be done on
the SuperFlow.
Now the hooker, take the bike and put one of the finished calibrations
in it and give it to the customer and say go ride it and come back
after you've ridden it well, to know how it feels/runs. They come back
after an hour or so then load the other calibration and ask them to do
the same riding over and come back again. Each and everytime we have
done this every customer has picked the calibration that was done on
the SuperFlow under the controlled acceleration modes! So pick what
works for you but there is a difference. Does it take longer, does it
end with a measurable difference............. YEP!"
When we have turbo bikes
like our Road Glide Turbo it gets a bit interesting to go testing in LA
traffic with police, cell phone cameras, and freeway cameras. We still do
real world riding with data acquisition as the real world is where you ride.
People want "Dyno Sheets"...see below. We aren't going to test every damn camshaft, compression ratio, piston confguration, cylinder head etc as there is not enough money nor time to do so. However, we do testing for our own race development, R&D, and our personal development platforms.
Dyno Sheets

People call us all the time
asking for "Dyno Sheets" and we patiently tell them we do not provide
self-serving graphs predicting fantastic horsepower and torque
gains. Plenty of customers send us dyno sheets but, as we've been at
this a long time, we know the tuning game is too complicated to provide
numbers just to sell an exhaust. Tuning is a multi-variable process.
When the EVO motors came out Jerry Branch published his famous manifesto on tuning 80" EVO motors...In short, unless you bumped the compression the horsepower was not forthcoming. Same these days. In 2014 John O'Keefe of Branch O'Keefe ran an extensive series of tests on OEM Twin Cam cylinder heads to see if he could offer a "less expensive" ported head as everyone with a grinder in his garage was suddenly an expert at cylinder head porting. John found out that any attempt to clean up the ports killed the flow and port velocities dropped. He scrapped that idea and kept his well-proven chamber modification, porting and valve replacement system.
Logic seems to be in short
supply when it comes to tuning. Tuning is not a pipe changing exercise.
The world these days is full of customers who agonize endlessly over
what to buy and then dump these parts on some unsuspecting "shop-tuner"
expecting miracles. It just isn't going to happen. Coordinated
development is expensive and time consuming. If it was NASCAR developer
they might spend days searching for a few hp or a different curve for a
specific track.
If you are looking for warm cuddily sheets we are clean out of them. We are tuners and you can buy all the trick parts in the world and a guy with a well tuned mild bike with a good power to weight ratio will kick your ass. Real world. Find a good tuner or become one. Look in the mirror.
New "Double Coat" Black and Silver Ceramic Finishes
We
have a lot more people looking for durable ceramic finishes and we
think we have the best finishes on the market. In the late 70's and
early 80's we tried all sorts of coatings and paints and even used
porcelain on some of our products in the late 1980's. The newer ceramic
finishes are tougher and we use both Polished Silver Ceramic and
Ceramic Black to complement our usual chrome offerings. The newest
"Double Coat" Black finish is a double coat process that
gives additional protection against scratches and nicks, providing two
barriers against corrosion...Silver then Black on top of it.
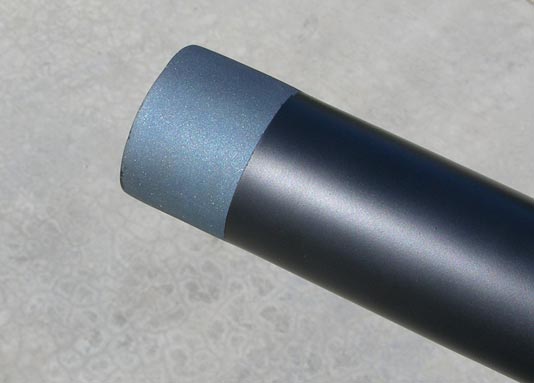
In 27 years we have tried all sorts of black finishes: Kal Gard, VHT, Techline, and others. We also, in the mid 1980's, even tried porcelain for awhile. It chipped and the heat distorted the parts. Most finishes will not survive over a long period unless they have a base coat to cushion rock strikes, moisture and scratches. The surface has to be perfectly prepared and most applications can fail if run too soon at elevated temperatures as they are typically baked at 450 to 500 deg F whereas the cure takes place at around 750 deg F. Lower temperatures will not cure the resins and they will fail once the bike is run. To get around this dilemma for Black Finishes we have found the best solution is a Silver Ceramic cushion base coat and a secondary Black Semi-Gloss finish on top of this.
"Double Coat" Black Ceramic finish is the most expensive
as it involves a triple process. First the parts are polished to
remove any tooling marks.Then the parts are zirconia media blasted to
prepare the surface. Then parts are cleaned. The parts are base coated
with a Silver Ceramic ceramic base coat and then a second Black coating on top of this.
The Silver Ceramic finishes can be cleaned with soap and water and scuff marks can be removed with Mother's Aluminum and Magnesium Polish.
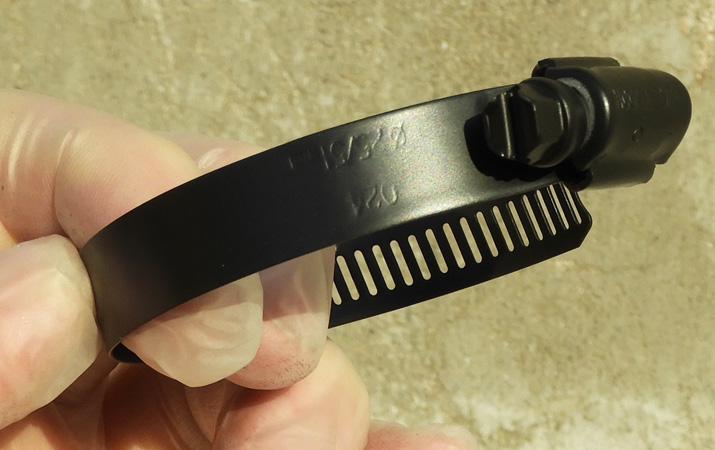

General LSR 2-1 Installation Sequence
1. Remove the OEM exhaust and exhaust bracketry. If the bike has floorboards remove the right floorboard.
2. Pry the OEM exhaust gaskets out of the exhaust ports. We use billet gaskets instead.
3. Install the frame or transmission bracket provided. Use Blue Loctite on the mounting bolt threads into the transmission. Lockwashers under the bolt heads on the transmission mount. If through-bolt like on early rigid Sportsters or Shovels use lockwashers under the hex nuts.
4. Front and Rear primary
tubes: Install billet flanges and clips. Install front pipe loosely
with billet gasket and nuts provided. Loosely affix the front heat
shield to the pipe as you might not be able to install the shield later
with the rear pipe in place. We use 1/4 drive ratchet plus extensions
and 3/8" socket and a 3/8" wobble for the exhaust stud nuts.
5. If the rear pipe has a
slip joint (rubber mounted C Style) slip the rear pipe into the tail
section. You may use Permatex ULTRA BLACK.
6. Begin slip of tail section/rear pipe into the front exhaust slip joint (You may use Permatex ULTRA BLACK) and work the rear exhaust and billet gasket into the exhaust port. Loosely affix exhaust stud nuts provided. We use 1/4 drive ratchet plus extensions and 3/8" socket.
7. Slide 5/16" x 18 bolt(s) into slotted bracket on back of exhaust and thread these through the mounting braket. Loosely affix with lock washer(s) and hex nuts provided. Some exhausts may require a spacer (provided) between the exhast slotted bracket and frame/transmission bracket.
8. Gently tighted up all fasteners and nuts. Nothing can be in tension. You may use a rubber mallet to seat the slip joint(s).
9. Install remaining heat
shields and tighten front heat shield (5/16" Nut driver). Completely
wipe the pipe and shields down with a clean cloth to prevent grease and
oil stains from being baked on.
10. Run bike briefly in place. Let it cool down and retighten fasteners. Reinstall the right floorboard with hardware provided.
11. If ceramic finishes it is wise to go through several heat cycles. On modern efi closed loop systems they go into closed loop within minutes. Let bike idle for a few minutes then shut it down to let it cool. Several sessions of this will cure the resins as they are only oven-fired to 400F. Exhaust temperatures are >1000F.
12. Double check all
fasteners and ride the bike. Check your work afterwards. You bought a
Harley so you are already showing signs of dementia.
