Engine Tech
Secrets to power and reliability. We will be adding new topics to this section covering every facet of engine building, showing you what to either look for, ask for, or actually do yourself when building a high performance V-Twin. This isn't rocket science, but it isn't likely that you'll have real MIT or Caltech graduates wrenching on your sled.
Oil Control Ring Tension
Ask people what their ring tension is and you'll get a blank stare or some brave muttering about "high tension or low tension"...ask again for a definitive number and they'll get real defensive, but you still won't get an answer.

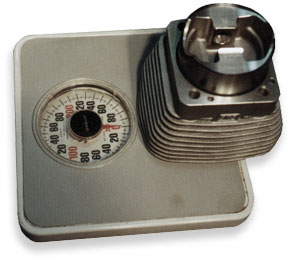
Hell, go high-tech and grab your bathroom scale, and do it yourself. Install your three-piece oil control ring being careful not to overlap the ends of the waffle-shaped expander (middle piece). Some of these rings have a wire guide to keep your frustration level low. In case no one tells you, the ends that butt together should point down towards the bottom of the piston.
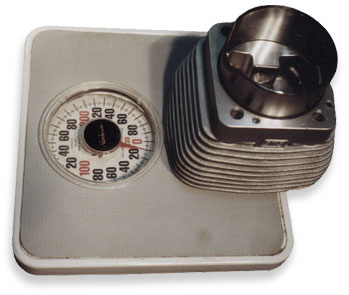
Use a very light coat of oil on the bore of the cylinder and the three-piece oil control ring. Do not install the other two rings, the top compression ring and the second ring. Gently install the piston into the bottom of the cylinder so it's skirt is flush with the liner.
Place the cylinder upside down on the bathroom scale and set the scale to zero with the handy dandy knob you use to fake out your loved ones around Thanksgiving.

Gently push the piston down the bore at a constant speed and note the reading on the scale. Repeat this a few times so you get a good idea what the tension is. At RB Racing we set ORCAS up for low ring tension, normally between 10 and 12 pounds. If you think those 700+hp small blocks in NASCAR or a brand new Lexus V8 run a lot of ring tension you'd be dead wrong. Free horsepower.
Excessive tension robs horsepower and should not be used as an excuse to cure an "oiling problem". Correct and accurate honing should only be done on professional Sunnen hones with trained operators. Old ideas about "You need high tension oil rings in a Harley or it will "puff oil" die hard.
Ring Fitment

You can file or grind the rings by hand of you can use some sort of grinder. It's a bit easier to hold the ring flat in some apparatus and then exactly cut the ring for clearance. Manufacturer's recommendations border on the safe side i.e. larger gaps. In a general (safe) sense the top ring is set with a gap of .004" x bore diameter. The second ring is set at a (safe) gap of .005" x bore diameter. A 4.000" bore would be .016" for the top ring and .020" for the second ring.
You can cheat on these a bit, i.e. .014" for the top ring and .018" for the second ring in a 4.000" bore.
Why Gaps At All?
The reason the gap is there is that the gas pressure has to get behind the ring to provide the sealing pressure that forces the ring against the cylinder wall. These forces are way, way, greater than the static ring tension described above. These forces push the ring "down and out" i.e. against the bottom of the groove and out against the cylinder wall.
Piston manufacturers generally recommend that the second ring vents easier than the top ring to prevent pressure between these two rings rising and lifting the top ring. They speak of dreaded "ring flutter". Ring flutter or radial vibration of the ring is actually more directly related to the weight i.e. thickness of the ring. The thinner the ring the less mass and the less mass the less likely the ring is to "flutter" at high rpms. This is why we use thinner rings. Flutter has less to do with gaps than it does to do with the weight of the rings themselves.
Engine Balance Factors (Introduction)

The Harley 45 degree V-Twin is a "shaker". Balancing this configuration is an impossibility as it will never be a 180 degree opposed twin where the reciprocating masses cancel each other out. There is going have to be a compromise and that compromise will be one which suits the engine's intended usage. If you've ridden a number of bikes you probably have stories of the one that was "smooth as glass" as well as the ones that vibrated your feet off of the floorboards.
There are a lot of other reasons why things turn to shit in the vibration department...cracked frames, bad compensator sprockets, misaligned primary drives, crapped-out bearings, wobbling flywheels etc. There's no point in talking about all these things as that would get boring fast...and we all know our bike is "perfect " anyway.
Stock flywheels weigh about 33 pounds. Our 113" ORCA flywheels weigh about 26 pounds as they are narrower. You might have the bright idea of "knife edging" the flywheels or "pork-chopping" them to lose weight or "drag". Both ideas would be a big mistake. Those stock flywheels at 33 pounds are spec'ed out for a 60 horsepower engine whereas the 26 pound ORCA wheels see aywhere from 135 to 350 horsepower. It doesn't take a genius to figure out that they will accelerate quicker. Would they accelerate quicker if they were lighter? Of course they would, but everytime you let out the clutch there would be less "stored energy" or torque available...and torque is what gets the job done. Super light flywheels in certain Buells simply kill the torque. If you want your bike to rev @ 40,000 rpm /second/second buy a Jap bike. Oh yeah, in case you think the Japanese build crap, the new Honda VTX 52 degree 110 cubic inch v-twin motor has a crankshaft that weighs over 41 pounds. The Honda VTX puts out 107 ft lbs of torque at 3000 rpm. Lighter crankshafts are not the way to go.
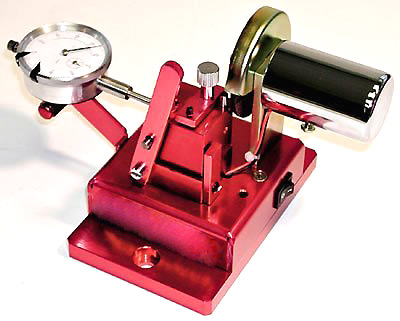
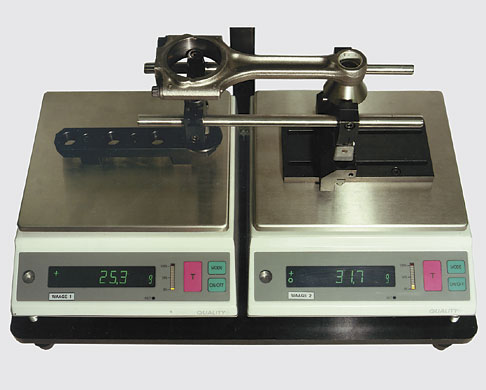
We have created an Engine Balance Calculator to calculate Bobweight values for specific balance factors. A bit of balance theory is thrown in.
Before you delve into the specifics of balance you might want to read an excellent ![]() PDF document
on the subject published by S&S Cycle. It is written for the small
shop or individual balacing flywheels. This isn't rocket science but
we'll make it easy for you. Stay tuned.
PDF document
on the subject published by S&S Cycle. It is written for the small
shop or individual balacing flywheels. This isn't rocket science but
we'll make it easy for you. Stay tuned.
More Topics To Come